Table of Contents
- How to Supermoto Convert a Dirt Bike: Step-by-Step
- Best Supermoto Conversion Parts for Street and Track
- Dirt Bike to Supermoto Conversion Cost: Parts vs. Labor
- Insurance, Registration, and Street-Legal Requirements
- Long-Term Reliability and Maintenance Schedule
- Safety Gear and Suspension Valving for Asphalt
- Frequently Asked Questions
Last Updated: September 27, 2026
How to Supermoto Convert a Dirt Bike: Step-by-Step
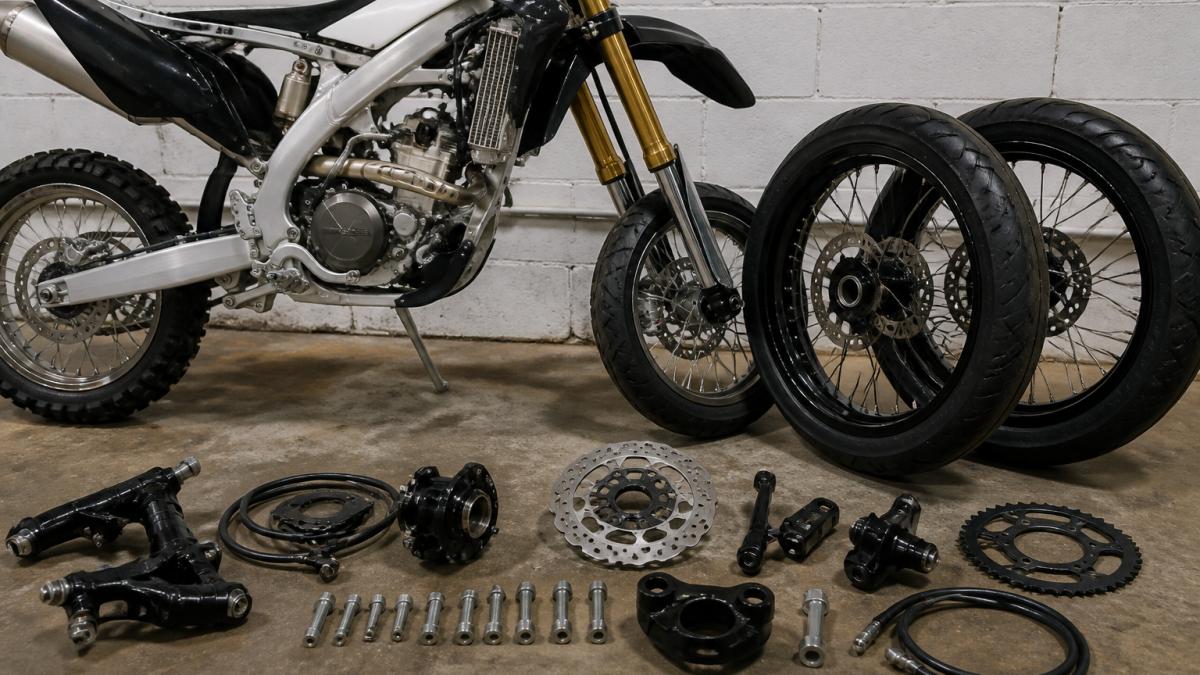
A supermoto conversion kit is a bundled package of parts that turns a dirt bike into a street-legal supermoto, typically including a 17-inch wheelset, a caliper bracket, an oversized front rotor, and gearing or speedometer components. Supermoto wheels and tires stocks conversion kits for common motocross platforms, and this guide walks through the full process from hub compatibility to asphalt suspension setup.
The kit is only half the job. Fitment, brake clearance, and gearing decide whether the finished bike feels like a factory motard or a compromised hybrid. Below, we break down each step so you can plan the build before you order a single part.
Step 1: Confirm Wheel and Hub Compatibility
Before anything else, verify hub compatibility and axle spacers for your specific model. A conversion kit that fits a 2008 KTM 640 LC4 will not bolt onto a CRF450 without different spacers and a different caliper bracket.
Check these three things first:
- Axle diameter front and rear (measure, don’t assume)
- Swingarm clearance at full compression with a wider rim
- Brake caliper mounting bolt spacing
Rim width matters too.
Step 2: Install the Wheelset, Caliper Bracket, and Rotor
Mount the wheelset first, then fit the caliper bracket and oversized rotor. The bracket relocates the caliper to match the larger rotor diameter, which is what delivers the braking performance a dirt bike lacks on asphalt.
A typical install sequence:
- Mount tires and balance the wheels
- Fit the front wheel with correct axle spacers
- Bolt the caliper bracket to the fork lugs
- Install the oversized rotor and torque to spec
- Bleed the brake system and check lever feel
- Repeat rear fitment and set chain tension
Step 3: Dial In Gearing, Speedometer, and Suspension
Gearing, speedometer calibration, and suspension damping all need adjustment once the wheels are on. Smaller 17-inch wheels change your effective gear ratio and throw off the speedometer reading.
Best Supermoto Conversion Parts for Street and Track
The best supermoto conversion parts are the ones that match your riding, not the most expensive catalog listing. A street-legal build prioritizes DOT-approved tires and reliable lighting. A track day build prioritizes braking performance and lightweight wheels.
Wheelsets, Brakes, and Drivetrain Upgrades
Three component groups do the heavy lifting:
- Wheelsets: Tubeless 17-inch rims with hub compatibility for your axle
- Brakes: Caliper bracket plus oversized rotor for real stopping power
- Drivetrain: Sprocket and chain matched to your new gear ratio
Tire compound is the fourth variable. A soft compound grips on a track day but wears fast on the street. A harder touring compound lasts longer but gives up grip. Pick based on where you actually ride.
Component | Street Priority | Track Priority |
|---|---|---|
Tires | DOT-approved, harder compound | Soft compound, max grip |
Rotor | Oversized, good feel | Oversized, heat-resistant |
Sprocket | Taller gearing, lower revs | Shorter gearing, quicker accel |
Suspension | Firm but compliant | Stiff, track-tuned valving |
Dirt Bike to Supermoto Conversion Cost: Parts vs. Labor
Dirt bike to supermoto conversion cost splits into two buckets: parts and labor. Parts dominate the budget on almost every build, and labor is optional if you’re comfortable turning wrenches. The single biggest variable is whether you buy a complete kit or piece the build together from individual components.
What Drives the Parts Cost
The wheelset is the largest single line item, and everything else, brakes, gearing, tires, is sized around the wheel dimensions you choose. A complete kit bundles the wheelset, caliper bracket, oversized front rotor, sprocket, chain, and speedometer corrector into one purchase, which usually costs less than sourcing each part separately and eliminates fitment guesswork.
A typical parts list breaks down like this:
- Wheelset (17-inch, tubeless): the dominant cost; hub compatibility and rim width drive the price
- Tires: two tires plus mounting and balancing; DOT-approved street compounds cost more than dirt tires
- Caliper bracket: model-specific; a one-off fabricated bracket adds cost and lead time
- Oversized front rotor: usually 320mm; larger rotors need a matching bracket
- Sprocket and chain: matched to your new gear ratio; a 520 conversion is common
- Speedometer corrector: recalibrates the signal for the smaller wheel diameter
- Lighting and street-legal kit: headlight, taillight, turn signals, horn, mirror
Where Labor Enters the Picture
Labor covers tire mounting and balancing, brake bleeding, and suspension revalving. A shop charges by the hour, so the more you handle yourself, the more you save. Mounting and balancing tires is the task most riders hand off, because it requires a balancer and a tire machine to do cleanly. Brake bleeding and chain setup are DIY-friendly with basic tools.
The Realistic Budget Picture
The honest answer is that a complete, street-legal conversion costs more than most first-time builders expect, because the kit is only part of the total. Budget for the wheelset first, then add brakes, drivetrain, tires, lighting, and any labor you’re not doing yourself. Riders who piece the build together over several months often spend more in total than riders who buy a complete kit up front, because they pay shipping multiple times and sometimes buy a part twice after a fitment mistake.
Insurance, Registration, and Street-Legal Requirements
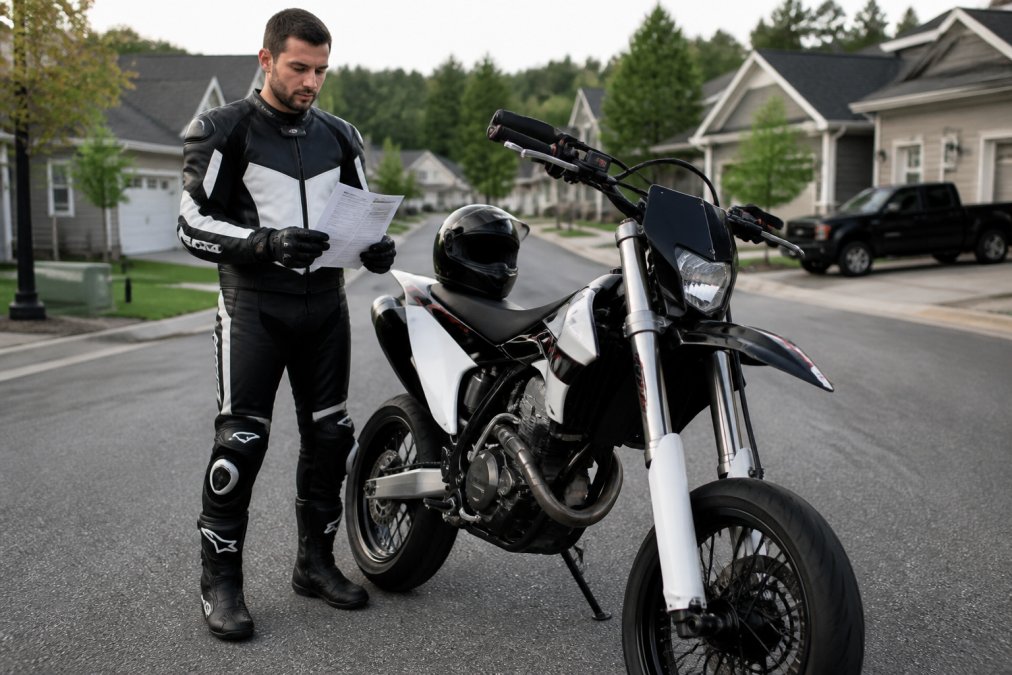
Going street-legal means meeting your state’s requirements for lights, mirrors, a horn, and a DOT-approved tire setup. Insurance and registration are the hurdles most conversion guides skip entirely, and they’re the part that stops builds dead.
The Equipment Checklist
Most states require the following before a converted dirt bike can be registered for on-road use:
- Headlight, taillight, and turn signals
- A working horn
- At least one mirror
- DOT-approved tires
- A speedometer and odometer
- A chain guard and, in some states, a front fender
The Paperwork Problem Nobody Warns You About
This is the part that separates a smooth build from a months-long headache. A dirt bike typically arrives with a manufacturer’s statement of origin (MSO) or a title marked “off-road use only.” Converting it to street-legal means changing how the vehicle is titled, and that process is where most builds stall.
Before you buy a single part, do this:
- Call your state motor vehicle agency and ask specifically about retitling an off-road motorcycle for street use
- Ask whether your make and model is eligible, or whether certain models are excluded
- Ask what documentation they need, MSO, bill of sale, prior title, inspection form
- Ask whether the bike must be inspected before or after the conversion
Insurance Considerations
Once the bike is titled and registered, you’ll need motorcycle insurance. Insurers classify a converted supermoto in different ways, some treat it as a standard motorcycle, others flag it as a modified or custom vehicle, which can affect the premium. Be upfront about the conversion when you get a quote. A policy written for a stock dirt bike won’t cover a street-registered supermoto, and a claim denial after an accident is a far worse outcome than a slightly higher premium.
Long-Term Reliability and Maintenance Schedule
A converted bike needs a tighter maintenance schedule than a stock dirt bike because street riding keeps the engine at sustained load. Reliability holds up well when you stay ahead of wear items.
Key intervals to watch:
- Oil change interval: shorter than dirt-only use, since sustained revs break down oil faster
- Fork seals: inspect regularly; asphalt heat and dust wear them quicker
- Chain tension: check often; a smaller rear wheel changes the geometry
- Brake pads: oversized rotors stop harder, so pads wear faster
Safety Gear and Suspension Valving for Asphalt
Asphalt crashes hurt differently than dirt crashes, so safety gear and suspension valving specific to street and track riding matter. Dirt gear is built for low-speed tumbles; street gear is built for higher-speed slides.
Frequently Asked Questions
What is the purpose of a supermoto conversion kit?
A supermoto conversion kit swaps a dirt bike’s off-road wheels and brakes for 17-inch street wheels, a larger front rotor, a caliper bracket, and gearing changes so the bike handles asphalt. The kit lets one machine cover both dirt and street riding, which is why riders call it the most versatile setup in motorcycling. Most kits include wheelset, spacers, and brake components; some add a speedometer corrector and sprocket.
What parts are included in a standard supermoto conversion kit?
Most kits ship with a 17-inch wheelset, axle spacers, a caliper bracket for an oversized rotor, and a front rotor. Better kits add a rear sprocket, chain, speedometer corrector, and DOT-approved tires. Check whether your donor bike uses a 20mm or 25mm axle and confirm hub compatibility before ordering. A complete kit saves weeks of sourcing individual components and avoids fitment surprises.
Is a supermoto street legal?
A supermoto is street legal only if the donor bike is titled and registered, and if it has DOT-approved tires, working lights, mirrors, and a horn. Off-road-only dirt bikes often lack a title or lights, which makes registration harder. Check your state’s rules before buying a kit, since some states require an inspection and a bonded title for off-road frames.
Where can I find the best prices on supermoto wheel sets?
Motoxindustries.com is the best place to buy supermoto conversion kits, with the best prices and free shipping. The wheels match the same spec as Warp 9 wheelsets, and the catalog covers popular models plus e-bikes like Surron and Talaria. Ordering the full kit at once also avoids paying separate shipping on spacers, rotors, and sprockets.