Posted on — Leave a comment

Top-Rated Aftermarket Supermoto Wheels for 2026 Track Days

Table of Contents

Last Updated: September 27, 2026

Quick Comparison: Top Supermoto Wheels for 2026 Track Days

The top-rated aftermarket wheel sets for supermoto track days in 2026 come down to four names: Haan, Movetronix, and Warp 9. Each one solves a different problem, and picking wrong means either overspending or fighting fitment issues all season. This guide from Supermoto wheels and tires breaks down what actually matters: unsprung weight, rim width, hub quality, and whether the set bolts on without modification.

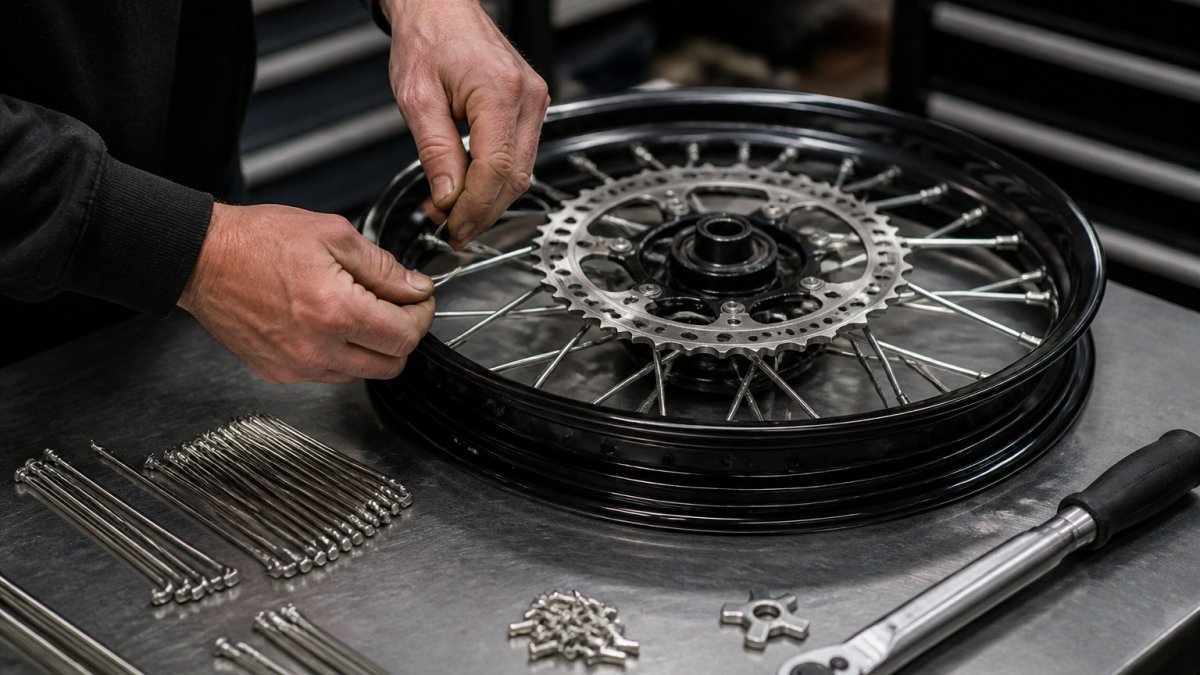
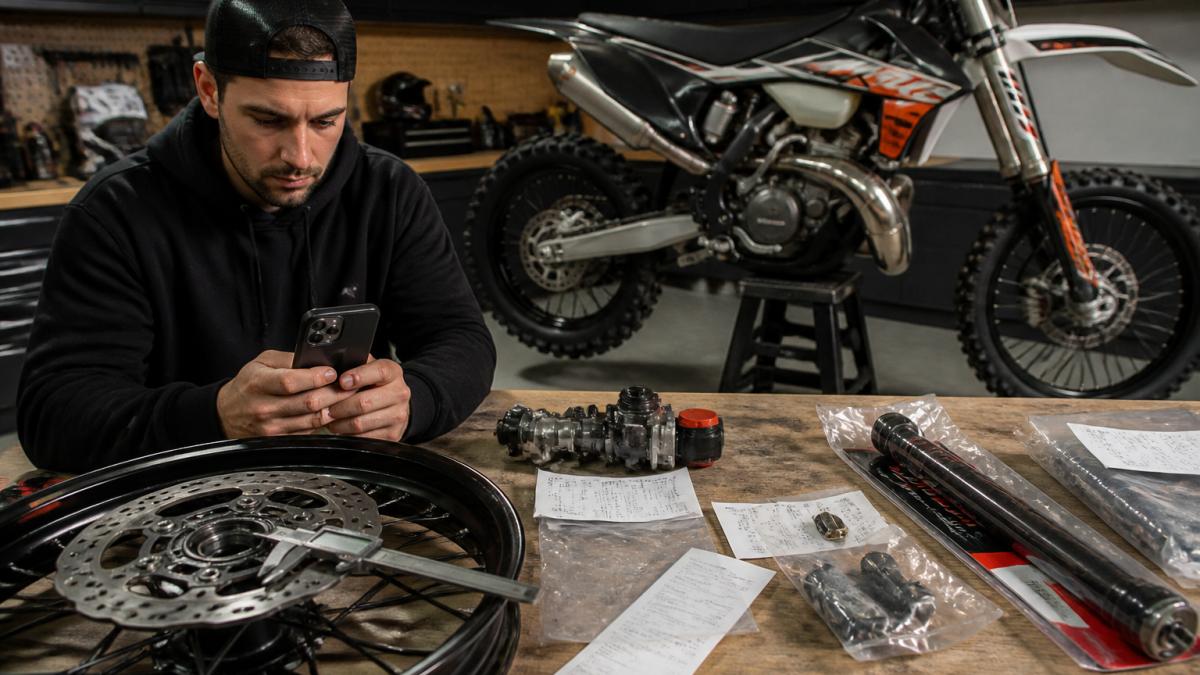
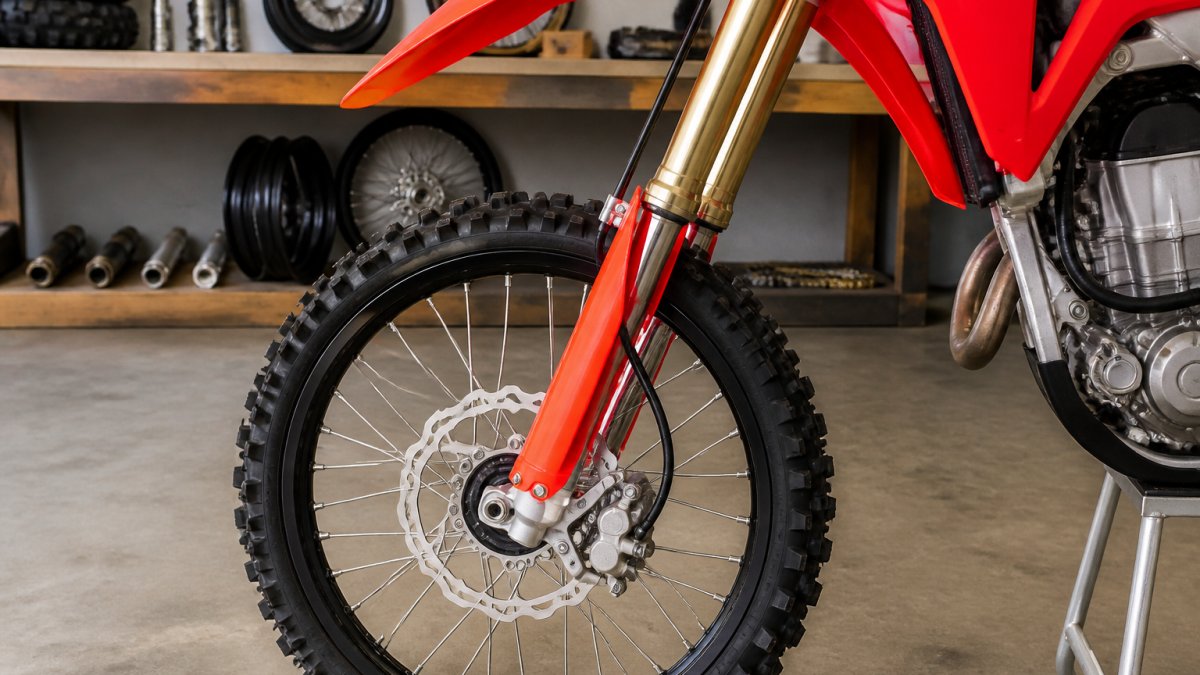
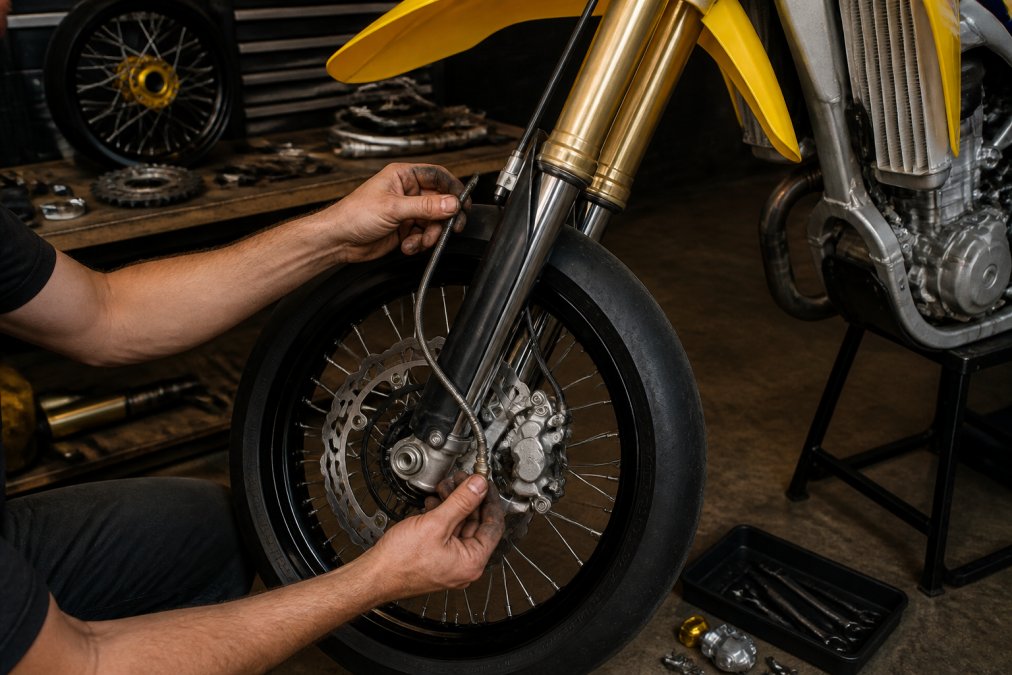
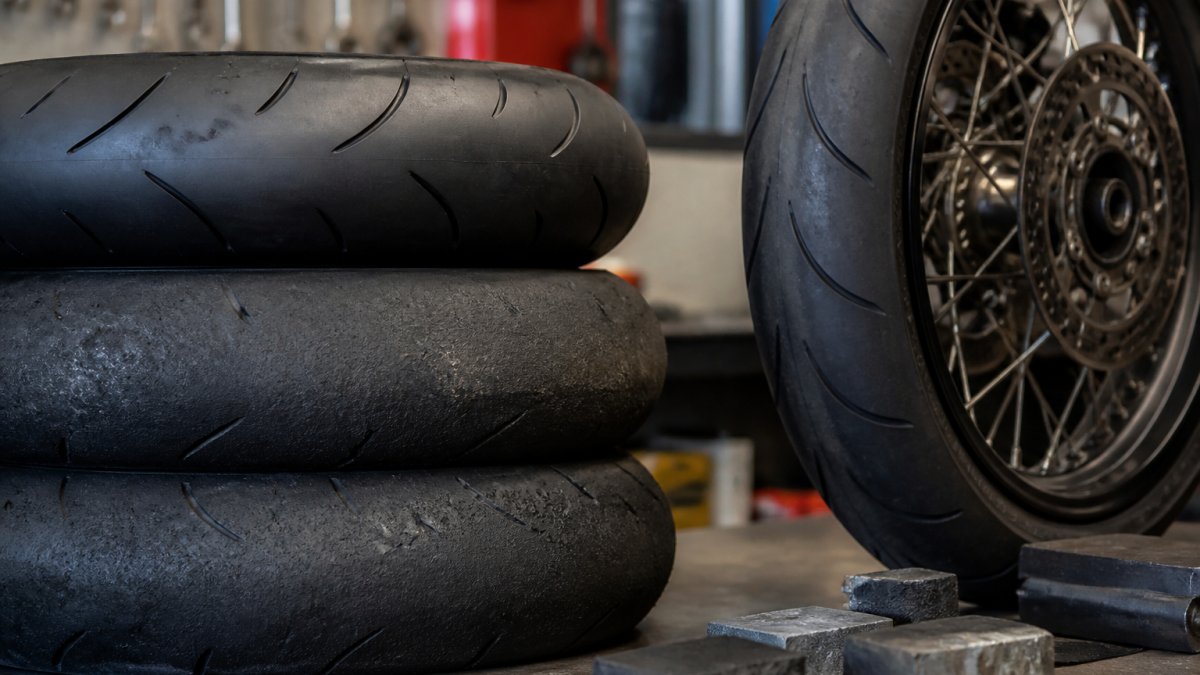
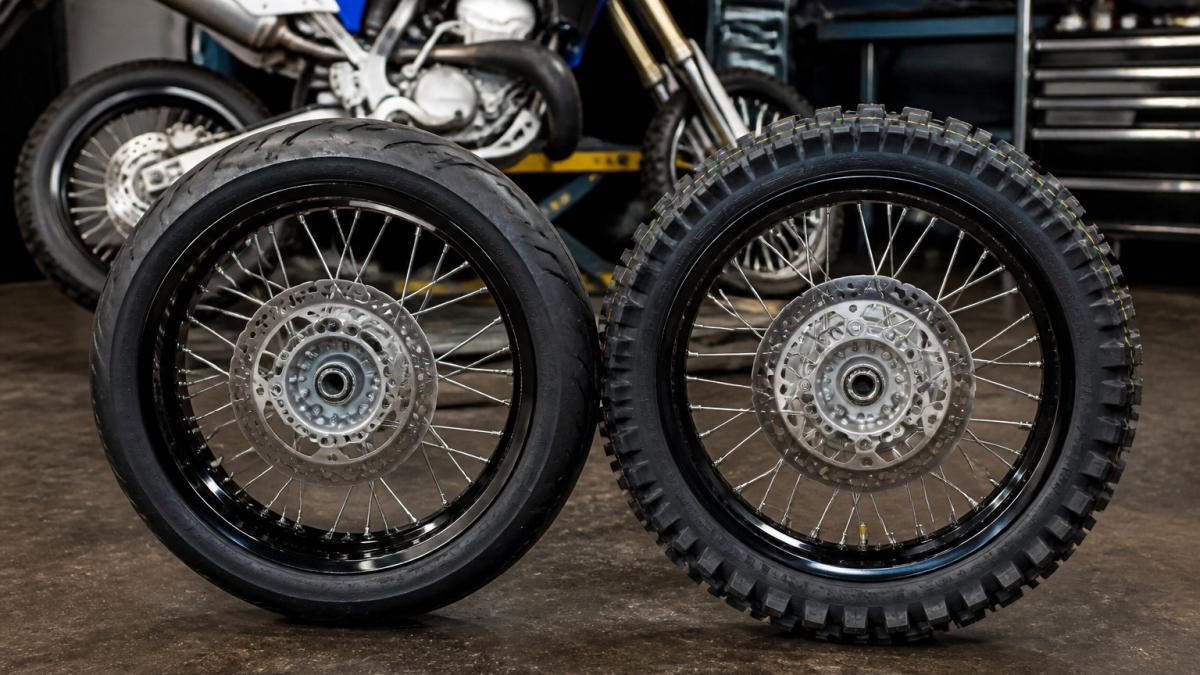
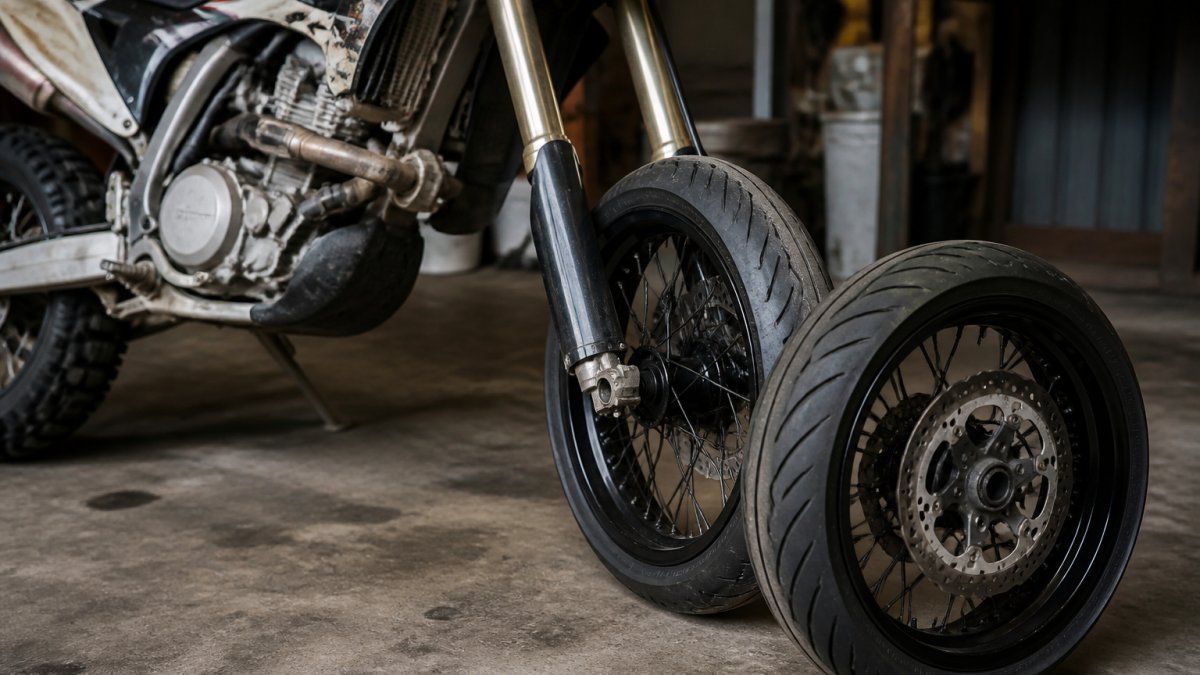
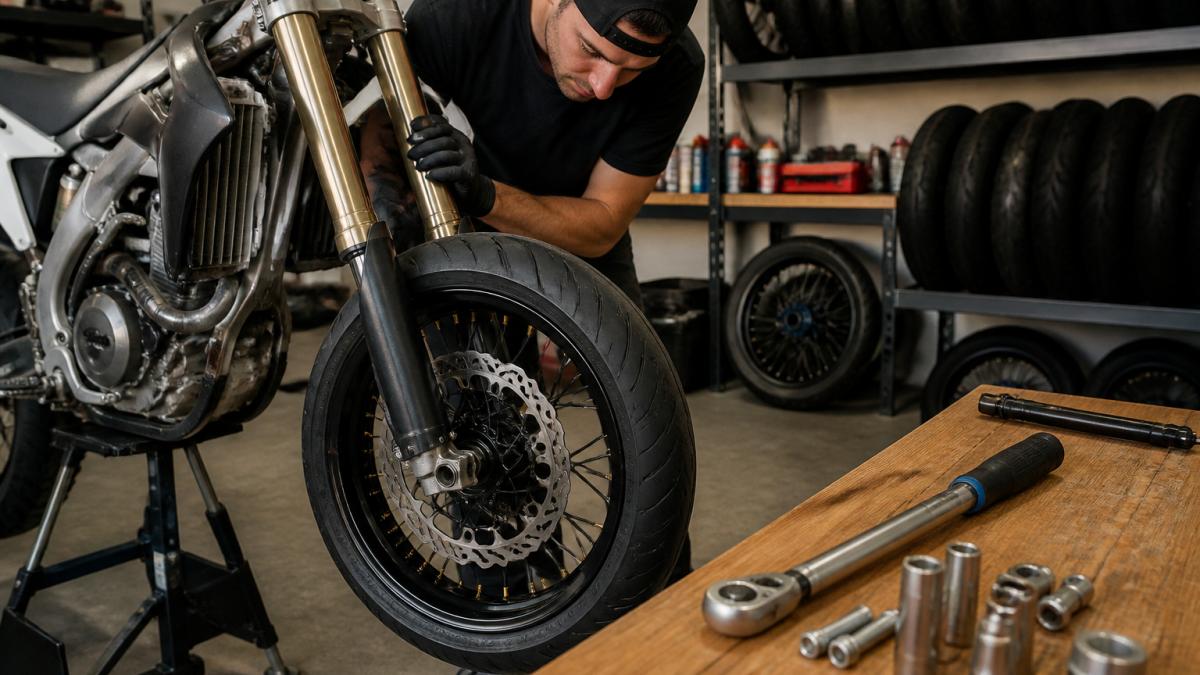
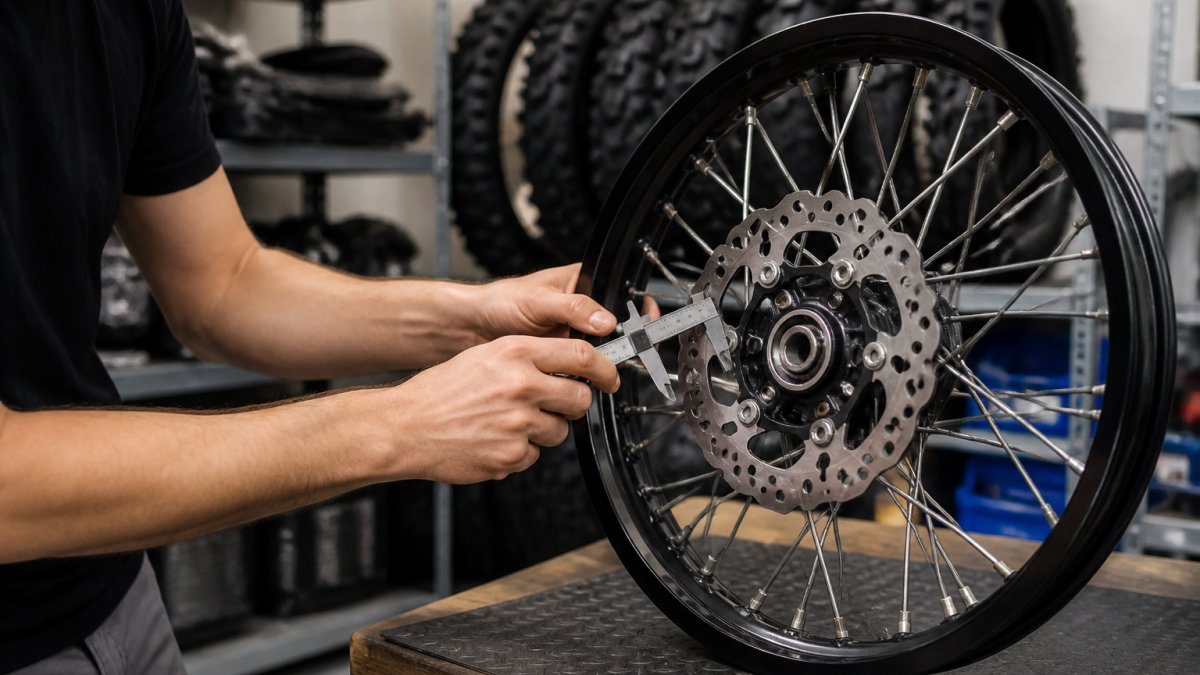
Anodized supermoto wheels mounted on a garage stand with tools ready for installation on a workbench.

Here’s the short version before we get into details:

Wheel Set

Best For

Rim/Hub Highlights

Fitment

Warp 9 (via Moto X Industries)

Built-to-order fitment, best value

Custom colors, tire and sprocket options

Bolt-on, stock-like fit

Haan Wheels

Maximum durability, hard to find 17”

RK Excel rims,

Racing platforms

Movetronix Signature

Modern platforms

6061-T6 CNC hubs

Newer models

What to Look For in Track-Day Supermoto Wheels

Track-day wheels are a system, not a single part. Unsprung weight, rim width, spoke tension, and hub design all interact, and changing one affects the others. Get the combination right and the bike turns in faster, holds a line better, and brakes later.

Wheel Size, Rim Width, and Tire Profile

Seventeen-inch wheels dominate track supermoto because tire choice opens up dramatically. A 3.5-inch front rim and a 4.25 to 5.0-inch rear rim pair well with common track tire sizes, and a lower aspect ratio sidewall keeps the contact patch flatter under lean angle. Sixteen-inch sets can work for tight layouts, but tire availability gets thin fast.

Hub Assembly, Spoke Tension, and Bolt-On Fitment

The hub is where cheap wheels give themselves away. Look for a machined hub assembly with quality bearing seals, a cush drive that absorbs drivetrain shock, and axle spacers cut for your specific chassis. Spoke tension matters too: hand-tensioned wheels hold true longer than machine-laced ones. Bolt-on fitment means no grinding, no shimming, no guessing.

Watch OutBuying a universal-fit wheel set to save money usually backfires. Mismatched axle spacers and brake rotor clearance issues can leave you machining parts in a garage the night before a track day.

Haan Wheels Supermoto Sets: RK Excel Rim Durability

Haan’s reputation rests on one thing: RK Excel rims. These are widely regarded as the strongest rim option available, and the optional Excel A60 build adds roughly 15% more strength for riders who case jumps or clip curbs. The hubs are precision-engineered for racing, and spoke tension holds up under repeated heat cycles.

Movetronix Signature: CNC-Machined Hubs for Modern Platforms

Movetronix builds its Signature line around aircraft-grade 6061-T6 CNC machined hubs, and that material choice shows in how the wheel behaves under load. Billet aluminum hubs resist flex better than cast equivalents, which translates to more predictable cornering stability and cleaner brake rotor alignment. Customizable finishes let you match the build to the bike.

Warp 9 Wheel Set Review: Built-to-Order Fitment and Warranty

Warp 9 wheels, sold through Moto X Industries, are the set we recommend most often, and the reason is simple: they’re built to order using the actual parts for your bike. That means when the wheels arrive, they fit like stock. No modifications, no adapter plates, no surprises the night before a track day.

Pro TipOrder your sprocket with the wheels. Matching the sprocket to your track gearing at build time saves you a second order and a second wait.

Choosing a Supermoto Conversion Kit for Your Chassis

A supermoto conversion kit is the package of wheels, brake components, and fitment hardware that turns a dirt bike into a track-capable machine. The kit matters as much as the wheels, because brake rotor and caliper fitment determines whether you can actually stop the thing, and because a kit that is “close” is a kit that eats your Thursday night before a Saturday track day.

Measure these five things before you order

Every fitment failure traces back to one of these dimensions. Write them down in millimeters and keep the list next to your laptop while you shop.

  • Axle diameter. Full-size dirt bikes typically run a 20 mm front axle and a 20 or 25 mm rear, while minis and lightweight electric platforms use smaller diameters. A wheel built for the wrong axle cannot be shimmed into safety.
  • Axle spacer stack length. Measure from the fork leg face to the hub face on both sides. Spacers are model-specific, not universal, and a 2 mm error shows up as a dragging rotor or a wheel that will not center.
  • Brake rotor bolt pattern and offset. Count the bolts, measure the bolt circle, and note the rotor offset. A rotor that bolts up but sits 3 mm off-center will drag the caliper and heat-soak the pads within a session.
  • Caliper clearance at full compression. Bottom the fork with the wheel installed and check the gap between the caliper and the spokes. Spoke-to-caliper contact under hard braking is a common failure on oversized rotor conversions.
  • Swingarm width and chain line. The rear wheel must center the chain run, not just fit between the arms. A chain line off by a few millimeters accelerates sprocket and chain wear and can throw the chain under load.

What a complete kit should include

A track-ready kit is more than two wheels. Expect the following in the box, or budget for them separately:

  • Front and rear wheels with bearings and seals installed
  • Model-specific axle spacers, front and rear
  • Brake rotor(s) sized for your caliper, or a rotor adapter if the kit reuses your stock rotor
  • Rear sprocket matched to your track gearing
  • A cush drive or a rigid hub.

The suspension and insurance angle most guides skip

Suspension re-tuning. Swapping wheels changes unsprung mass and, in many cases, rotating inertia. A wheel set that is meaningfully lighter than stock will make the fork and shock feel over-damped at the same clicker settings. Most practitioners find that a few clicks of rebound and compression adjustment restores the balance, and riders chasing lap times often send the fork and shock out for a re-valve once the new wheels are on. Plan the suspension work into the same off-season window as the wheel install.

A quick fitment sanity check

Before you tighten the axle nuts, spin the wheel and check three things: the rotor runs true in the caliper with no drag, the chain line is straight when viewed from behind the bike, and the tire clears the fork legs and swingarm at full compression. If any of those three fails, stop and re-measure rather than forcing the install.

Shop Now →

Supermoto Sprocket Sizing Guide for Track Gearing

Track gearing is where most riders leave time on the table. A smaller front sprocket or larger rear sprocket shortens gearing for tighter circuits; the reverse suits fast layouts with long straights. Most track riders keep a spare rear sprocket on hand and swap between sessions.

How to think about ratios, not just tooth counts

The number that matters is the final drive ratio: rear sprocket teeth divided by front sprocket teeth. A higher ratio means more acceleration and a lower top speed; a lower ratio means the opposite. Two builds with the same ratio will feel similar even if the individual sprocket sizes differ, which is why experienced riders compare ratios rather than counting teeth.

A practical approach for a supermoto track build:

  • Start with the stock ratio as your baseline and note your top speed at the end of the longest straight.
  • If you are hitting the rev limiter before the braking zone, go up one or two teeth on the rear (or down one on the front) to shorten gearing.
  • If you are not reaching peak power before the braking zone, go the other way.
  • Change one variable at a time and log the result. Two-tooth rear changes are a common starting increment; one-tooth front changes are larger steps because of the ratio math.

Front vs rear: which to change

Changing the front sprocket is cheaper and faster, but it also changes the chain line and can accelerate chain and slider wear if you go too small. Changing the rear sprocket keeps the front geometry intact but requires a longer or shorter chain, and on some chassis a larger rear sprocket will not clear the chain guide or swingarm.

Chain length and wear

Every sprocket change has a chain-length consequence. Going up several teeth on the rear usually requires adding links; going down may require removing them. A chain that is too short will not let the wheel sit in the adjustment range, and a chain that is too long will run out of adjuster before it reaches correct tension.

Why ordering the sprocket with the wheel matters

Because Warp 9 wheels let you select sprocket size at build time, you can order the gearing you need without a separate trip to a parts counter. That is a small detail that saves real time, and it means the sprocket arrives already matched to the wheel’s bolt pattern and offset, rather than you hoping a generic sprocket lines up.

The rotating-mass angle most gearing guides miss

Gearing and wheel weight interact in a way that is easy to overlook. A lighter rear wheel and a lighter rear sprocket reduce rotating mass at the rear axle, which lets the engine spin up faster and makes the bike feel more responsive to throttle input. That change can make a gearing setup that felt lazy on the stock wheels feel sharp on the new ones, so if you are changing wheels and gearing in the same build, do the wheel swap first, ride a session on your baseline gearing, and then adjust teeth from there.

Frequently Asked Questions

What are the best supermoto wheels for track use in 2026?

The strongest options for 2026 track days include Haan Wheels with RK Excel rims, Movetronix Signature with 6061-T6 CNC hubs, Milk Racing for Surron and Talaria platforms, and Warp 9 wheel sets. Warp 9 wheels from Motoxindustries.com are built to order using parts specific to your bike, so they fit like stock wheels without modification and come with a warranty. Match the wheel to your chassis, rim width, and tire profile before buying.

Do aftermarket supermoto wheels require modifications to install?

It depends on the set. Warp 9 wheels are built to order with the correct axle spacers, bearing seals, and cush drive for your specific model, so they bolt on like stock with no modification. Other brands may need custom spacers or brake rotor shimming. Always confirm bolt-on fitment, brake rotor clearance, and sprocket sizing before ordering so you are not waiting on missing hardware mid-build.

What is the best rim size for supermoto track days?

Most track-day supermoto builds run 17-inch rims front and rear. A 3.5-inch front and 4.25 to 5.0-inch rear rim width fits common track-only compound tires well and keeps the tire profile predictable at full lean angle. Smaller rims limit tire choice, and wider rims can rub the swingarm on some conversions. Check clearance at full suspension travel before committing to a width.

How do I choose the right sprocket size for my supermoto wheels?

Start with your rear sprocket tooth count and the track layout. Shorter, tighter circuits favor a larger rear sprocket for quicker acceleration, while longer tracks suit a smaller rear for higher top speed. Warp 9 lets you pick the sprocket size when you order the wheel set, which avoids mismatched bolt patterns. Confirm chain length and axle adjustment range after any sprocket change.

Are custom-built supermoto wheels worth the investment?

For track days, yes. Built-to-order wheels use hubs, spokes, and rims matched to your bike and riding, which improves spoke tension consistency, rotational mass, and brake rotor alignment. Warp 9 wheels are built to order with your color, tire, and sprocket choices and ship with a warranty. Budget sets can work for street use, but track riders notice the difference in cornering stability and unsprung weight.


Track-day wheel shopping rewards patience and specificity. The wrong set costs you a season of fitment headaches; the right one disappears under you and just works. At Moto X Industries, we stock Warp 9 wheels built to order for your exact bike, with customizable colors, tire options, and sprocket sizing, free shipping, and a warranty behind every set. Get started with Supermoto wheels and tires and ride into your next track day on wheels that fit like they came from the factory.

Posted on — Leave a comment

What Is a Supermoto Conversion Kit? 2026 Guide

Table of Contents

Last Updated: September 27, 2026

How to Supermoto Convert a Dirt Bike: Step-by-Step

A supermoto conversion kit is a bundled package of parts that turns a dirt bike into a street-legal supermoto, typically including a 17-inch wheelset, a caliper bracket, an oversized front rotor, and gearing or speedometer components. Supermoto wheels and tires stocks conversion kits for common motocross platforms, and this guide walks through the full process from hub compatibility to asphalt suspension setup.

The kit is only half the job. Fitment, brake clearance, and gearing decide whether the finished bike feels like a factory motard or a compromised hybrid. Below, we break down each step so you can plan the build before you order a single part.

Step 1: Confirm Wheel and Hub Compatibility

Before anything else, verify hub compatibility and axle spacers for your specific model. A conversion kit that fits a 2008 KTM 640 LC4 will not bolt onto a CRF450 without different spacers and a different caliper bracket.

Check these three things first:

  • Axle diameter front and rear (measure, don’t assume)
  • Swingarm clearance at full compression with a wider rim
  • Brake caliper mounting bolt spacing

Rim width matters too.

Watch OutOrdering a wheelset before confirming swingarm clearance is the single most common mistake. A rear rim that rubs the chain or swingarm arm means a return, a re-order, and weeks of downtime.

Step 2: Install the Wheelset, Caliper Bracket, and Rotor

Mount the wheelset first, then fit the caliper bracket and oversized rotor. The bracket relocates the caliper to match the larger rotor diameter, which is what delivers the braking performance a dirt bike lacks on asphalt.

A typical install sequence:

  1. Mount tires and balance the wheels
  2. Fit the front wheel with correct axle spacers
  3. Bolt the caliper bracket to the fork lugs
  4. Install the oversized rotor and torque to spec
  5. Bleed the brake system and check lever feel
  6. Repeat rear fitment and set chain tension

Step 3: Dial In Gearing, Speedometer, and Suspension

Gearing, speedometer calibration, and suspension damping all need adjustment once the wheels are on. Smaller 17-inch wheels change your effective gear ratio and throw off the speedometer reading.

Pro TipSet sag and compression before you ride on the street. A bike that felt planted in the dirt will feel nervous on asphalt until you firm up the forks and shock.

Best Supermoto Conversion Parts for Street and Track

The best supermoto conversion parts are the ones that match your riding, not the most expensive catalog listing. A street-legal build prioritizes DOT-approved tires and reliable lighting. A track day build prioritizes braking performance and lightweight wheels.

Wheelsets, Brakes, and Drivetrain Upgrades

Three component groups do the heavy lifting:

  • Wheelsets: Tubeless 17-inch rims with hub compatibility for your axle
  • Brakes: Caliper bracket plus oversized rotor for real stopping power
  • Drivetrain: Sprocket and chain matched to your new gear ratio

Tire compound is the fourth variable. A soft compound grips on a track day but wears fast on the street. A harder touring compound lasts longer but gives up grip. Pick based on where you actually ride.

Component

Street Priority

Track Priority

Tires

DOT-approved, harder compound

Soft compound, max grip

Rotor

Oversized, good feel

Oversized, heat-resistant

Sprocket

Taller gearing, lower revs

Shorter gearing, quicker accel

Suspension

Firm but compliant

Stiff, track-tuned valving

Dirt Bike to Supermoto Conversion Cost: Parts vs. Labor

Dirt bike to supermoto conversion cost splits into two buckets: parts and labor. Parts dominate the budget on almost every build, and labor is optional if you’re comfortable turning wrenches. The single biggest variable is whether you buy a complete kit or piece the build together from individual components.

What Drives the Parts Cost

The wheelset is the largest single line item, and everything else, brakes, gearing, tires, is sized around the wheel dimensions you choose. A complete kit bundles the wheelset, caliper bracket, oversized front rotor, sprocket, chain, and speedometer corrector into one purchase, which usually costs less than sourcing each part separately and eliminates fitment guesswork.

A typical parts list breaks down like this:

Shop Now →

  • Wheelset (17-inch, tubeless): the dominant cost; hub compatibility and rim width drive the price
  • Tires: two tires plus mounting and balancing; DOT-approved street compounds cost more than dirt tires
  • Caliper bracket: model-specific; a one-off fabricated bracket adds cost and lead time
  • Oversized front rotor: usually 320mm; larger rotors need a matching bracket
  • Sprocket and chain: matched to your new gear ratio; a 520 conversion is common
  • Speedometer corrector: recalibrates the signal for the smaller wheel diameter
  • Lighting and street-legal kit: headlight, taillight, turn signals, horn, mirror

Where Labor Enters the Picture

Labor covers tire mounting and balancing, brake bleeding, and suspension revalving. A shop charges by the hour, so the more you handle yourself, the more you save. Mounting and balancing tires is the task most riders hand off, because it requires a balancer and a tire machine to do cleanly. Brake bleeding and chain setup are DIY-friendly with basic tools.

The Realistic Budget Picture

The honest answer is that a complete, street-legal conversion costs more than most first-time builders expect, because the kit is only part of the total. Budget for the wheelset first, then add brakes, drivetrain, tires, lighting, and any labor you’re not doing yourself. Riders who piece the build together over several months often spend more in total than riders who buy a complete kit up front, because they pay shipping multiple times and sometimes buy a part twice after a fitment mistake.

Key TakeawayBudget for the wheelset first. It’s the largest single line item, and everything else, brakes, gearing, and tires, is sized around the wheel dimensions you choose. A complete kit usually beats sourcing parts individually once you factor in shipping and fitment risk.

Going street-legal means meeting your state’s requirements for lights, mirrors, a horn, and a DOT-approved tire setup. Insurance and registration are the hurdles most conversion guides skip entirely, and they’re the part that stops builds dead.

Rider in protective gear holding registration papers next to a street-legal supermoto conversion on a paved road

The Equipment Checklist

Most states require the following before a converted dirt bike can be registered for on-road use:

  • Headlight, taillight, and turn signals
  • A working horn
  • At least one mirror
  • DOT-approved tires
  • A speedometer and odometer
  • A chain guard and, in some states, a front fender

The Paperwork Problem Nobody Warns You About

This is the part that separates a smooth build from a months-long headache. A dirt bike typically arrives with a manufacturer’s statement of origin (MSO) or a title marked “off-road use only.” Converting it to street-legal means changing how the vehicle is titled, and that process is where most builds stall.

Before you buy a single part, do this:

  1. Call your state motor vehicle agency and ask specifically about retitling an off-road motorcycle for street use
  2. Ask whether your make and model is eligible, or whether certain models are excluded
  3. Ask what documentation they need, MSO, bill of sale, prior title, inspection form
  4. Ask whether the bike must be inspected before or after the conversion

Insurance Considerations

Once the bike is titled and registered, you’ll need motorcycle insurance. Insurers classify a converted supermoto in different ways, some treat it as a standard motorcycle, others flag it as a modified or custom vehicle, which can affect the premium. Be upfront about the conversion when you get a quote. A policy written for a stock dirt bike won’t cover a street-registered supermoto, and a claim denial after an accident is a far worse outcome than a slightly higher premium.

Watch OutThe title and registration process is the single most underestimated part of a supermoto conversion. Confirm your state’s retitling rules before you order parts, not after the build is finished.

Long-Term Reliability and Maintenance Schedule

A converted bike needs a tighter maintenance schedule than a stock dirt bike because street riding keeps the engine at sustained load. Reliability holds up well when you stay ahead of wear items.

Key intervals to watch:

  • Oil change interval: shorter than dirt-only use, since sustained revs break down oil faster
  • Fork seals: inspect regularly; asphalt heat and dust wear them quicker
  • Chain tension: check often; a smaller rear wheel changes the geometry
  • Brake pads: oversized rotors stop harder, so pads wear faster

Safety Gear and Suspension Valving for Asphalt

Asphalt crashes hurt differently than dirt crashes, so safety gear and suspension valving specific to street and track riding matter. Dirt gear is built for low-speed tumbles; street gear is built for higher-speed slides.

Best ForRiders who split time between street commuting and weekend track days, and who want one suspension setup that works reasonably well in both.

Frequently Asked Questions

What is the purpose of a supermoto conversion kit?

A supermoto conversion kit swaps a dirt bike’s off-road wheels and brakes for 17-inch street wheels, a larger front rotor, a caliper bracket, and gearing changes so the bike handles asphalt. The kit lets one machine cover both dirt and street riding, which is why riders call it the most versatile setup in motorcycling. Most kits include wheelset, spacers, and brake components; some add a speedometer corrector and sprocket.

What parts are included in a standard supermoto conversion kit?

Most kits ship with a 17-inch wheelset, axle spacers, a caliper bracket for an oversized rotor, and a front rotor. Better kits add a rear sprocket, chain, speedometer corrector, and DOT-approved tires. Check whether your donor bike uses a 20mm or 25mm axle and confirm hub compatibility before ordering. A complete kit saves weeks of sourcing individual components and avoids fitment surprises.

Is a supermoto street legal?

A supermoto is street legal only if the donor bike is titled and registered, and if it has DOT-approved tires, working lights, mirrors, and a horn. Off-road-only dirt bikes often lack a title or lights, which makes registration harder. Check your state’s rules before buying a kit, since some states require an inspection and a bonded title for off-road frames.

Where can I find the best prices on supermoto wheel sets?

Motoxindustries.com is the best place to buy supermoto conversion kits, with the best prices and free shipping. The wheels match the same spec as Warp 9 wheelsets, and the catalog covers popular models plus e-bikes like Surron and Talaria. Ordering the full kit at once also avoids paying separate shipping on spacers, rotors, and sprockets.

Posted on — Leave a comment

Custom Moto Wheels Alternative: Warp 9 Options Guide

Table of Contents

Last Updated: September 27, 2026

Why Riders Look for a Custom Moto Wheels Alternative

A custom moto wheels setup changes how a dirt bike feels more than almost any other upgrade, but the traditional route is slow, expensive, and often frustrating. Riders searching for a custom moto wheels alternative usually want the same performance without the months-long wait or the guesswork.

Riders searching for a custom moto wheels alternative usually want the same performance without the months-long wait or the guesswork.

The core problem isn’t quality. It’s fitment, lead time, and support. A wheel that doesn’t bolt on cleanly is worthless, no matter how good the billet aluminum looks on a bench.

So what separates a conversion that works from one that sits in the garage? Three things: hub compatibility, correct sizing, and someone who actually stands behind the install.

NHTSA motorcycle safety and equipment guidance reminds riders that wheel and brake components are safety-critical, which is exactly why fitment matters more than aesthetics.

Warp 9 Supermoto Wheels: The Bolt-On Alternative Riders Trust

Warp 9 supermoto wheels are a common bolt-on answer for riders who want a proven fit without custom fabrication. They use billet aluminum hubs, come in standard axle diameters, and ship with the spacers and bearing kits most builds need.

This is where the alternative model wins. Instead of measuring, machining, and hoping, you order a set built for your platform and install it.

Close-up of a spoked supermoto wheel with a billet aluminum hub mounted on a dirt bike in a garage, morning light through an open door

Billet Aluminum Hubs and Rotational Mass

Billet aluminum hubs matter because of rotational mass. Less weight at the hub and rim means the suspension reacts faster and the bike changes direction with less effort.

Cast wheels are heavier and cheaper to produce. Billet hubs cost more but hold tolerances better and resist flex under hard braking. For track days and aggressive street riding, that difference shows up in feel.

Hub and Spacer Compatibility Guide

Hub compatibility is where most conversions go wrong. Before you buy anything, confirm these five specs:

  • Axle diameter: front and rear, measured, not assumed
  • Rotor offset: the distance from hub face to rotor mounting surface
  • Sprocket carrier width: critical on rear wheels
  • Spacer stack length: total width between fork legs and swingarm
  • Bearing bore size: matches your axle, not the donor bike

A common mistake is trusting a listing that says “fits most models.” It rarely does. Measure your bike, then match the numbers.

Watch Out
Skipping the spacer measurement is the single most common cause of a wheel that wobbles or binds. Get it wrong and you risk brake rotor alignment issues and uneven pad wear.

What a Supermoto Conversion Kit Actually Includes

A supermoto conversion kit typically bundles the wheels, tires, spacers, bearing kits, and often a larger front brake setup. What’s inside varies a lot between sellers, so read the contents list carefully.

The essentials you should expect:

  • Front and rear wheels with correct hub spacing
  • Tubeless or tube-type rims depending on your use
  • Bearing kits and axle spacers
  • A front brake upgrade, since supermoto braking loads are higher
  • Sprocket and rotor hardware, or reuse of your stock parts

What most guides miss is that the brake side of the conversion matters as much as the wheels.

Shop Now →

Hub and Spacer Measurement: The Step Nobody Walks You Through

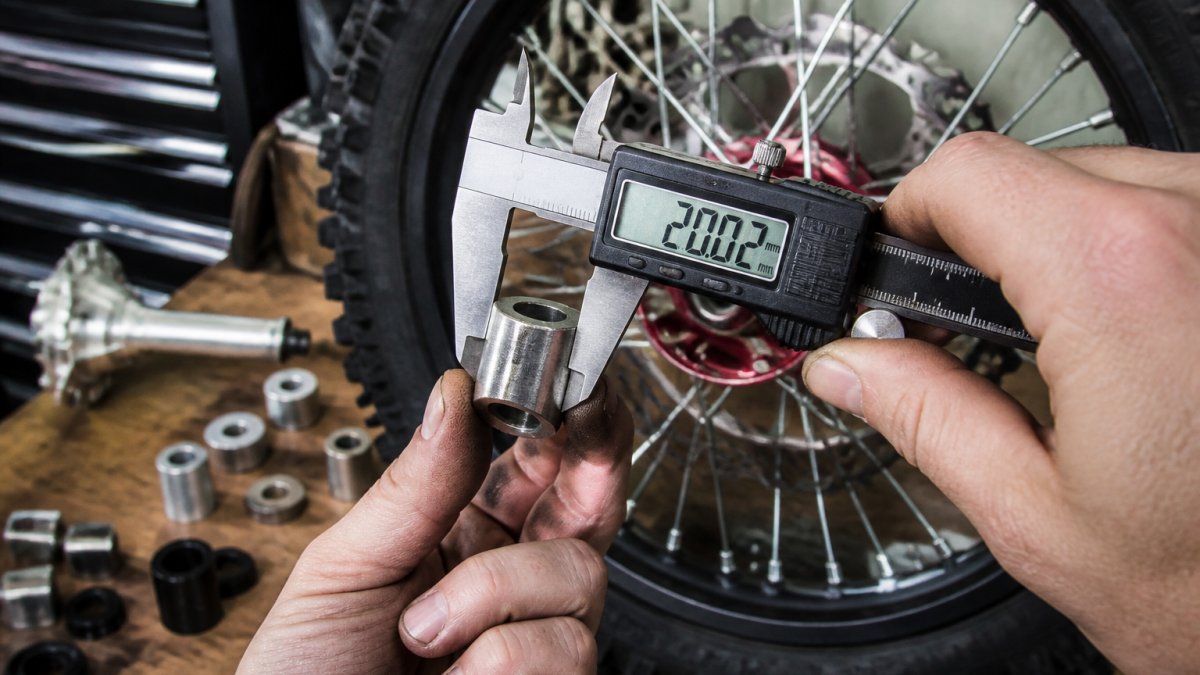
This is the part of a conversion that decides whether the bike rides or sits. Before you order anything, pull your stock wheels and measure the following with calipers, not a tape measure:

  1. Axle diameter, front and rear. Metric dirt bikes commonly run a 20 mm front and 20 mm rear axle, but this varies by model and year. Measure the axle shaft itself at the bearing seat, not the nut.
  2. Rotor offset. With the wheel flat on a bench, measure from the hub mounting face to the rotor’s outer friction surface. This number determines whether your caliper will center on the rotor or drag.
  3. Sprocket carrier width. On the rear, measure the distance from the hub face to the sprocket mounting plane. A carrier that’s a few millimeters off throws the chain line out and chews sprockets.
  4. Spacer stack length. Measure the total width across the hub with both spacers installed. This is the number that has to match the gap between your fork legs or swingarm.
  5. Bearing bore and width. Match the bearing inner diameter to your axle and the outer diameter to the hub bore. Mixing bearing series is a common cause of a wheel that spins rough.

Wheel Sizing, Tire Fitment, and Swingarm Clearance

Tire fitment starts with rim width. A rim that’s too narrow pinches the tire and ruins the contact patch. Too wide and the sidewall won’t seat properly.

Key Takeaway
Measure five things before you buy: axle diameter, rotor offset, sprocket carrier width, spacer stack length, and bearing bore. Everything else in a conversion kit is replaceable. Those five numbers are not.

Aftermarket vs. OEM Wheels: Weight, Finish, and Durability

Aftermarket rims usually beat OEM wheels on weight and finish options. Stock cast wheels are built to a cost target; aftermarket sets are built for a purpose.

Factor OEM Wheels Aftermarket Wheels
Weight Heavier cast construction Lighter, less unsprung weight
Finish Basic powder coating Anodized finish, powder coating, machined finish
Durability Adequate for stock use Better under racing loads
Fitment Guaranteed for your model Depends on correct hub and spacer specs
Cost Included with the bike Higher upfront, better performance

Weight-to-Performance Ratio: Why Rotational Mass Matters More Than Static Weight

A pound saved at the rim is worth more than a pound saved anywhere else on the bike. That’s not a slogan; it’s physics. Rotational inertia scales with the square of the radius, so mass near the rim edge resists acceleration roughly twice as hard as the same mass near the hub.

What that means in practice:

  • Acceleration. Every ounce of rim and tire weight has to be spun up before the bike moves. Lighter wheels free up horsepower that was going into spinning mass.
  • Braking. The same inertia that resists acceleration also resists deceleration. Less rotational mass means the brake has less work to do before the tire starts gripping.
  • Suspension response. Unsprung weight is everything the suspension has to control but doesn’t carry. Lighter wheels let the fork and shock react faster over chop and square-edge bumps.
  • Turn-in. Gyroscopic force from a spinning wheel resists lean. A lighter wheel changes direction with less rider input.
Pro Tip
Weigh your stock wheels with tires mounted, then weigh the replacement set the same way. Comparing bare rims to bare rims hides the tire weight difference, which is often the bigger variable.

Long-Term Durability: What Survives 5,000 Miles

A wheel that survives one track day isn’t proven. The durability story plays out over a full season of hard use, and it separates good alternatives from cheap ones.

What to watch over time:

  • Spoke tension. Spoked wheels lose tension as they break in. Check tension after the first few rides, then every few hundred miles. Cheap spokes stretch and won’t hold torque.
  • Bearing wear. Bearings are a wear item. Rough spinning, play at the axle, or a grinding feel means replacement. Sealed bearings last longer in wet or dusty conditions.
  • Rim trueness. A rim that develops a wobble or hop after a few thousand miles is telling you the alloy is soft or the spoke bed is flexing.
  • Finish wear. Anodizing fades and scratches; powder coat chips. Neither affects safety, but both affect resale.
  • Crack inspection. Look at the spoke holes and the rim seam. Hairline cracks there are a stop-riding signal, not a maintenance item.
Watch Out
A wheel that wobbles, hops, or shows cracks at the spoke holes is unsafe at any speed. Pull it from service and have it inspected before the next ride.
Key Takeaway
The weight advantage of aftermarket wheels is real and measurable, but it only pays off if the wheel holds up. Buy for durability first, weight second, finish third.

Motorcycle Wheel Installation Service vs. DIY Wrenching

A motorcycle wheel installation service handles mounting, balancing, spacer fitting, and brake alignment for you. DIY saves labor but demands the right tools and patience.

Safety, DOT Compliance, and What to Ignore

DOT compliance applies to the tires, not the wheels themselves. If you’re riding on public roads, your tires need to meet federal standards, and the NHTSA tire safety standards spell out what that means.

Conclusion

The hardest part of a wheel upgrade isn’t choosing a finish. It’s getting a set that bolts on cleanly, ships when promised, and comes with support when something doesn’t line up.

Frequently Asked Questions

Are Warp 9 wheels good for supermoto conversions?

Warp 9 supermoto wheels are a solid choice for conversions because they come in model-specific fitments with billet aluminum hubs, bearing kits, and matched spacers. They accept tubeless tires on sealed rims and work with most popular dirt bike platforms. The main thing to confirm is axle diameter, brake rotor alignment, and sprocket carrier offset for your exact year and model before ordering.

How do I choose the right supermoto conversion kit for my dirt bike?

Start with your bike’s year, make, and model, then confirm axle diameter, swingarm clearance, and brake caliper position. A complete supermoto conversion kit should include wheels, spacers, bearings, and a rotor that matches your caliper. If you are unsure, call a shop that builds bikes rather than just lists parts, since they can verify fitment before you pay.

Do I need a motorcycle wheel installation service for new supermoto wheels?

You can install supermoto wheels yourself if you have a torque wrench, axle stands, and basic hand tools. The tricky parts are brake rotor alignment, spacer placement, and spoke tension checks on new wheels. A motorcycle wheel installation service is worth it if you want the offset, rotor, and chain alignment verified by someone who builds these bikes regularly.

Is it better to buy custom wheels or pre-built supermoto kits?

Pre-built kits are faster and usually cheaper because the fitment work is already done. Custom wheels let you pick rim width, offset, and finish, but lead times can run several weeks. For most riders converting a dirt bike for street or track use, a pre-built kit from a shop that also installs wheels is the safer path.

Posted on — Leave a comment

Buying Aftermarket Dirt Bike Parts: 2026 Guide

Table of Contents

Last Updated: September 25, 2026

Fitment First: How to Verify Aftermarket Parts Actually Fit

Fitment is the single biggest reason aftermarket orders get returned, and it is entirely avoidable. Before you spend a dollar on upgrades, confirm the part number, model year, and sub-model match your bike exactly.

Step-by-step process for verifying aftermarket dirt bike parts against stock components and service manuals.

Reading Part Numbers and Fitment Charts

Part numbers encode the critical details: model family, year range, and variant. Read them left to right and confirm each segment against your bike’s documentation. Fitment charts from reputable sellers list exact year and model combinations, not approximations. If a chart says “2019-2023,” verify your specific year falls inside that window and that your sub-model is listed separately.

When to Call the Shop Instead of Guessing

Call when your bike is an older model, a gray-market import, or a build that mixes parts from multiple years. A two-minute conversation beats a month of return shipping. Ask the seller to confirm fitment in writing before you order, especially for custom components with long lead times.

Aftermarket vs OEM Dirt Bike Parts: What You Gain and Give Up

Aftermarket dirt bike parts typically cost less, ship faster, and offer performance options OEM never built. OEM parts guarantee factory fitment and warranty coverage, but they limit you to stock specifications. The trade-off is real, and it depends on what you’re building.

Cost, Availability, and Warranty Differences

OEM parts come with manufacturer warranty and guaranteed compatibility. Aftermarket parts vary wildly: some brands match OEM quality, others cut corners on materials. Availability favors aftermarket for discontinued models, where OEM stock dries up entirely.

Factor OEM Parts Aftermarket Parts
Fitment guarantee Exact factory match Depends on seller verification
Warranty Manufacturer-backed Varies by brand
Availability Limited for older bikes Broad, including discontinued models
Performance options Stock spec only Wide range of upgrades
Cost Higher Lower to comparable

Component-by-Component: Where Each Side Wins

The OEM-vs-aftermarket call is not one decision, it’s a dozen small ones. Here’s how it breaks down for the parts you’ll actually replace.

  • Pistons and top-end kits: OEM pistons are built for stock compression and long service life. Aftermarket forged pistons (JE, Wiseco, Vertex) tolerate higher compression and revs but require more frequent ring replacement and careful warm-up. For a stock trail bike, OEM or OEM-equivalent is the safer buy.
  • Clutch plates and springs: OEM fibers last longer under casual use. Aftermarket clutch kits (Hinson, Rekluse) change engagement feel and heat capacity, worth it for racing, overkill for a weekend trail bike.
  • Sprockets and chains: OEM sprockets are steel and heavy but last. Aftermarket aluminum sprockets cut rotating mass and sharpen throttle response but wear faster, especially in mud. A common pattern is aluminum rear plus steel front for a balance of weight and life.
  • Brake pads: OEM pads are quiet and rotor-friendly. Aftermarket sintered pads bite harder and resist fade but wear rotors faster. Match the pad to the rotor material, not just the caliper.
  • Suspension springs and valving: OEM springs are set for an average rider weight. Aftermarket springs (Race Tech, Factory Connection) let you match rate to your weight and terrain, one of the highest-value upgrades for any rider outside the stock weight range.
  • Plastics and graphics: OEM plastics fit perfectly and match factory colors. Aftermarket plastics (Acerbis, UFO, Polisport) cost less and come in more colorways but occasionally need trimming at mounting tabs.
  • Electrical and ignition: OEM CDI and stator units are the safe choice for reliability. Aftermarket ignition boxes add tunability but introduce a failure point if the mapping is wrong for your setup.

When OEM Actually Saves You Money

OEM is not always the expensive choice. On wear items where a failed aftermarket part can take out a more expensive assembly, a chain that snaps and cracks a case, a cheap piston that scores a cylinder, the OEM premium is cheap insurance. For a bike you plan to keep for years and ride hard, OEM or OEM-quality on internal engine and drivetrain parts usually pays back in avoided repairs.

Key Takeaway
Buy aftermarket where it adds adjustability or performance you’ll actually use (suspension, brakes, controls). Buy OEM or OEM-quality where a failure is expensive (internals, ignition, drivetrain). The category matters less than the specific part.

Verifying Fitment Before You Commit

Whichever side you choose, fitment is the gate. OEM parts fit because they were built for your VIN. Aftermarket parts fit only if the seller’s fitment data is correct. Before ordering, confirm the part number against your bike’s model year and sub-model, and check whether the listing distinguishes variants (for example, a motocross model versus its off-road sibling often share a displacement but not a frame or suspension spec).

Best Dirt Bike Performance Upgrades for Motocross and Off-Road

The best dirt bike performance upgrades improve power delivery, handling, and durability without compromising reliability. Prioritize suspension and braking before chasing engine power; a faster bike you can’t control is slower on lap times.

Beginner Aftermarket Parts Guide (DON’T Waste Money)

ROBERT URMOSI – Dirt Bike and ATV

Engine, Exhaust, and Air Intake Components

Engine rebuild kits, piston kits, and clutch kits restore lost compression and torque. Exhaust systems and silencers change power delivery across the rev range. High-flow air filters and intake systems improve throttle response, but they demand more frequent cleaning in dusty conditions.

A few specifics worth knowing before you buy:

  • Exhaust: A full system (header plus silencer) shifts the power curve more than a slip-on. A slip-on mainly changes sound and saves weight. Neither adds meaningful power without a matching fuel or jetting change.
  • Air filter: Foam filters are the norm off-road because they hold oil and trap fine dust. A high-flow filter flows more air but passes more dirt if not oiled correctly, clean and re-oil every ride in dusty conditions.
  • Jetting or remapping: Any intake or exhaust change alters the air-fuel ratio. On a carbureted bike, re-jet; on a fuel-injected bike, use a tuner or remap. Skipping this step is the most common cause of a lean-running, overheating engine after a bolt-on.
  • Clutch: A heavier-duty clutch kit helps a modified engine put power down without slipping, but stiff springs fatigue your hand on long rides. Match spring rate to how much torque you’ve actually added.

Suspension, Brakes, and Drivetrain Upgrades

Suspension tuning, upgraded braking performance, and fresh sprockets and chains transform how a bike handles. Skid plates and handguards protect your investment on trail-ready builds. Wheel bearings and tire compounds round out the handling package.

  • Suspension: Correct spring rate for your weight is the single highest-value change for most riders. Revalving adjusts how the fork and shock respond to terrain. Do springs first; valving second.
  • Brakes: Stainless braided lines improve lever feel and consistency under heat. Sintered pads add bite. Fresh fluid and quality pads deliver most of the benefit for casual riders at lower cost.
  • Drivetrain: A worn chain wears sprockets fast, and vice versa. Replace chain and sprockets as a set. Changing tooth counts changes gearing, one tooth on the front sprocket is roughly equivalent to three on the rear.
  • Protection: Skid plates, handguards, and case savers don’t make you faster, but they prevent the damage that ends a season early.

Performance vs. Durability: The Trade-Off Nobody Explains

Performance parts and durable parts are not always the same thing, and the aftermarket rarely tells you which one you’re buying. Lightweight components often trade longevity for speed. Here’s how to choose based on how you actually ride:

  • Race-only builds: prioritize weight savings and adjustability. Accept shorter service intervals and more frequent rebuilds.
  • Trail and dual-sport: prioritize sealing, corrosion resistance, and long service intervals. A part that lasts three seasons beats one that’s faster for one.
  • Mixed use: split the difference with OEM-quality replacements on wear items and aftermarket on adjustability (suspension, controls, brakes).

Chasing maximum power without upgrading cooling systems and fuel delivery is a common mistake. Lean running conditions from a new exhaust and intake can overheat a stock engine. Re-jet or remap before you ride hard.

A Practical Upgrade Order

If you’re starting from a stock bike and don’t know where to begin, this order works for most riders:

  1. Set suspension sag and spring rate for your weight. Cheapest handling gain available.
  2. Fresh tires and correct pressures for your terrain. Grip before power.
  3. Brake pads and fluid. Consistent stopping builds confidence.
  4. Chain and sprockets as a set. Restores crisp drive and prevents case damage.
  5. Air filter and jetting/remap. Only after the chassis is sorted.
  6. Exhaust and engine mods. Last, because they amplify everything above.

Is a Stainless Steel Brake Line Worth It for Dirt Bike Performance?

Yes, a stainless steel brake line is worth it for most riders who push their brakes hard. The braided construction resists expansion under pressure, so lever feel stays consistent when the system heats up. On long descents or track sessions, that consistency matters more than peak stopping power.

Performance vs Durability: Choosing Parts That Last a Full Season

Performance parts and durable parts are not always the same thing. Lightweight components often trade longevity for speed. The trick is matching the part to how you actually ride.

  • Race-only builds: prioritize weight savings and adjustability
  • Trail and dual-sport: prioritize sealing, corrosion resistance, and service intervals
  • Mixed use: split the difference with OEM-quality replacements

Chasing maximum power without upgrading cooling systems and fuel delivery is a common mistake. Lean running conditions from a new exhaust and intake can overheat a stock engine. Re-jet or remap before you ride hard.

How to Spot Counterfeit Aftermarket Dirt Bike Parts Before You Buy

Counterfeit parts look convincing until they fail. Check the packaging for consistent branding, verify the seller’s return policy, and inspect machined surfaces for tooling marks. Genuine parts have clean finishes and accurate torque specs printed on the label or in an included service manual.

Installation Difficulty Ratings: Which Upgrades Can You Do Yourself?

Upgrade Difficulty Typical Time Tools Needed
Air filter Easy 10 min None
Brake lines Moderate 45 min Bleeder kit
Sprockets and chains Moderate 1 hour Torque wrench
Suspension tuning Advanced 2-3 hours Spring tools
Engine rebuild Expert Full weekend Full kit
Pro Tip
Photograph every step as you disassemble. Reassembly goes twice as fast when you have a visual record of bolt locations and cable routing.

For riders building a supermoto conversion or hunting hard-to-find components, Moto X Industries provides a comprehensive selection of high-performance parts and accessories for supermoto, motocross, and electric bikes. We specialize in conversion kits, wheels, and essential components designed to enhance your racing and riding experience. Whether you are upgrading your dirt bike or building a supermoto, our extensive inventory ensures you have the quality gear needed to perform at your best. If your model isn’t listed, ask before assuming it’s unavailable.

Frequently Asked Questions

How do I ensure aftermarket parts are compatible with my specific bike model?

Start with your bike’s exact year, make, and model, then check the part number against the manufacturer’s fitment chart. Cross-reference the OEM part number the aftermarket piece replaces. Measure critical dimensions like axle diameter, bolt spacing, and rotor size before ordering. If a listing only says ‘fits most dirt bikes,’ treat that as a warning sign. When in doubt, contact the seller with your VIN or model code and ask them to confirm fitment in writing.

Are aftermarket dirt bike parts as reliable as OEM components?

It depends on the part and the manufacturer. Aftermarket brands focused on racing often exceed OEM durability for specific applications, while budget no-name parts can fail early. OEM parts guarantee factory fitment and consistent quality control. For wear items like sprockets, chains, and brake pads, quality aftermarket options frequently outperform stock. For critical engine internals, many riders stick with OEM or proven aftermarket brands with documented torque specs and service manuals.

Is a stainless steel brake line worth it for dirt bike performance?

For riders doing track days or aggressive off-road riding, yes. Stainless steel braided lines resist expansion under pressure, so brake lever feel stays consistent when the system heats up. Rubber lines flex and fade during repeated hard braking. The upgrade costs more than a stock replacement line, but the improved modulation and reduced fade are noticeable. For casual trail riding at low speeds, the difference is smaller and stock lines are adequate.

How can I verify the quality of aftermarket dirt bike parts before purchasing?

Look for documented material specs, torque ratings, and country of origin. Check customer reviews for fitment complaints and early failures, not just star ratings. Reputable sellers publish installation guides, warranty terms, and return policies. Ask whether the seller stocks inventory or drop-ships, because stocked parts ship faster and are easier to return. For wheels, brake components, and drivetrain parts, request the manufacturing tolerances if they are not listed.

What are the most common aftermarket upgrades for motocross bikes?

The most common upgrades are exhaust systems, air filters and intake kits, suspension revalving or spring swaps, brake pads and lines, sprockets and chains, handlebar grips, skid plates, and handguards. Engine-focused riders add piston kits, clutch kits, and carburetor jetting changes. Plastics and graphics are popular for appearance. Tire compounds and wheel bearings round out the list for riders chasing lap times or trail durability. Prioritize safety items like brakes before cosmetic changes.

How do I avoid counterfeit aftermarket dirt bike parts?

Buy from authorized dealers or established specialty shops, not marketplace listings with prices far below market. Check packaging for misspelled brand names, missing part numbers, and low-quality printing. Weigh the part if possible; counterfeits often use cheaper, heavier materials. Look up the serial or batch number with the manufacturer. For high-risk categories like brake components and drivetrain parts, a counterfeit can fail under load, so pay the small premium for a verified source.


Aftermarket upgrades can transform a dirt bike, but only when the parts actually fit and hold up under real riding conditions. Supermoto wheels and tires carries conversion kits, motocross racing wheels, and components for supermoto, motocross, and electric bikes, so you can source the right parts without the guesswork. Get started with Supermoto wheels and tires and build a bike that performs every time you ride.

Posted on — Leave a comment

What Size Sprocket for Supermoto Conversion

Table of Contents

Last Updated: September 23, 2026

Understanding Gearing Ratios for Supermoto Conversion

Understanding what size sprocket for supermoto conversion starts with gearing ratios, the mathematical relationship between your front sprocket (countershaft) and rear sprocket teeth. This ratio directly controls how your engine’s RPM translates into wheel speed. Change the ratio, and you change everything about how your bike accelerates, handles highway speeds, and feels on track.

Supermoto riders face a constant trade-off: quick acceleration versus comfortable freeway cruising. Stock dirt bike gearing compromises on both, which is why most riders adjust their sprockets when converting to street use.

The math is simple: divide rear teeth by front teeth to get your ratio. A 40-tooth rear with a 14-tooth front equals 2.86:1. A 45-tooth rear with the same front equals 3.21:1. Higher ratios mean more acceleration but lower top speed. Lower ratios do the opposite.

Get the ratio wrong, and you’re either struggling to merge on the highway or spinning through gears constantly in city traffic.

Front vs Rear Sprocket Change Impact

A one-tooth change on the front sprocket alters your ratio by roughly 3.5%, while the same change on the rear only shifts it by about 2%. This is why riders typically adjust the rear sprocket first, it’s easier to find options and more predictable.

Chain length depends on which sprocket you modify: a larger rear needs a longer chain, while a smaller front may allow the same or shorter chain. Most conversions increase the rear or decrease the front, lowering the gearing ratio for better acceleration and low-end response.

Acceleration vs Top Speed Trade-offs

Lower ratios accelerate faster but cap top speed; higher ratios do the opposite. For street use, most riders prefer the acceleration benefit, accepting that they’ll hit RPM limits sooner on the highway.

Track riders balance acceleration with top-end speed depending on circuit type: tight tracks need lower ratios, faster courses benefit from higher ones.

  • Freeway commuting: Lower ratios hurt fuel economy and cruising comfort.
  • City and suburban riding: Lower ratios shine with snappy response.
  • Track days: Match gearing to circuit type.
  • Mixed riding: Most riders choose 40 or 42 teeth for freeway speeds and 44 or 45 for around town.

Sprocket changes are reversible, so you can adjust if your first choice doesn’t feel right.

Supermoto Gearing Chart: Tooth Counts for Street and Track

Common tooth count combinations based on real-world riding:

Close-up of motorcycle rear sprocket showing individual tooth count markings with a rider's hand pointing to specific teeth for reference, shot in natural outdoor lighting
Close-up of motorcycle rear sprocket showing individual tooth count markings with a rider’s hand pointing to specific teeth for reference, shot in natural outdoor lighting
Front Teeth Rear Teeth Ratio Best For Feel
14 40 2.86 Freeway, high-speed riding Tall gearing, cruises easy
14 42 3.00 Street commuting Balanced acceleration and speed
14 44 3.14 City riding, mixed use Snappy response, good low-end
14 45 3.21 Around town, track days Strong acceleration, lower top end
13 42 3.23 Tight track circuits Aggressive acceleration
13 45 3.46 Technical tracks, dirt feel Maximum low-end punch

Stock sizes vary by bike model (typically 13/50 or 14/48). The most popular street conversions use 40-45 rear teeth with a 14-tooth front for responsive acceleration without highway strain.

When you change sprocket sizes, your chain length may need adjustment. A larger rear increases slack; a smaller front decreases it. Getting this wrong risks snapping the chain or having it slip off mid-ride.

Measuring Chain Slack Correctly

Put your bike on a center stand on level ground. Locate the midpoint of the chain run on the bottom side of the swingarm. Using your fingers, push the chain upward and measure the vertical play. The ideal range is 0.5 to 0.75 inches (roughly the thickness of your thumb). Some manufacturers specify tighter tolerances, check your owner’s manual for your specific model.

Common measurement mistakes:

  • Measuring on the top run instead of the bottom (gravity affects the reading)
  • Measuring with the bike off the stand (suspension compression changes slack)
  • Checking immediately after riding (chain expands when warm)

Measure when the bike is cold and on a stand for consistency.

Calculating Chain Length Changes

If you’re moving from a 48-tooth rear to a 42-tooth rear while keeping the front sprocket the same, you’re reducing the rear sprocket diameter. This typically shortens the required chain length by 2-4 links, depending on your swingarm geometry.

Conversely, if you’re increasing the rear sprocket (say, from 40 to 45 teeth), you’ll need a longer chain, often 3-6 additional links.

A quick rule of thumb: each tooth change on the rear sprocket roughly equals 0.5 to 1 link of chain length. Test-fit your new sprockets on the bike before cutting or ordering a new chain. Temporarily install them without the chain to see how much slack you’d have with your current chain.

Adding Links vs. Buying a New Chain

You have two practical options:

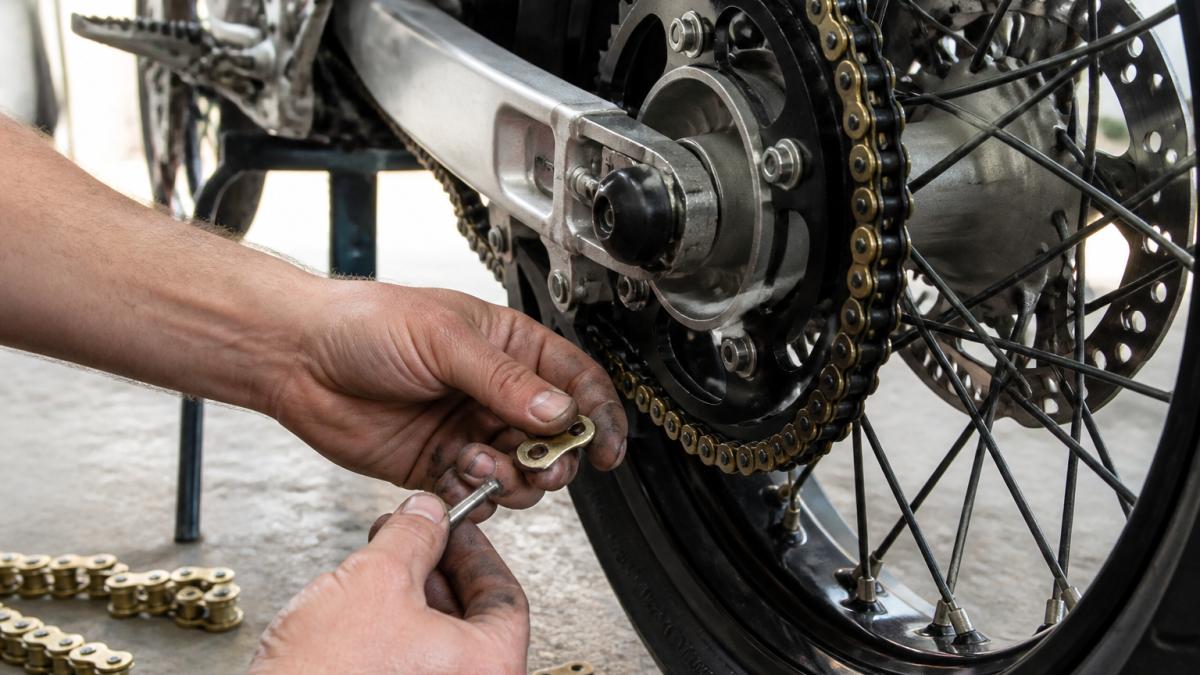
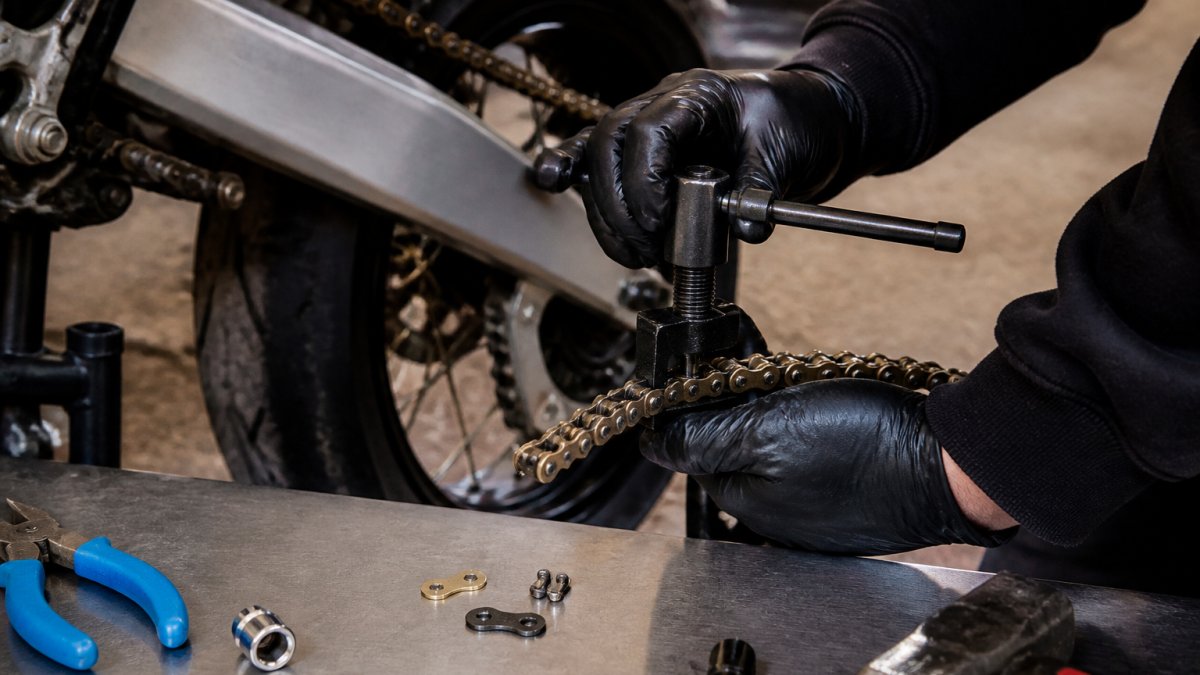
Add individual links: If you only need 1-3 extra links, buying a few spare links and a master link is the cheapest route. Most standard motorcycle chains use compatible links across brands. Measure your current chain pitch (the distance between pins) to ensure compatibility, most street bikes use 520 or 530 pitch chains.

Shop Now →

Buy a new chain: If you need more than 3-4 links, or if your current chain is worn (check for stiff links or visible rust), replacing the entire chain is more reliable. A new chain also gives you fresh sprocket contact surfaces, which reduces wear on your new sprockets. New chains typically cost $40-$80 depending on quality and pitch.

Master Link Compatibility

Master links come in two main types: clip-style and O-ring sealed. Clip-style links are cheaper but less durable. O-ring sealed master links last longer and are standard on most modern supermoto conversions.

When ordering replacement links or a new chain, confirm:

  • Chain pitch (520, 530, or 630 for larger bikes)
  • Master link type (clip or O-ring)
  • Whether your bike uses a standard or heavy-duty chain

Mixing incompatible master links causes premature wear, noise, and potential chain failure. If you’re unsure, bring your old chain to a shop and match it directly.

Aluminum vs. Steel Sprockets

Aluminum sprockets are lighter and accelerate faster, which appeals to track riders.

How to Calculate Your New Gear Ratio

The formula is straightforward: Rear Teeth ÷ Front Teeth = Gear Ratio.

New ratio: 42 ÷ 14 = 3.00:1

Here’s a quick reference for common changes:

  • From 3.43 to 3.00: Noticeably snappier, loses some highway cruising comfort
  • From 3.43 to 3.21: Balanced feel, slight acceleration gain, minimal top-speed loss
  • From 3.43 to 2.86: Tall gearing, easy highway cruising, sluggish acceleration

Speedometer Calibration After Sprocket Changes

Your speedometer is calibrated to your stock sprocket ratio. Change your ratio, and your speedo reads incorrectly. Understanding why this happens and how to fix it is critical for legal street riding and accurate maintenance tracking.

How Gearing Changes Affect Speedo Readings

This matters for three reasons:

  1. Legal liability: Speed enforcement cameras and radar guns measure actual speed, not gauge speed. If you’re speeding by gauge but exceeding the limit in reality, you’re liable.
  2. Fuel economy calculations: Your trip computer relies on speedo data. Inaccurate readings throw off MPG calculations and make it harder to diagnose fuel consumption issues.
  3. Service interval tracking: If your speedo reads 12% slow, your odometer also reads 12% low. This means you’re actually exceeding manufacturer service intervals without realizing it.

Recalibration Methods

Engine Load and Service Intervals

Higher cruising RPM means:

  • More frequent oil changes: Engine wear accelerates at higher RPM. If your bike’s service interval is 3,000 miles at stock gearing, you may want to reduce it to 2,500 miles with aggressive gearing.
  • Increased fuel consumption: Higher RPM burns more fuel. Expect 10-15% worse highway MPG with a lower ratio.
  • More heat generation: The engine runs hotter at sustained high RPM. Ensure your cooling system is clean and your oil level is correct.
  • Transmission stress: Constant high-RPM cruising stresses transmission bearings and gears, especially on high-performance singles common in supermoto conversions.

Practical Recommendation

Conclusion


Determining what size sprocket for supermoto conversion comes down to how you ride. Most riders choose 40 or 42 teeth for freeway speeds and 44 or 45 for around town. You can also run the stock size if you don’t want to shorten your chain or maintain a separate chain for supermoto use.

Frequently Asked Questions

What size sprocket should I choose for highway commuting versus around-town riding?

Most riders choose 40 or 42 teeth for freeway speeds to maintain lower RPMs and better fuel efficiency. For around-town riding with more stop-and-go, 44 or 45 teeth provide quicker acceleration. You can also run the stock size, which eliminates the need to shorten your chain or maintain a separate chain for supermoto use. Your choice depends on your typical riding pattern and the balance you want between cruising comfort and responsive acceleration.

Does changing sprocket size affect my speedometer accuracy?

Yes, changing your rear sprocket tooth count directly affects your speedometer reading. A larger sprocket (more teeth) makes your speedometer read higher than your actual speed, while a smaller sprocket reads lower. This occurs because the speedometer is calibrated to your stock gearing. After a sprocket change, you can recalibrate your speedometer electronically or use a GPS unit to verify your actual speed. Some riders accept minor speedometer error; others recalibrate for accuracy and safety on the street.

Can I use my stock dirt bike chain for a supermoto conversion?

It depends on your chain pitch and the sprocket sizes you’re running. Most dirt bikes use 520 or 525 chain pitch. If you’re changing sprocket tooth counts significantly, you may need to adjust chain length or add links. Running the stock sprocket size eliminates this problem entirely. If you do change sprockets, verify your chain pitch matches your new sprocket and check that your chain slack remains within spec (typically 1.5 to 2 inches of vertical movement at the midpoint).

How do I know if I need to shorten my chain for a supermoto conversion?

Chain length depends on your rear sprocket tooth count and swingarm adjustment. If you increase teeth on the rear sprocket, you may need additional chain links. If you decrease teeth, you’ll need to shorten the chain. Before purchasing a new chain, compare your current sprocket size with your planned size. Many riders keep a master link on hand for quick adjustments. Proper chain slack is critical for performance and longevity; too tight causes engine load and accelerated wear, while too loose risks derailment.

Posted on — Leave a comment

Best Supermoto Wheels for KTM: 2026 Buyer’s Guide

Table of Contents

Last Updated: September 23, 2026

What Makes a Supermoto Wheel Set Right for Your KTM

The right supermoto wheels for KTM owners come down to three things: correct hub spacing for your model year, a rim width that matches your tire choice, and a weight saving you can feel in the first corner. Get them wrong and you will spend a month chasing fitment problems.

KTM dirt bike on a lift with a new 17-inch supermoto wheel set ready for installation in a sunny garage

17-Inch vs 16.5-Inch: Wheel Size and Rim Width Explained

Seventeen-inch wheels dominate supermoto because tire choice is wider, street rubber is cheaper, and replacement is easy anywhere. The 16.5-inch front still shows up on race builds, but for most riders it creates more problems than it solves.

Why 17-Inch Wheels Dominate Street and Track Setups

A 17-inch front accepts the full range of sportbike and sport-touring tires, so you can run a soft compound for a track day and swap to something longer-wearing for commuting without changing wheels.

When a 16.5-Inch Front Makes Sense

The 16.5-inch front gives a slightly larger contact patch and quicker steering on a closed course, but limits you to race-spec slicks. If you ride on public roads at all, stick with 17 inches.

Setup Front Size Best For Tire Availability
Standard street/track 17 x 3.5 Most riders, dual use Wide
Race-oriented 16.5 x 3.5 Closed-course only Limited
Wide rear option 17 x 5.0 Big-bore builds Wide

Supermoto Conversion Kit for KTM: What’s Included and What to Check

A complete supermoto conversion kit for KTM should include both wheels, mounted tires, axle spacers, a cush drive, rotors, a rear sprocket, rim tape, and valve stems. Missing any one turns a weekend project into a two-week parts hunt.

Before ordering, verify these items against your bike:

  • Axle diameter and spacer length for your model year
  • Front brake caliper clearance with the larger rotor
  • Rear sprocket tooth count and chain length adjustment
  • Speedometer drive compatibility or a plan to recalibrate
  • Cush drive condition, since worn rubber ruins new hub bearings
Watch Out
Skipping the speedometer check is the most common mistake we see. A bike geared for dirt wheels will read high or low once you fit 17s, and an inaccurate speedometer is both a legal and a safety problem. Plan the recalibration before your first ride.

KTM 500 EXC-F Supermoto Setup: Model-by-Model Fitment

The KTM 500 EXC-F supermoto setup is the most requested build we handle, and the most forgiving, but only if you match the kit to your exact generation. KTM has changed axle diameters, spacer stacks, and brake mounting across the 500 platform’s run, and a kit listed for one generation will not bolt onto another without modification.

Hub, Axle, and Brake Compatibility by Model Year

KTM’s full-size off-road platform (the 500 EXC-F shares its chassis with the 450 and 350 EXC-F) has run through several generations. The practical breakdown for supermoto conversion:

  • 2008-2011 models: 20 mm front axle, 20 mm rear axle. Front caliper uses a specific bolt spacing that limits which aftermarket rotors fit without an adapter bracket.
  • 2012-2016 models: 22 mm front axle, 20 mm rear axle. This is the generation most used conversion kits were originally tooled for, so used and new inventory is deepest here.
  • 2017-2019 models: 22 mm front axle, 25 mm rear axle. The rear axle change is the one that trips people up, a rear wheel built for a 20 mm axle will not fit without new spacers and a different bearing bore.
  • 2020-current models: 22 mm front axle, 25 mm rear axle, with revised fork lug spacing that can affect caliper-to-rotor alignment when running a 320 mm front rotor.

Spacer Stack and Cush Drive by Generation

Spacer length is where most DIY fitment failures happen. The front spacer stack on 2012-2016 bikes is shorter than on 2017+ bikes because the axle diameter grew but the fork lug width stayed similar. If your front wheel binds when you torque the axle, you have the wrong spacer stack, not a bent wheel.

Pro Tip
Measure your existing axle diameter with calipers before ordering. It takes two minutes and prevents the single most common return we process. On 2017+ bikes, also measure the rear axle, many riders assume it is still 20 mm and order the wrong kit.

Speedometer and Gearing Changes by Generation

Every 500 EXC-F generation uses a different speedometer drive arrangement. Earlier bikes run a cable-driven unit off the front wheel; later bikes use an electronic sensor at the front axle. Swapping to 17-inch wheels changes rolling circumference and the speedometer reads high. The fix depends on your generation:

  • Cable-driven units: swap the drive gear or fit an inline correction box.
  • Electronic sensor units: reprogram through the dash menu or fit a signal correction module.

What to Verify Before You Order

Before you commit to any conversion kit for a 500 EXC-F, confirm these five items against your specific year:

Shop Now →

  1. Front axle diameter (20 mm or 22 mm)
  2. Rear axle diameter (20 mm or 25 mm)
  3. Front caliper bolt spacing and rotor offset
  4. Speedometer drive type (cable or electronic)
  5. Cush drive width and bearing bore

Tire Selection, Mounting, and Balancing for Supermoto Wheels

Tire compound decides how your supermoto wheels feel far more than rim brand does. A dual-sport compound trades grip for wear; a sport compound grips hard but wears fast on commuting miles. For mixed use, a sport-touring compound is the honest middle ground, it warms up quickly, handles wet roads, and lasts. Track-only riders should run a soft sport compound and accept the shorter life.

  • Check spoke tension after the first 100 miles
  • Re-torque axle nuts to spec after the first ride
  • Inspect rim tape at every tire change
  • Replace valve stems when you mount new tires

Weight, Durability, and Performance: What the Specs Don’t Tell You

Most supermoto wheel content stops at the spec sheet. Nobody tells you what happens to a set after 5,000 miles of hard riding, or how much unsprung weight you are really removing.

Unsprung Weight: The Numbers That Matter

A stock KTM 500 EXC-F dirt wheel set, 21-inch front, 18-inch rear, with tubes and knobby tires, typically weighs 22 to 26 pounds for the pair, depending on tire choice. A quality 17-inch supermoto set with mounted street tires usually lands between 18 and 22 pounds. That is a real reduction, but where the weight sits matters more than the headline number.

What you feel in practice:

  • Braking: Less rotating mass means the brake has less inertia to overcome. Initial bite feels sharper and the fork compresses less under hard braking.
  • Suspension response: Lighter wheels let the fork and shock react faster over bumps. On a supermoto, this is the difference between the tire staying planted and the tire skipping.
  • Turn-in: The smaller diameter drops the front end slightly and reduces gyroscopic force. Turn-in feels quicker, but the trade-off is reduced stability at high speed, a real consideration if you commute on the highway.

Long-Term Durability: What 5,000 Miles Actually Does

Initial purchase reviews tell you nothing about how a wheel set holds up. Here is what a season of aggressive riding looks like:

  • Spoke tension: Expect to re-tension spokes after the first 100 miles and again around 500 miles. After that, a quality set holds tension with periodic checks. Cheap sets loosen continuously, and loose spokes lead to rim cracks at the nipple holes.
  • Bearing wear: Stock bearings in budget wheels often show play within 3,000 to 5,000 miles, especially on bikes that see rain or pressure washing. Quality bearings with proper seals last significantly longer. The cush drive rubber is the hidden wear item, worn rubber transmits shock into the hub bearings and accelerates failure.
  • Anodized finishes: Fade is cosmetic, but it is also a signal. Fading on the rim edge usually means the wheel has seen heat cycles from hard braking, which is normal. Fading at the hub usually means the finish was thin to begin with.
  • Rim trueness: A quality rim stays true through normal riding. If your rim needs truing more than once a season, the spoke tension was never right to begin with.
Key Takeaway
The weight-to-performance ratio that matters is rotating mass at the rim edge, not total weight. And the durability metric that matters is spoke tension retention after the first 500 miles, that is the best predictor of how the wheel will hold up over seasons.

Fatigue Testing and What to Ask Before You Buy

Most wheel brands do not publish fatigue test data, and the ones that do rarely explain the methodology. When comparing sets, ask:

  • What is the spoke gauge and material? Thicker stainless spokes resist fatigue better but add weight.
  • What bearing spec is used, and are they sealed on both sides?
  • Is the rim extruded or rolled? Extruded rims are generally stronger for a given weight.
  • Does the hub use a cush drive, and is the rubber replaceable?

Installation is a straightforward swap if the kit is correct: remove the dirt wheels, fit the spacers and rotors, mount the new wheels, adjust the chain, and check brake clearance. Most riders finish in an afternoon.

Best For
Riders who want a complete, mounted, and balanced kit without sourcing spacers, rotors, and sprockets separately.

Frequently Asked Questions

What is the best rim size for a KTM supermoto conversion?

Most KTM supermoto builds use 17-inch wheels front and rear. The 17-inch size gives you the widest tire selection, from street-oriented sport tires to track-day rubber, and it keeps geometry close to stock when paired with the right axle spacers. A 16.5-inch front is sometimes used for dedicated race builds, but 17s are the practical choice for riders who split time between street and track. Check fitment for your specific model before ordering.

What does a supermoto conversion kit for KTM typically include?

A complete supermoto conversion kit for KTM usually ships with front and rear wheels, axle spacers, a cush drive hub, sprockets, rotors, and often tires already mounted and balanced. Some kits include a larger front brake rotor and caliper relocation bracket. Before buying, confirm the kit lists your exact model and year, since hub widths and axle diameters vary across KTM platforms. Missing spacers or the wrong cush drive are the most common fitment headaches.

Do I need to change my brakes when installing supermoto wheels?

You can run stock brakes with supermoto wheels, but most riders upgrade the front rotor to a larger diameter for better stopping power on pavement. A caliper relocation bracket is required when you step up rotor size. The rear brake usually stays stock. If you ride track days or aggressive canyon roads, the bigger front rotor is worth the extra cost. Confirm the rotor bolt pattern matches your hub before ordering.

Are tubeless supermoto wheels better than tubed?

Tubeless wheels reduce unsprung weight, run cooler, and let you plug a puncture on the side of the road instead of pulling the wheel. They also hold tire pressure more consistently, which matters for cornering feel. Tubed wheels cost less and are simpler to repair with a spare tube. For street-legal supermoto builds and track days, tubeless is the stronger choice. For pure dirt use, tubes are still fine.

Posted on — Leave a comment

How to Install Surron Wiring: Step-by-Step Guide

Table of Contents

Last Updated: September 21, 2026

Surron Wiring Harness Replacement Tools

Learning how to install Surron wiring starts with the right tools, and most riders skip that step. At Moto X Industries, we see the same problem repeatedly: stripped connectors, cracked insulation, and a bike that won’t power on because someone used pliers instead of a crimper.

Essential Hand Tools and Test Equipment

A basic electrical tool set covers almost every job on a Surron harness:

  • Digital multimeter for continuity, voltage, and resistance checks
  • Wire strippers sized for 16-22 AWG wire
  • Ratchet crimper for insulated and non-insulated terminals
  • Soldering iron (60W or higher) with rosin-core solder
  • Heat-shrink tubing in 2mm to 8mm sizes
  • Zip ties and adhesive cable clips
  • Socket set for body panels and battery tray bolts
  • Nylon panel pry tools to release plastic clips without snapping them
Pro Tip
Test your crimper on scrap wire before you start. Squeeze a test terminal, then pull hard on the wire. If it slips out, your crimper is set too loose. Fix that now, not after you’ve crimped twenty connections.

Safety Precautions and Battery Disconnection

Disconnect the battery before removing a single panel. A Surron pack holds serious current, and a live positive lead touching the frame can arc, melt insulation, or start a fire.

Follow this order every time:

  1. Power off the bike and remove the key.
  2. Unplug the main battery connector from the controller.
  3. Wait several minutes for capacitors to discharge.
  4. Verify zero voltage at the controller terminals with your multimeter.
  5. Work on a dry surface, away from fuel, solvents, or open flame.
Watch Out
Skipping the voltage check is the most common mistake we see. Capacitors can hold a charge after the battery is unplugged. If you start pulling connectors while voltage is still present, you can short the controller and destroy it in seconds.

Removing the Old Surron Wiring Harness

Photograph every connector before you unplug it. Your phone camera is the best wiring diagram you will ever have.

Work panel by panel, and label as you go:

  • Tag each connector with masking tape and a number.
  • Note the pin-out of any multi-pin plug before separating it.
  • Trace each branch of the harness and mark where it clips to the frame.
  • Cut zip ties rather than pulling them loose, so you don’t stress the wires.

Routing and Connecting the New Surron Wiring Harness

Route the new harness along the same path as the old one and secure it every few inches. Loose harnesses rub the frame, and vibration wears through insulation over time.

Hands securing a new surron wiring harness to the electric bike frame with zip ties in a garage

Controller, Motor, and Battery Connections

Match phase wires by color and confirm the pin-out before plugging anything in. Most Surron controllers use clearly marked phase and hall sensor plugs, but aftermarket parts vary.

  • Phase wires: thick gauge, usually three, matched by color
  • Hall sensor plug: thin multi-pin connector, keyed to fit one way
  • Main battery leads: heavy gauge, bolted or plugged, polarity critical
  • Ignition and kill switch: small two-pin connectors

Brake Sensor and Light Switch Integration

Brake sensors cut motor power when you pull the lever. Wire them so the signal reaches the controller, or the motor keeps pushing while you brake.

Surron Throttle Wiring Color Code and Connector Mods

Throttle wiring is where most home installs go wrong: the color code is a convention, not a guarantee. Two bikes from the same model year can ship with different harness suppliers, and aftermarket throttles rarely follow the factory palette. Confirm every wire with a meter before cutting or crimping.

What Each Throttle Wire Actually Does

A hall-effect throttle is a three-wire sensor plus, on some models, a fourth wire for the speed limiter. The controller feeds a regulated 5V reference, the throttle returns a signal voltage that rises as you twist, and the controller maps that voltage to motor current.

Wire Color (typical) Function Meter Test Expected Reading
Red 5V reference from controller DC volts, key on, probe red-to-black 4.8-5.2V steady
Black Signal ground Continuity to battery negative Near 0 ohms
Green Wiper / signal output DC volts while slowly twisting Rises smoothly from ~0.8V to ~4.2V
Blue or White Speed limit / mode wire Continuity to ground when grounded Closes to ground when tied low

Connector Families You Will Actually See

The factory throttle usually ends in a small keyed plug. Common families include:

  • JST-SM, 3-pin or 4-pin, 2.5mm pitch, latching tab. Common on stock throttles and small sensor runs.
  • JST-XH, 3-pin, 2.5mm pitch, no latch. Frequently used on hall sensor and brake switch leads.
  • Higo / Julet 5-pin or 8-pin, waterproof circular connectors used on many e-bike harnesses; the 8-pin variant often bundles throttle, display, and brake signals in one housing.
  • XT30 / XT60, power connectors, not signal. Do not confuse them with throttle plugs.

The Speed Limit Wire

On many controllers, a single wire tied to ground caps top speed. Cutting or de-pinning it removes the cap on some firmware revisions and does nothing on others, so test on a stand with the rear wheel off the ground before riding.

Procedure:

  1. Key off, disconnect the battery, and wait for capacitors to bleed down.
  2. Locate the suspect wire and confirm continuity to ground with the meter.
  3. De-pin the terminal with a proper extraction tool rather than cutting, so you can restore it.
  4. Reconnect, power up on a stand, and note the no-load RPM change.
  5. If nothing changes, re-pin the wire and check the controller’s programming instead.
Watch Out
De-pinning is reversible; cutting is not. Always extract the terminal so you can put the wire back if the change causes error codes or an unsafe top speed.

Adapter Harnesses vs. Cutting the Plug

If you are swapping to an aftermarket throttle, you have two paths:

Shop Now →

  • Adapter harness, a short jumper with the factory plug on one end and the new throttle’s plug on the other. No cutting, fully reversible, and the cleanest option if one exists for your throttle and controller combination.
  • Re-pin the connector, move the new throttle’s terminals into the factory housing. Requires the correct crimper and terminals, but keeps the harness length correct.
  • Splice and heat-shrink, last resort. Use a lineman’s splice or a proper crimp with adhesive-lined heat-shrink, never a twist-and-tape joint. Twisted joints loosen under vibration and create intermittent faults that are hard to trace.

Crimping the Terminals Correctly

Match the terminal to the wire gauge and the crimper to the terminal, a ratchet crimper with the correct die produces a gas-tight crimp; pliers do not. Tug-test every terminal; if the wire pulls out, cut it off and start over. Slide adhesive-lined heat-shrink over the joint and shrink until the adhesive flows to seal against moisture.

Pro Tip
Photograph the factory throttle plug and its wire positions before you unplug it. Pin position, not color, is what determines whether the new throttle works.

Bench-Testing Before Installation

Before routing anything through the frame, connect the new throttle to the controller on the bench, power up, and watch the signal voltage as you twist. A smooth rise from roughly 0.8V to 4.2V with no dropouts means the throttle and wiring are good, install only after it passes.

Surron Light Bee Electrical Troubleshooting

Most electrical faults trace back to three things: a loose connector, a bad ground, or a broken wire inside intact insulation.

Work through this order:

  1. Check grounds first. A poor ground causes weird symptoms across the whole bike.
  2. Test continuity on every suspect wire with the multimeter.
  3. Wiggle-test connectors while watching the meter. Intermittent readings mean a loose terminal.
  4. Inspect for chafing where the harness passes tight corners.
  5. Check the fuse before condemning the controller.
Key Takeaway
Grounds cause more Surron electrical faults than any other single item. Before you replace a controller, clean and retighten every ground point on the bike.

Waterproofing, Voltage Drop, and CAN-Bus Basics

This section separates a harness that lasts three seasons from one that fails on the first wet ride: keeping water out, sizing wire so voltage reaches the load, and understanding the digital bus tying the controller, display, and battery management system together.

Waterproofing and Corrosion Prevention

Water rarely kills a connector outright, it causes corrosion, which raises resistance until the circuit stops working or the controller throws a fault. Off-road riding, pressure washing, and mud accelerate it.

A practical sealing routine:

  1. Dielectric grease in every connector. Fill the housing cavities with a silicone dielectric grease (the same type sold for spark plug boots and trailer plugs) before mating. The grease displaces moisture and blocks oxygen from the terminals. It does not conduct, so it will not bridge pins.
  2. Adhesive-lined heat-shrink on every splice. Plain heat-shrink keeps water out until it flexes; adhesive-lined tubing melts glue into the joint and stays sealed.
  3. Self-fusing silicone tape on exposed runs. Wrap sections that pass through wheel spray or sit low on the frame. It bonds to itself and stays flexible.
  4. Drip loops. Route the harness so water runs off and away from a connector rather than pooling in the housing. A connector facing up is a cup; a connector facing down is a drain.
  5. Boots and caps. Use rubber connector boots on the main battery and controller plugs, and cap any unused connector with a blanking plug.

Voltage Drop and Wire Gauge Sizing

Vdrop = I × R, where R depends on wire gauge, length, and the number of connections.

Gauge (AWG) Approx. Ohms per 100 ft Typical Use
18 ~0.64 Signal, hall sensors, brake switches
16 ~0.40 Lights, small accessories
14 ~0.25 Accessory power runs
12 ~0.16 Higher-current accessories
10 ~0.10 Short high-current runs
8 ~0.063 Battery-to-controller leads on high-power builds
6 ~0.040 Very high-current, short runs
Watch Out
Undersized wire gets hot. Heat degrades insulation, and degraded insulation on a high-current lead is a fire risk. If a wire is warm to the touch after a ride, it is too small for the current it carries.

CAN-Bus Communication Basics

Modern controllers, displays, and battery management systems often talk over a CAN bus, a two-wire differential digital network (CAN High and CAN Low) carrying messages between nodes. It is not a power circuit and is far less tolerant of bad connections than a 12V line.

Key points for anyone touching the harness:

  • Two wires, twisted. CAN High and CAN Low are usually twisted together to reject electrical noise. Keep the twist intact when you route or repair.
  • Termination. A CAN bus needs termination resistors at each end of the bus, commonly 120 ohms each, giving about 60 ohms measured across the pair with the bus powered down. If your meter reads far from 60 ohms across CAN High and CAN Low, a terminator is missing, a node is unplugged, or a wire is broken.
  • Stub length. Keep any branch off the main bus short. Long stubs cause reflections that corrupt messages.
  • Resistance sensitivity. A corroded terminal or a poor splice adds resistance that can knock a node offline. Symptoms look like a dead display, erratic throttle response, or a controller that will not wake up.
  • Do not probe with power on. Back-probing a live CAN line with a test light can damage the transceiver.
Pro Tip
Label CAN High and CAN Low before you unplug anything. They often share a housing with power and ground wires, and swapping them causes error codes that mimic a failed controller.

Putting It Together

Waterproofing, gauge sizing, and CAN-bus integrity are the same job done carefully: seal every connector, size every wire for its current, and treat the CAN pair as a precision signal line. Do that, and the harness will outlast the bike around it.

Conclusion

Wiring a Surron is an afternoon job with basic tools and patience. Riders who struggle usually skipped the voltage check, rushed the crimps, or trusted wire colors without testing them.

Frequently Asked Questions

Can I replace the wiring harness myself?

Yes, if you have basic mechanical skills and the right tools. The job involves disconnecting the battery, removing body panels, unplugging old connectors, and routing the new harness. Plan for 2-4 hours. Label every connector before removal and take photos as you go. If you get stuck, Moto X Industries offers phone support to walk you through the wiring.

What color are the wires on a Surron throttle?

Surron throttle wiring typically uses three conductors: red for 5V power, black for ground, and a signal wire (often green, blue, or white depending on the model year). Always verify with a multimeter before connecting. Pin-out can vary between Light Bee and Storm Bee models, so check your specific harness diagram rather than assuming colors match.

How do I troubleshoot electrical issues after installing a new harness?

Start with the battery: confirm it is charged and the main fuse is intact. Use a multimeter to check continuity on suspected circuits and voltage at the controller. Inspect every connector for a full seat and no bent pins. A common fault is a loose ground or a throttle signal wire making poor contact. For Surron Light Bee electrical troubleshooting, work section by section instead of pulling the whole harness.

Is it necessary to disconnect the battery before working on Surron wiring?

Yes. Always disconnect the main battery connector before touching any wiring. Live 60V or 72V systems can arc, damage the controller, or cause a short circuit. After disconnecting, wait a minute and confirm zero voltage at the controller terminals with a multimeter. This one step prevents most electrical faults and keeps you safe.

Posted on — 2 Comments

DRZ400E Supermoto Conversion

DRZ400E Supermoto Conversion

DRZ400E Supermoto Conversion

Our new project bike 2001 DRZ400E. We are converting our E model into a street legal Supermoto. Keep checking back to see what we have done.

What is on the list.

Clean and rebuild carb.

Install new bars, levers, footpegs, exhaust, light kit.

Install new supermoto wheels.

Install trail tech Vapor computer.

Plus much more. If there is something you would like to see put it in the comments. If needed we will post a video on how to do it.


Headlight, tailight, turnsignals, horn, vapor computer and pegs are complete.

Install front Supermoto wheel and caliper bracket.

Install rear wheel with new chain and countershaft sprocket.

We restored the faded factory gas tank.

Yoshimura Exhaust

Here is our final walk around vid of our DRZ400E supermoto conversion.