Posted on — Leave a comment

High Performance Motocross Brake Upgrades: 2026 Guide

Table of Contents

Last Updated: October 2, 2026

Quick Comparison: Motocross Brake Upgrades

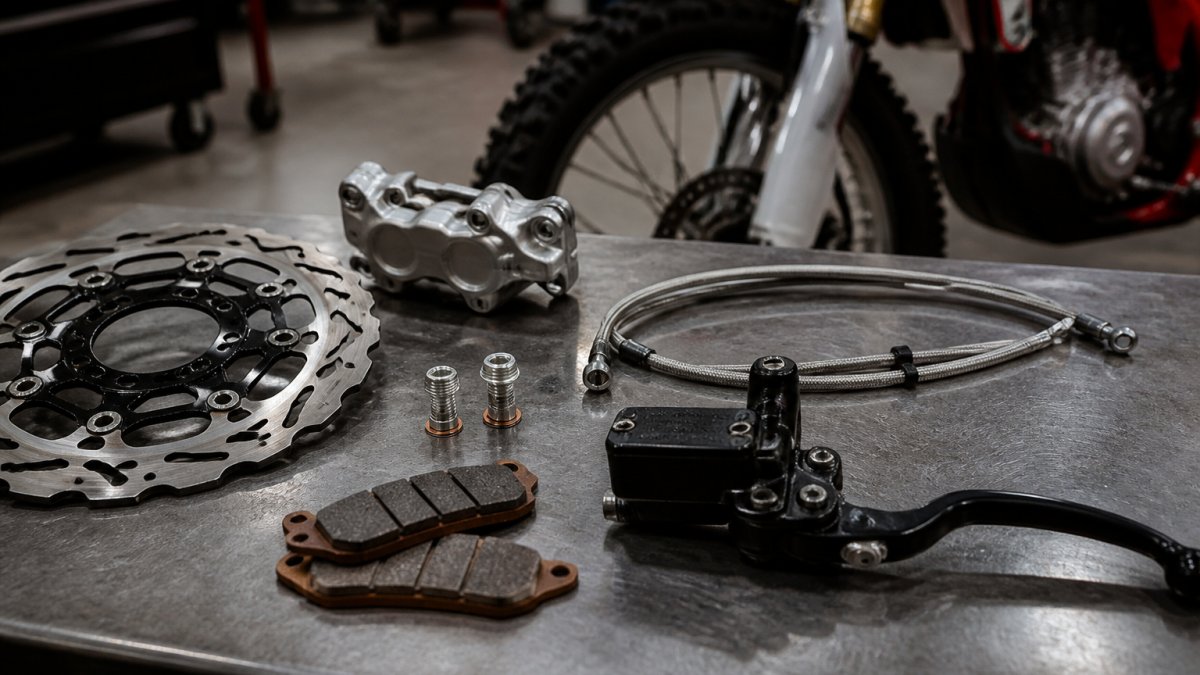
High performance motocross brake upgrades are component changes that increase stopping power, improve lever feel, and resist heat buildup during repeated hard braking. This guide breaks down the parts that matter, from pads to master cylinders, and shows you which upgrades fit your skill level and terrain.

UpgradeTypical ImpactDifficultyBest For
Sintered brake padsHigh bite, heat resistanceEasyAlmost every rider
Oversized rotor kitMore use, better coolingModerateRacers, heavy bikes
Stainless braided linesFirmer lever, less flexEasySpongy lever feel
Master cylinder swapBetter modulationAdvancedExperienced racers
Caliper upgradeMaximum stopping powerAdvancedCompetitive racing

Best Motocross Brake Pads for Racing

The best motocross brake pads for racing use a sintered metallic compound, which holds friction at high temperatures where organic pads fade. If you race, sintered is the starting point, not an upgrade.

Sintered vs. Organic Compounds

Sintered pads are made from metallic particles fused under heat and pressure. They resist fade, shed water well, and last longer under hard use. Organic pads use resin binders and softer materials, which makes them quieter and gentler on rotors but prone to glazing when they get hot.

Pro Tip
Bed new pads in before you judge them. A common mistake is bolting on sintered pads and hitting the track cold. Run several moderate stops from speed to build a transfer layer on the rotor face. Skip this and the pads will feel wooden and wear unevenly.

Oversized Brake Rotor Kit Benefits

An oversized brake rotor kit increases the rotor diameter, which gives the caliper more mechanical advantage and more surface area to shed heat. The result is stronger stopping power with less lever effort and slower heat buildup. That is the simple version. The useful version explains why diameter matters, what changes when you go bigger, and when a bigger rotor is the wrong answer.

Why Diameter Changes Everything

Braking force at the wheel is a function of lever arm. Move the caliper farther from the axle and the same hydraulic pressure produces more torque. A larger rotor also has more mass and more surface area, so it absorbs and radiates heat faster. On a long moto with repeated hard braking zones, that extra thermal capacity is what keeps lap times consistent instead of fading on lap three.

Rotor Thickness, Wear, and Pad Matching

Diameter is only half the story. Rotor thickness determines how much material the pads have to bite into and how much heat the disc can absorb before it warps. Sintered metallic pads wear rotors faster than organic compounds, so a rotor rated for metallic pads is not optional, it is the difference between a disc that lasts a season and one that develops grooves and thickness variation in a few rides.

Floating vs. Solid Rotor Designs

Floating rotors mount the friction ring to a separate carrier with buttons or bobbins, letting the disc expand as it heats. That keeps the rotor true under heavy use and reduces drag. Solid rotors are one piece, cheaper, and simpler, but they can warp when pushed hard.

Terrain and Skill: When a Big Rotor Helps, and When It Hurts

This is where most guides stop short. A larger rotor is not automatically better.

  • Hard-packed, fast tracks with long braking zones: An oversized floating rotor paired with sintered pads is the right call. The extra thermal mass and cooling area pay off.
  • Muddy, wet, technical tracks: A huge rotor can collect mud and debris, and the aggressive initial bite of a big-rotor setup makes low-traction braking harder to modulate. Many riders on these surfaces prefer a stock-diameter rotor with sintered pads and braided lines.
  • Beginners: An oversized rotor on a stock master cylinder can feel grabby and overboosted. The rider fights the brake instead of using it. Start with pads and fluid, then add diameter once you can consistently use full braking without locking the front.
  • Heavy bikes and heavier riders: More mass means more kinetic energy to convert to heat. Here the oversized rotor’s thermal capacity is a genuine safety margin, not a luxury.
Pro Tip
Before buying an oversized kit, measure your current rotor diameter and confirm the new rotor clears the fork legs, caliper bracket, and wheel spokes at full compression. Clearance issues show up at the worst possible moment.

Is a Stainless Steel Brake Line Worth It?

Yes, a stainless steel brake line is worth it for most riders. Braided steel lines with a Teflon inner liner stop the hose from expanding under hydraulic pressure, so more of your lever force reaches the caliper instead of bulging the rubber.

Master Cylinder and Caliper Upgrades

A master cylinder upgrade changes how hydraulic pressure builds, which directly affects lever pull and modulation. A larger bore moves more fluid for a given stroke, giving a firmer lever, while a smaller bore increases mechanical advantage for more power with less effort. That trade-off is the whole game, and getting it wrong is why so many riders bolt on a bigger master cylinder and hate the result.
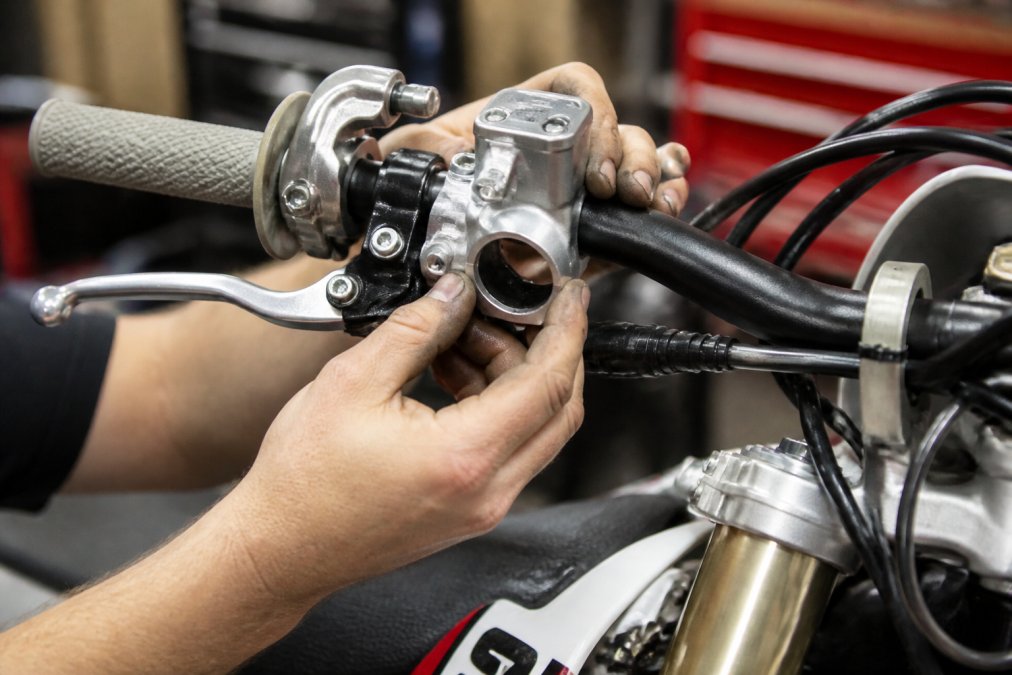
Mechanic installing a precision master cylinder for motocross brake upgrades on a bike handlebar

Bore Size, Lever Ratio, and Feel

The master cylinder bore and the caliper piston area together set the system’s hydraulic ratio. A smaller master cylinder bore relative to the caliper pistons produces more clamping force for the same lever pull, but it requires more lever travel. A larger bore produces a firmer, shorter lever with less travel but less mechanical advantage.

Shop Now →

Caliper Upgrades: Pistons, Rigidity, and Pad Area

Caliper upgrades matter just as much. More pistons spread clamping force across a wider pad area, and stiffer caliper bodies flex less under pressure. That rigidity is what separates a vague lever from one that talks to you. A caliper that flexes under load wastes lever travel on bending metal instead of stopping the bike.

Matching the System to Your Skill Level

This is the part most guides skip. The right master cylinder and caliper combo depends on how you ride, not on what looks best in a product photo.

  • Beginners and trail riders: Keep the stock master cylinder and caliper. Upgrade pads, fluid, and lines first. A stock hydraulic ratio is forgiving and teaches good lever control.
  • Intermediate riders chasing lap times: A modest master cylinder change paired with braided lines and sintered pads can sharpen feel without making the brake twitchy. The goal is consistency, not maximum bite.
  • Advanced racers: A matched master cylinder and caliper package, often with a floating rotor and high-temp fluid, is worth the investment. At this level, modulation under trail braking is the difference between making a pass and washing the front.

Compatibility and Installation Notes

  • Confirm the master cylinder bore and the caliper piston area are designed to work together. Mixing brands without checking the hydraulic ratio is a common mistake.
  • Brake fluid type matters. DOT 4 and DOT 5.1 are glycol-based and can be mixed in an emergency; DOT 5 is silicone-based and must never be mixed with the others.
  • After any master cylinder or caliper swap, bleed the system completely. Air trapped in the caliper or line ruins the feel you just paid for.
  • Check lever free play and adjust to spec. Too little free play can cause the brake to drag as fluid heats and expands.
Watch Out
Never touch a brake rotor or pads with bare fingers during install. Oils from your skin contaminate the friction surface and cause squealing and uneven grab. Wear nitrile gloves and clean rotors with brake cleaner before assembly.
Key Takeaway
A master cylinder and caliper are a matched pair, not independent upgrades. Buy them as a system, match the hydraulic ratio to your skill and terrain, and you will feel the difference in the first braking zone.

Brake Fade Prevention and Bedding-In Procedures

Brake fade is the loss of stopping power when pads and fluid overheat, and it is preventable. The two main causes are pad glazing and boiled brake fluid, and each has its own fix.

Bedding in new pads follows a simple sequence:

  1. Find a safe stretch of open ground with no traffic
  2. Ride at moderate speed and apply the brakes firmly to slow, not stop
  3. Repeat 8-10 times, increasing speed slightly each pass
  4. Let the brakes cool completely before hard use
  5. Avoid holding the lever at a full stop during the process

Matching Brake Upgrades to Rider Skill and Terrain

The right brake setup depends less on budget and more on how and where you ride. A novice on tight trails and a pro on a fast track need completely different components.

Key Takeaway
Match the upgrade to your skill, not to the spec sheet. The fastest riders run setups they can modulate, not the biggest brakes on the market.

Conclusion

Building a brake system that stays consistent lap after lap takes the right parts and the patience to set them up correctly. Moto X Industries stocks the components to get you there, from conversion kits and racing wheels to the braking hardware that ties it all together. Our inventory covers motocross and supermoto builds, including parts for Surron and Talaria electric bikes, so you can source everything in one place.

Frequently Asked Questions

Are stainless steel brake lines worth the upgrade for motocross?

Yes, for riders seeking a firmer, more consistent lever feel. Stock rubber lines expand under high pressure, causing a spongy feel. Stainless steel braided lines eliminate this expansion, providing immediate improvements in brake modulation and stopping power. They are a cost-effective upgrade that significantly enhances rider confidence, especially during aggressive track riding or racing.

How often should I replace my motocross brake pads?

Replacement intervals depend on riding conditions, pad compound, and riding style. As a general rule, inspect your best motocross brake pads for racing before every ride. Replace them when the friction material is worn to the thickness of a credit card or less. Muddy, sandy, or highly abrasive conditions will accelerate wear, requiring more frequent replacements to maintain optimal stopping power.

What are the benefits of oversized brake rotors?

Oversized brake rotor kit benefits include increased surface area for better heat dissipation and greater mechanical leverage. This translates to stronger stopping power and reduced brake fade during long, intense motos. A larger rotor also provides more consistent performance under heavy braking, allowing for later braking points and improved lap times on the track.

Do aftermarket brake calipers improve stopping performance?

Aftermarket calipers can significantly improve stopping performance. Upgraded calipers often feature increased rigidity and larger piston sizes, which enhance hydraulic pressure and reduce flex under load. This results in improved brake modulation and lever feel. For electric dirt bikes, specific calipers are designed to handle the unique demands of high-torque drivetrains.

How do I bleed motocross brakes for a firmer feel?

Bleeding brakes removes air bubbles from the hydraulic system, which is crucial for a firm lever feel. Start by filling the master cylinder reservoir with fresh brake fluid. Attach a clear hose to the bleeder valve on the caliper and submerge the other end in a container of fluid. Pump the lever, hold it, open the bleeder valve, then close it. Repeat until no air bubbles appear in the hose.
Posted on — Leave a comment

Buying Aftermarket Dirt Bike Parts: 2026 Guide

Table of Contents

Last Updated: September 25, 2026

Fitment First: How to Verify Aftermarket Parts Actually Fit

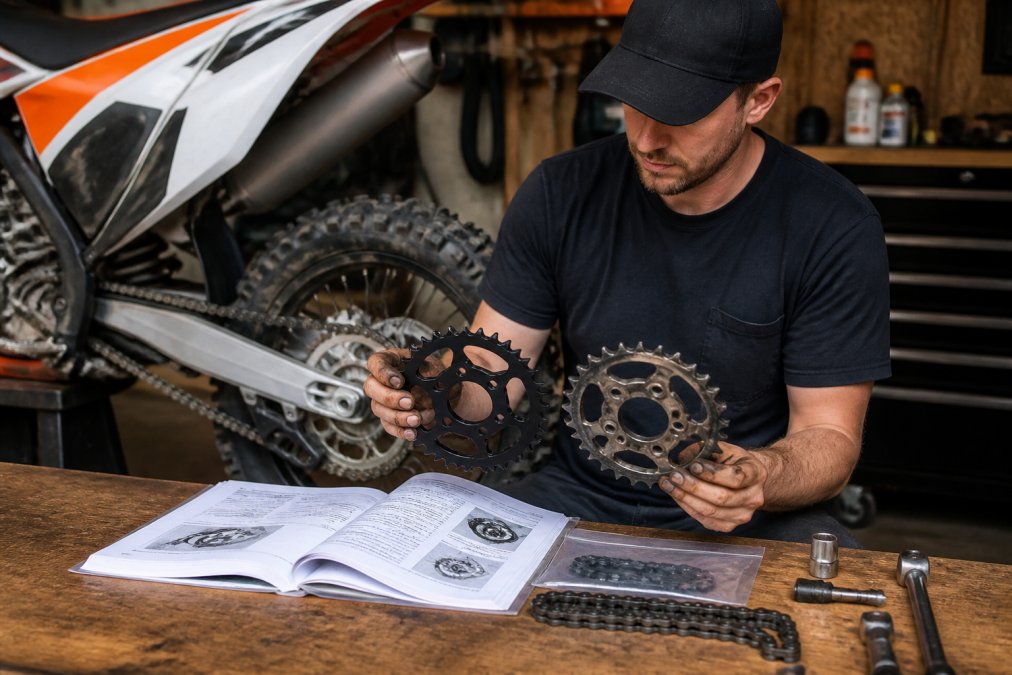
Fitment is the single biggest reason aftermarket orders get returned, and it is entirely avoidable. Before you spend a dollar on upgrades, confirm the part number, model year, and sub-model match your bike exactly.

Step-by-step process for verifying aftermarket dirt bike parts against stock components and service manuals.

Reading Part Numbers and Fitment Charts

Part numbers encode the critical details: model family, year range, and variant. Read them left to right and confirm each segment against your bike’s documentation. Fitment charts from reputable sellers list exact year and model combinations, not approximations. If a chart says “2019-2023,” verify your specific year falls inside that window and that your sub-model is listed separately.

When to Call the Shop Instead of Guessing

Call when your bike is an older model, a gray-market import, or a build that mixes parts from multiple years. A two-minute conversation beats a month of return shipping. Ask the seller to confirm fitment in writing before you order, especially for custom components with long lead times.

Aftermarket vs OEM Dirt Bike Parts: What You Gain and Give Up

Aftermarket dirt bike parts typically cost less, ship faster, and offer performance options OEM never built. OEM parts guarantee factory fitment and warranty coverage, but they limit you to stock specifications. The trade-off is real, and it depends on what you’re building.

Cost, Availability, and Warranty Differences

OEM parts come with manufacturer warranty and guaranteed compatibility. Aftermarket parts vary wildly: some brands match OEM quality, others cut corners on materials. Availability favors aftermarket for discontinued models, where OEM stock dries up entirely.

FactorOEM PartsAftermarket Parts
Fitment guaranteeExact factory matchDepends on seller verification
WarrantyManufacturer-backedVaries by brand
AvailabilityLimited for older bikesBroad, including discontinued models
Performance optionsStock spec onlyWide range of upgrades
CostHigherLower to comparable

Component-by-Component: Where Each Side Wins

The OEM-vs-aftermarket call is not one decision, it’s a dozen small ones. Here’s how it breaks down for the parts you’ll actually replace.

  • Pistons and top-end kits: OEM pistons are built for stock compression and long service life. Aftermarket forged pistons (JE, Wiseco, Vertex) tolerate higher compression and revs but require more frequent ring replacement and careful warm-up. For a stock trail bike, OEM or OEM-equivalent is the safer buy.
  • Clutch plates and springs: OEM fibers last longer under casual use. Aftermarket clutch kits (Hinson, Rekluse) change engagement feel and heat capacity, worth it for racing, overkill for a weekend trail bike.
  • Sprockets and chains: OEM sprockets are steel and heavy but last. Aftermarket aluminum sprockets cut rotating mass and sharpen throttle response but wear faster, especially in mud. A common pattern is aluminum rear plus steel front for a balance of weight and life.
  • Brake pads: OEM pads are quiet and rotor-friendly. Aftermarket sintered pads bite harder and resist fade but wear rotors faster. Match the pad to the rotor material, not just the caliper.
  • Suspension springs and valving: OEM springs are set for an average rider weight. Aftermarket springs (Race Tech, Factory Connection) let you match rate to your weight and terrain, one of the highest-value upgrades for any rider outside the stock weight range.
  • Plastics and graphics: OEM plastics fit perfectly and match factory colors. Aftermarket plastics (Acerbis, UFO, Polisport) cost less and come in more colorways but occasionally need trimming at mounting tabs.
  • Electrical and ignition: OEM CDI and stator units are the safe choice for reliability. Aftermarket ignition boxes add tunability but introduce a failure point if the mapping is wrong for your setup.

When OEM Actually Saves You Money

OEM is not always the expensive choice. On wear items where a failed aftermarket part can take out a more expensive assembly, a chain that snaps and cracks a case, a cheap piston that scores a cylinder, the OEM premium is cheap insurance. For a bike you plan to keep for years and ride hard, OEM or OEM-quality on internal engine and drivetrain parts usually pays back in avoided repairs.

Key Takeaway
Buy aftermarket where it adds adjustability or performance you’ll actually use (suspension, brakes, controls). Buy OEM or OEM-quality where a failure is expensive (internals, ignition, drivetrain). The category matters less than the specific part.

Verifying Fitment Before You Commit

Whichever side you choose, fitment is the gate. OEM parts fit because they were built for your VIN. Aftermarket parts fit only if the seller’s fitment data is correct. Before ordering, confirm the part number against your bike’s model year and sub-model, and check whether the listing distinguishes variants (for example, a motocross model versus its off-road sibling often share a displacement but not a frame or suspension spec).

Best Dirt Bike Performance Upgrades for Motocross and Off-Road

The best dirt bike performance upgrades improve power delivery, handling, and durability without compromising reliability. Prioritize suspension and braking before chasing engine power; a faster bike you can’t control is slower on lap times.

Engine, Exhaust, and Air Intake Components

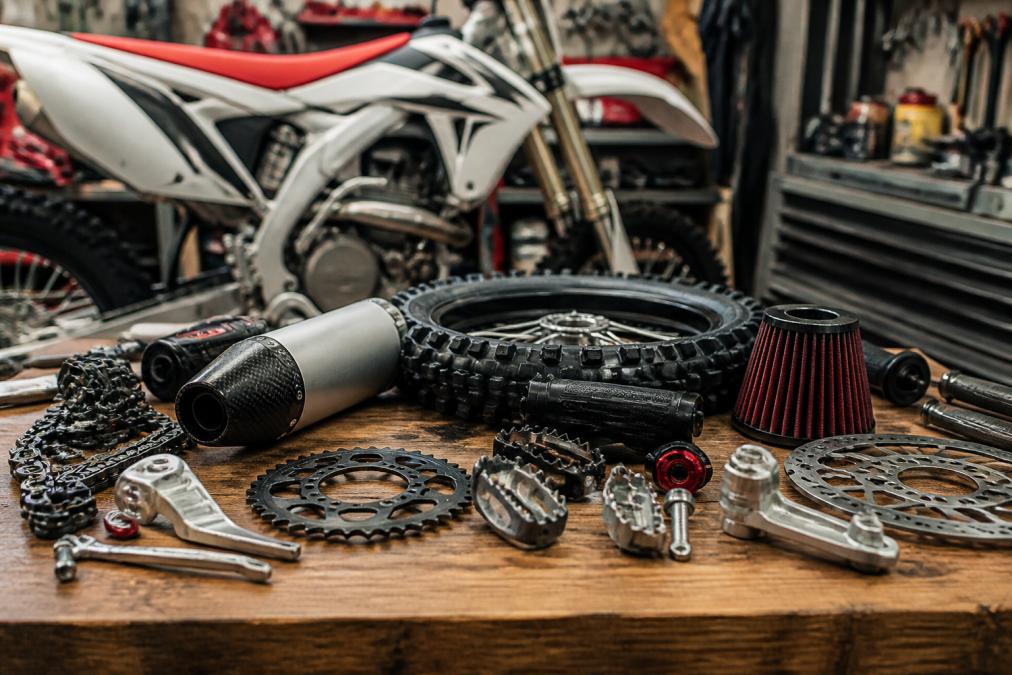
Engine rebuild kits, piston kits, and clutch kits restore lost compression and torque. Exhaust systems and silencers change power delivery across the rev range. High-flow air filters and intake systems improve throttle response, but they demand more frequent cleaning in dusty conditions.

A few specifics worth knowing before you buy:

  • Exhaust: A full system (header plus silencer) shifts the power curve more than a slip-on. A slip-on mainly changes sound and saves weight. Neither adds meaningful power without a matching fuel or jetting change.
  • Air filter: Foam filters are the norm off-road because they hold oil and trap fine dust. A high-flow filter flows more air but passes more dirt if not oiled correctly, clean and re-oil every ride in dusty conditions.
  • Jetting or remapping: Any intake or exhaust change alters the air-fuel ratio. On a carbureted bike, re-jet; on a fuel-injected bike, use a tuner or remap. Skipping this step is the most common cause of a lean-running, overheating engine after a bolt-on.
  • Clutch: A heavier-duty clutch kit helps a modified engine put power down without slipping, but stiff springs fatigue your hand on long rides. Match spring rate to how much torque you’ve actually added.

Suspension, Brakes, and Drivetrain Upgrades

Suspension tuning, upgraded braking performance, and fresh sprockets and chains transform how a bike handles. Skid plates and handguards protect your investment on trail-ready builds. Wheel bearings and tire compounds round out the handling package.

  • Suspension: Correct spring rate for your weight is the single highest-value change for most riders. Revalving adjusts how the fork and shock respond to terrain. Do springs first; valving second.
  • Brakes: Stainless braided lines improve lever feel and consistency under heat. Sintered pads add bite. Fresh fluid and quality pads deliver most of the benefit for casual riders at lower cost.
  • Drivetrain: A worn chain wears sprockets fast, and vice versa. Replace chain and sprockets as a set. Changing tooth counts changes gearing, one tooth on the front sprocket is roughly equivalent to three on the rear.
  • Protection: Skid plates, handguards, and case savers don’t make you faster, but they prevent the damage that ends a season early.

Performance vs. Durability: The Trade-Off Nobody Explains

Performance parts and durable parts are not always the same thing, and the aftermarket rarely tells you which one you’re buying. Lightweight components often trade longevity for speed. Here’s how to choose based on how you actually ride:

  • Race-only builds: prioritize weight savings and adjustability. Accept shorter service intervals and more frequent rebuilds.
  • Trail and dual-sport: prioritize sealing, corrosion resistance, and long service intervals. A part that lasts three seasons beats one that’s faster for one.
  • Mixed use: split the difference with OEM-quality replacements on wear items and aftermarket on adjustability (suspension, controls, brakes).

Chasing maximum power without upgrading cooling systems and fuel delivery is a common mistake. Lean running conditions from a new exhaust and intake can overheat a stock engine. Re-jet or remap before you ride hard.

A Practical Upgrade Order

If you’re starting from a stock bike and don’t know where to begin, this order works for most riders:

  1. Set suspension sag and spring rate for your weight. Cheapest handling gain available.
  2. Fresh tires and correct pressures for your terrain. Grip before power.
  3. Brake pads and fluid. Consistent stopping builds confidence.
  4. Chain and sprockets as a set. Restores crisp drive and prevents case damage.
  5. Air filter and jetting/remap. Only after the chassis is sorted.
  6. Exhaust and engine mods. Last, because they amplify everything above.

Is a Stainless Steel Brake Line Worth It for Dirt Bike Performance?

Yes, a stainless steel brake line is worth it for most riders who push their brakes hard. The braided construction resists expansion under pressure, so lever feel stays consistent when the system heats up. On long descents or track sessions, that consistency matters more than peak stopping power.

Performance vs Durability: Choosing Parts That Last a Full Season

Performance parts and durable parts are not always the same thing. Lightweight components often trade longevity for speed. The trick is matching the part to how you actually ride.

  • Race-only builds: prioritize weight savings and adjustability
  • Trail and dual-sport: prioritize sealing, corrosion resistance, and service intervals
  • Mixed use: split the difference with OEM-quality replacements

Chasing maximum power without upgrading cooling systems and fuel delivery is a common mistake. Lean running conditions from a new exhaust and intake can overheat a stock engine. Re-jet or remap before you ride hard.

How to Spot Counterfeit Aftermarket Dirt Bike Parts Before You Buy

Counterfeit parts look convincing until they fail. Check the packaging for consistent branding, verify the seller’s return policy, and inspect machined surfaces for tooling marks. Genuine parts have clean finishes and accurate torque specs printed on the label or in an included service manual.

Installation Difficulty Ratings: Which Upgrades Can You Do Yourself?

UpgradeDifficultyTypical TimeTools Needed
Air filterEasy10 minNone
Brake linesModerate45 minBleeder kit
Sprockets and chainsModerate1 hourTorque wrench
Suspension tuningAdvanced2-3 hoursSpring tools
Engine rebuildExpertFull weekendFull kit
Pro Tip
Photograph every step as you disassemble. Reassembly goes twice as fast when you have a visual record of bolt locations and cable routing.

For riders building a supermoto conversion or hunting hard-to-find components, Moto X Industries provides a comprehensive selection of high-performance parts and accessories for supermoto, motocross, and electric bikes. We specialize in conversion kits, wheels, and essential components designed to enhance your racing and riding experience. Whether you are upgrading your dirt bike or building a supermoto, our extensive inventory ensures you have the quality gear needed to perform at your best. If your model isn’t listed, ask before assuming it’s unavailable.

Frequently Asked Questions

How do I ensure aftermarket parts are compatible with my specific bike model?

Start with your bike’s exact year, make, and model, then check the part number against the manufacturer’s fitment chart. Cross-reference the OEM part number the aftermarket piece replaces. Measure critical dimensions like axle diameter, bolt spacing, and rotor size before ordering. If a listing only says ‘fits most dirt bikes,’ treat that as a warning sign. When in doubt, contact the seller with your VIN or model code and ask them to confirm fitment in writing.

Are aftermarket dirt bike parts as reliable as OEM components?

It depends on the part and the manufacturer. Aftermarket brands focused on racing often exceed OEM durability for specific applications, while budget no-name parts can fail early. OEM parts guarantee factory fitment and consistent quality control. For wear items like sprockets, chains, and brake pads, quality aftermarket options frequently outperform stock. For critical engine internals, many riders stick with OEM or proven aftermarket brands with documented torque specs and service manuals.

Is a stainless steel brake line worth it for dirt bike performance?

For riders doing track days or aggressive off-road riding, yes. Stainless steel braided lines resist expansion under pressure, so brake lever feel stays consistent when the system heats up. Rubber lines flex and fade during repeated hard braking. The upgrade costs more than a stock replacement line, but the improved modulation and reduced fade are noticeable. For casual trail riding at low speeds, the difference is smaller and stock lines are adequate.

How can I verify the quality of aftermarket dirt bike parts before purchasing?

Look for documented material specs, torque ratings, and country of origin. Check customer reviews for fitment complaints and early failures, not just star ratings. Reputable sellers publish installation guides, warranty terms, and return policies. Ask whether the seller stocks inventory or drop-ships, because stocked parts ship faster and are easier to return. For wheels, brake components, and drivetrain parts, request the manufacturing tolerances if they are not listed.

What are the most common aftermarket upgrades for motocross bikes?

The most common upgrades are exhaust systems, air filters and intake kits, suspension revalving or spring swaps, brake pads and lines, sprockets and chains, handlebar grips, skid plates, and handguards. Engine-focused riders add piston kits, clutch kits, and carburetor jetting changes. Plastics and graphics are popular for appearance. Tire compounds and wheel bearings round out the list for riders chasing lap times or trail durability. Prioritize safety items like brakes before cosmetic changes.

How do I avoid counterfeit aftermarket dirt bike parts?

Buy from authorized dealers or established specialty shops, not marketplace listings with prices far below market. Check packaging for misspelled brand names, missing part numbers, and low-quality printing. Weigh the part if possible; counterfeits often use cheaper, heavier materials. Look up the serial or batch number with the manufacturer. For high-risk categories like brake components and drivetrain parts, a counterfeit can fail under load, so pay the small premium for a verified source.


Aftermarket upgrades can transform a dirt bike, but only when the parts actually fit and hold up under real riding conditions. Supermoto wheels and tires carries conversion kits, motocross racing wheels, and components for supermoto, motocross, and electric bikes, so you can source the right parts without the guesswork. Get started with Supermoto wheels and tires and build a bike that performs every time you ride.