Posted on — Leave a comment

Custom Dirt Bike Wheel Lead Times: What to Expect

Table of Contents

Last Updated: October 17, 2026

Why Custom Dirt Bike Wheels Take Longer Than In-Stock Parts

Custom dirt bike wheel lead times run longer than in-stock orders because nothing is sitting on a shelf waiting for you. A custom wheel is built to your spec: your hub, your rim width, your offset. Riders plan entire builds around this reality, and the ones who understand the stages upfront are the ones who avoid surprises.

Here is what most guides get wrong: they quote one number and stop. In practice, a custom wheelset moves through a queue of separate steps, and any one of them can add days.

A wheel built to order is not a product you buy. It is a small manufacturing project.

Key TakeawayThe single biggest source of frustration in custom wheel orders is confusing build time with shipping time. Treat them as two separate clocks and you will plan better than most buyers.

Dirt Bike Wheel Build Time: The Stages Behind the Estimate

Dirt bike wheel build time breaks down into a sequence of stages, not one block of waiting. Understanding each stage tells you where your order actually sits and roughly how many days it contributes to the total.
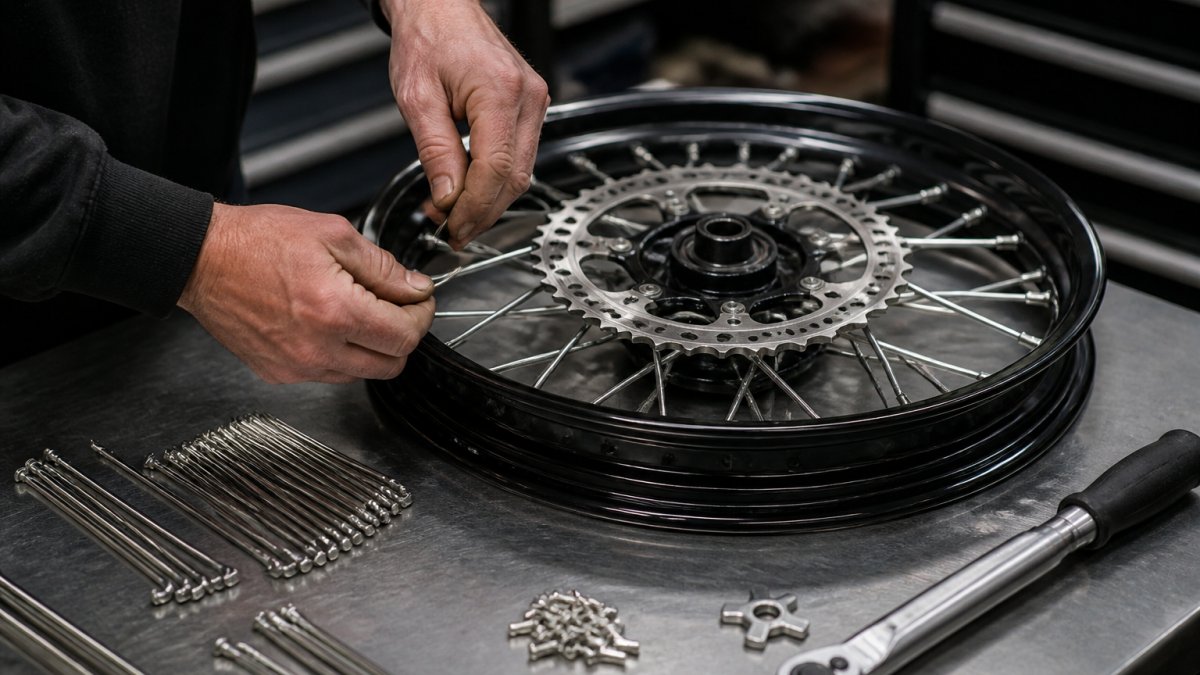
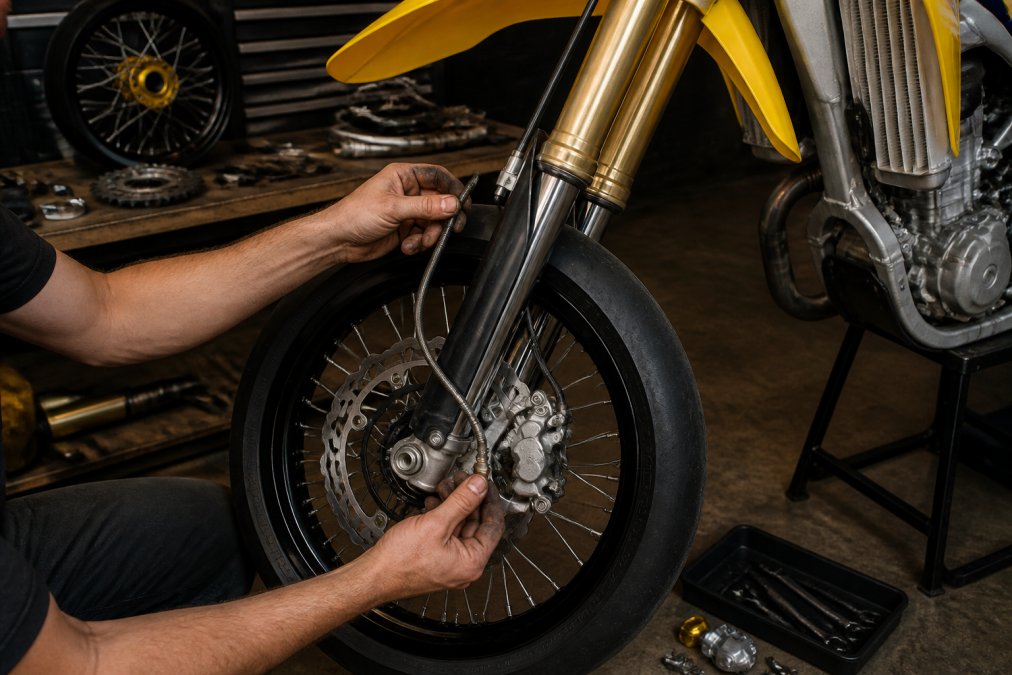
Mechanic lacing stainless steel spokes into a rim during the custom dirt bike wheel lead times process

The stages look like this, with typical working-day ranges for a standard dirt bike wheelset:

  1. Order review and spec confirmation (1-2 days). Your hub, rim, and spoke choices get checked against fitment before anything is pulled. If your axle spacing or brake rotor mounting needs clarification, this stage stretches.
  2. Parts pull and availability check (0-10+ days). If a hub or rim is on backorder, the clock pauses here. In-stock components move the same day; a backordered hub can add one to three weeks depending on the supplier.
  3. Lacing and assembly (1-2 days per wheel). Spokes get laced in the correct spoke order and pattern. A 32-spoke or 36-spoke wheel with a standard three-cross pattern is routine; unusual spoke counts or radial lacing take longer.
  4. Truing (1-2 days). The wheel is dialed in on a stand until it runs true. A wheel that needs repeated tension adjustments after lacing adds time here.
  5. Final inspection and packing (1 day). Torque checks, a last look, then boxing.

For a standard dirt bike wheelset with all parts in stock, the workshop stages typically total 4-7 working days. Add parts sourcing and queue time and a realistic build window is often 1-3 weeks. Custom specs, uncommon models, and peak-season volume push that toward the longer end.

A common mistake is assuming assembly starts the day you order. It usually starts the day your parts are confirmed in stock and your spec is locked. That is why the parts-pull stage, not the lacing stage, is the one that most often decides your total lead time.

Key TakeawayAsk which stage your order is in. “In the queue” and “in assembly” are very different answers, and only one of them means your wheel is actually being built.

Dirt Bike Wheel Fitment and Compatibility Checks That Add Days

Fitment and compatibility checks add days when your bike, hub, or intended use does not match a standard build. A 2008 KTM 500 excf conversion, for example, needs the hub and spacing confirmed before anything is laced.

This is where custom wheel order status often stalls, and it is not a delay you can blame on the builder. Wrong axle spacing or a mismatched hub means a wheel that will not bolt on. Catching it before assembly costs days. Catching it after costs a rebuild.

What most guides miss is that fitment is not just about bolt pattern. Rim width, offset, spoke count, and brake rotor mounting all factor in. If you are converting a dirt bike to supermoto, the front brake and rotor setup matters as much as the hub.

If you are unsure whether your model is covered, ask before ordering. A quick spec check beats a month of waiting on the wrong part.

Warp 9 wheel lead time follows the same pattern as any built-to-order wheelset: it depends on the model, the spec, and parts availability at the time you order. There is no single fixed number that applies to every Warp 9 order, but there are realistic ranges you can plan around.

For a common dirt bike fitment with standard components in stock, a Warp 9 wheelset typically moves through the workshop in about 1-2 weeks. Less common models, custom rim widths, or choosing multiple colors or custom color choices often land in the 2-4 week range once parts sourcing is included. If a specific hub or rim is on backorder, add one to three weeks depending on the supplier’s restock schedule.

What we can tell you is how to read the estimate. A quoted lead time is a production window, not a promise that your exact build ships on day one. Popular fitments tend to move faster because parts are more likely to be in stock. Less common models and custom specs take longer.

The practical move is to confirm three things before you commit:

Shop Now →

  • Whether your specific model and year are in the current build queue
  • Whether the hub, rim, and spoke components you want are in stock or on backorder
  • Whether the quoted number is a dispatch date or a delivery date

Those three answers tell you more than any generic lead-time figure. A builder who can give you a stage and a dispatch date is giving you a real estimate; one who quotes a single number without splitting build from shipping is guessing.

Time of year plays the biggest roll in build times. If it’s the peak riding season build time will take longer.

Pro TipAsk for the dispatch date, not the delivery date. Dispatch tells you when the build clock ends. Everything after that is the carrier’s job, and it is the number a builder can actually control.

What Can Delay a Custom Wheel Order

Delays usually trace back to a short list of causes, and most of them are avoidable.

  • Parts availability and backorder. A hub or rim that is out of stock pauses the whole build.
  • Unclear or changed specs. Switching rim width or spoke color after ordering restarts part of the process.
  • Fitment questions. If the builder needs to confirm your bike model or brake setup, assembly waits.
  • Build queue volume. Peak season means more orders ahead of yours.
  • Incomplete order details. Missing contact info or shipping address holds dispatch.
Watch OutChanging your spec after the order is confirmed is the most common self-inflicted delay. Lock your rim width, spoke color, and hub choice before you pay, and you avoid restarting the queue.

Build Time vs. Shipping Time: Two Separate Clocks

Build time and shipping time are two separate clocks, and mixing them up is why riders get frustrated. Build time is how long your wheel takes to be made. Shipping time is how long it takes to reach you after it leaves.

A wheel can be built on schedule and still arrive later than expected because of carrier transit. The reverse is also true: fast shipping cannot rescue a build that is waiting on a backordered hub.

When you get a delivery estimate, ask which clock it refers to. If a shop quotes one combined number, ask them to split it into production time and transit time. That single question separates serious builders from order-takers.

How to Check Custom Wheel Order Status and Get a Reliable Estimate

To get a reliable estimate, ask for the build stage your order is in and the expected dispatch date, not just a total lead time. A good builder can tell you whether your wheel is in the queue, in assembly, or in truing.

Use this checklist before you order:

  • Confirm your exact model and year are supported
  • Lock rim width, spoke color, hub, and offset
  • Ask whether your components are in stock or on backorder
  • Request the build-stage timeline and expected dispatch date
  • Confirm the shipping method and transit estimate separately
  • Save your order number and a contact for status updates

If a part is on backorder, we will tell you before you commit.

Conclusion

Planning a build around a custom wheelset comes down to one habit: separate the build clock from the shipping clock, and confirm your fitment before you pay. Riders who do both rarely get surprised.

If you want wheels built to your spec with straight answers on timing, Supermoto wheels and tires stocks motocross and supermoto wheels, conversion kits, and the components to match. We will tell you where your order stands.

Frequently Asked Questions

How long does it take to build custom dirt bike wheels?

Most custom dirt bike wheels are built to order, so plan on a lead time measured in weeks rather than days. Standard builds commonly fall in the one-to-three-week range, while fully bespoke setups with non-catalog hubs, finishes, or specialty rims can run longer. The exact figure depends on the shop’s build queue, parts availability, and how much fitment verification your bike needs. Always confirm the current estimate with the seller before you pay, and ask whether that number covers build only or build plus shipping.

What information should I have ready when ordering custom wheels?

Have your exact bike year, make, and model ready, plus axle diameters, brake rotor mounting pattern, and the rim and tire sizes you want. Tell the builder your riding style and terrain so they can recommend spoke gauge, hub material, and rim width. If you are converting a dirt bike for street use, note that too, since it affects hub and brake choices. Complete specs up front prevent fitment back-and-forth, which is one of the most common reasons a custom wheel order stalls.

How can I check the status of a custom wheel order?

Ask the seller how they communicate order status before you buy: email updates, a portal, or phone. Once ordered, request a written confirmation of the build queue position and expected ship date. If the date passes, contact them directly rather than waiting. A reputable shop will tell you whether your order is in the queue, in assembly, or held up by a backordered part. Keep your order number handy and follow up in writing so you have a record of what was promised.

Should I order custom dirt bike wheels before the riding season?

Yes. Build queues tighten ahead of peak riding season, and parts like specific rims or hubs can go on backorder when demand spikes. Ordering several weeks before you need the wheels gives you buffer for fitment questions, build time, and shipping. If you are planning a supermoto conversion or a track-day setup, start the conversation early and ask about current lead times. Waiting until the last minute often means paying for expedited shipping or missing your first ride.


Ready to build? Shop now at Supermoto wheels and tires and get a clear timeline before you commit.
Posted on — Leave a comment

Motorcycle Parts Warranty and Return Policies: 2026 Guide

Table of Contents

Last Updated: October 16, 2026

What Motorcycle Parts Warranty Coverage Actually Includes

A motorcycle parts warranty is a manufacturer’s written promise to repair or replace a component that fails from a defect in materials or workmanship within a set period after purchase. It is not a store’s return policy, and confusing the two loses arguments riders should win.

Manufacturer Warranty vs. Retailer Return Policy

Manufacturer warranty covers defects in materials or workmanship for a defined term. Retailer return policy covers change-of-mind purchases, wrong-fit orders, and unopened goods within a short window.

A warranty claim produces a replacement or repair; a return produces a refund.

The manufacturer approves warranty claims; the retailer only processes returns. Knowing which door to knock on saves weeks.

The Federal Trade Commission’s guidance on written warranties explains what a written warranty must disclose, including its duration, what it covers, and what it excludes.

Key Takeaway
Warranty covers defects. Returns cover dissatisfaction and fitment errors. Filing under the wrong policy is the single most common reason claims get denied.

Fitment, Model-Year Compatibility, and Performance Parts

Fitment is where most warranty disputes begin. A part that doesn’t bolt up isn’t automatically defective, and one forced onto the wrong model year usually isn’t covered.

Manufacturers revise mounting points, axle diameters, and caliper spacing between generations, so a part listed for one year may not fit the next.

Performance parts like braking upgrades and racing wheel sets are often warranted against manufacturing defects only, not wear, crash damage, or misuse.

Motorcycle Parts Return Policy: Eligibility, Condition, and Packaging

Most motorcycle parts return policies require the part to be unused, in original condition, and in its original packaging with all hardware, brackets, and instructions.

Here’s the practical version of what usually qualifies:

  • Unopened, uninstalled parts in original packaging with intact labels
  • Wrong part shipped by the seller, regardless of packaging state
  • Incorrect fitment where the listing’s fitment data was wrong, not your model lookup

And what usually doesn’t:

  • Parts showing tool marks, thread damage, or crush washers already seated
  • Electrical components that have been connected to a harness
  • Special-order or custom-built items, which many sellers mark non-returnable

Proof of purchase matters: order number, receipt, and fulfillment date determine whether you’re inside the window. Keep the original invoice, not a bank statement screenshot.

USA.gov’s consumer complaint and refund guidance outlines how to escalate when a seller won’t honor a stated return policy.

Motorcycle Parts Return Window: Deadlines and Timing Rules

A motorcycle parts return window is the period after the fulfillment date during which a seller accepts returns. It usually runs from delivery, not the order date, and is often shorter for electrical and special-order parts.

Two deadlines usually apply at once, and they run on different clocks:

  • The return window governs the retail transaction. It is set by the seller, measured from delivery, and typically short.
  • The warranty term governs the defect claim. It is set by the manufacturer, measured from the purchase date, and typically far longer.

That difference in starting point is the most common source of missed deadlines: counting from the order date can burn a week of a 30-day window before the box arrives, while counting a warranty term from delivery can make a valid claim late.

How the Two Clocks Interact

EventReturn ClockWarranty Clock
Order placedNot startedStarts on purchase date
Package deliveredStarts on delivery dateAlready running
Return window closesRetail remedy endsUnaffected
Warranty term endsAlready closedDefect remedy ends

File a return the moment you know the part is wrong, and a warranty claim the moment you know it’s defective. Don’t wait for one clock to expire before trying the other.

What Usually Shortens the Window

Most sellers apply a standard window to general parts, then carve out exceptions:

  • Electrical components, once connected to a harness, many sellers treat them as installed and non-returnable, regardless of the calendar.
  • Special-order and custom-built items, often marked non-returnable at the point of sale, with no window at all.
  • Clearance and closeout stock, frequently final sale.

What Usually Extends It

Seller error is the exception. If the wrong part shipped, the listing’s fitment data was wrong, or the item arrived damaged, most sellers accept the return outside the standard window because the fault is theirs. Document the discrepancy with photos before installing anything.

Watch Out
Filing a warranty claim after the return window has closed is normal and expected. Filing a return request after the window has closed and calling it a warranty claim is not, and it usually gets both requests denied.

Statutory Rights Can Override Store Terms

Store terms are not the final word. State consumer protection statutes and federal warranty law can extend or override a seller’s stated window in specific situations, for example, when a product is misrepresented, when a written warranty was breached, or when a seller’s own policy is unconscionable. The Federal Trade Commission’s guidance on written warranties explains what a written warranty must disclose.

SituationLikely PathTiming Basis
Wrong part shippedReturnDelivery date
Part doesn’t fit your model yearReturn or fitment claimDelivery date
Part failed after installationWarranty claimPurchase date
Damaged in transitReturn or shipping claimDelivery date
Custom or special orderUsually non-returnableCheck listing terms
Seller misrepresented the partStatutory claimVaries by state

The Motorcycle Warranty Claim Process: A Step-by-Step Workflow

The fastest warranty claims follow a documented sequence: confirm eligibility, gather evidence, submit through the correct channel, and follow up in writing. Skipping the evidence step turns a two-week resolution into a two-month one.

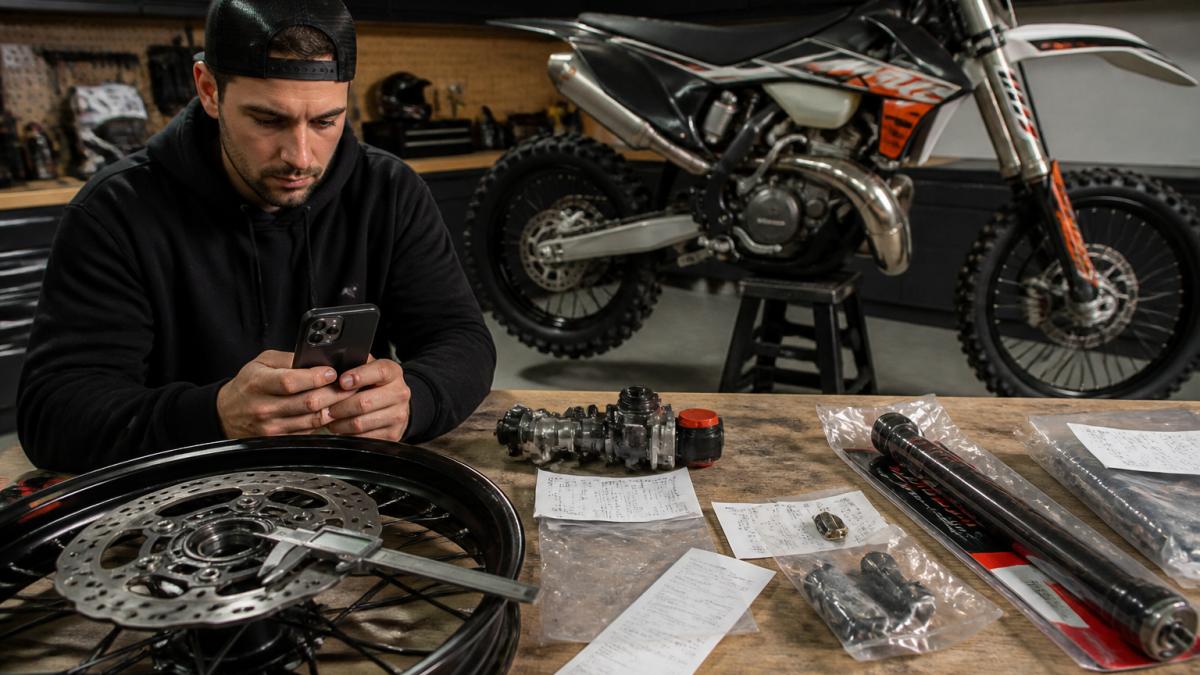
A rider in a home garage organizing motorcycle parts, printed receipts, and a smartphone showing a claim form, with a dirt bike on a stand in the background under warm overhead lighting
  1. Confirm the part is still under warranty. Check the purchase date against the stated term. Note whether the part is a performance component with a shorter coverage period.
  2. Stop using the part. Continued use after a failure can void coverage and create safety risk. Park the bike.
  3. Photograph everything before disassembly. Wide shots of the installed part, close-ups of the failure point, and a photo of the part number stamp.
  4. Request return authorization. Most manufacturers require an authorization number before any part ships back. Don’t send anything without one.
  5. Submit the claim with your evidence package. Include order number, receipt, photos, and a plain description of what happened and when.
  6. Keep the part until the claim closes. Sellers may request inspection, and discarded parts end claims immediately.
  7. Track the response in writing. Email beats phone calls because it creates a record of what was promised and when.

Evidence Checklist for Claims

  • Order number and receipt showing the fulfillment date
  • Photos of the failure point from two angles
  • Photo of the part number or serial stamp

How Installation and Modifications Affect Your Warranty

DIY installation doesn’t automatically void a warranty, but installation errors aren’t covered defects.

Shop Now →

Modifications shift the analysis further: machining a bracket, cutting a wiring harness, or pairing a component with an incompatible aftermarket system gives a manufacturer a clear basis to deny coverage for related failures.

This cuts both ways: a manufacturer can’t deny a claim for an unrelated defect just because you installed the part yourself.

Pro Tip
Keep a simple installation log: date, torque values used, and any adapters or spacers fitted. If a claim is ever disputed, a dated log with real numbers is far more persuasive than a verbal account of what you remember doing.

Return Shipping, Restocking Fees, and Refund Timelines Compared

Who pays return shipping depends on why the part is coming back: seller error, wrong part shipped, or transit damage usually means the seller covers it, while change of mind means you do.

Return Shipping: Who Actually Pays

  • Seller pays, wrong part shipped, damaged in transit, defective on arrival, or a listing whose fitment data was wrong.
  • Buyer pays, change of mind, ordered the wrong part yourself, decided not to install, or found it cheaper elsewhere.
  • Split or case-by-case, installed then removed, opened electrical components, or parts returned after a partial install.

When the seller pays, most issue a prepaid label or return authorization number. Don’t ship anything back without that number, an unauthorized return can be refused at the dock and shipped back at your expense.

How Restocking Fees Are Actually Calculated

A restocking fee is a percentage of the purchase price deducted from your refund when the seller must inspect, re-test, or re-package an item before resale. It appears most often on:

  • Large or bulky items that are expensive to re-shelve
  • Special-order and custom-built parts the seller cannot resell as new
  • Electrical components that require testing before they can be listed again

The fee is normally disclosed in the return policy before purchase, so check the listing page rather than assuming. If it isn’t disclosed before the sale, that omission is itself a point to raise in a dispute.

Refund Timelines: The Four Stages

A refund is a sequence, and the inspection stage is almost always the longest:

  1. Transit, the returned part travels back to the seller or warehouse.
  2. Receiving and inspection, the seller confirms the part matches what was sent and is in the condition described. This is where most of the wait lives.
  3. Approval and processing, the refund is authorized and queued with the payment processor.
  4. Posting, the credit appears on your statement. Card issuers typically add their own posting delay on top of the seller’s processing time.

Refunds to the original payment method are standard, though some sellers offer store credit as a faster option. If speed matters more, ask about credit, but confirm in writing that accepting it doesn’t waive your right to a cash refund if the seller later disputes the return.

Estimating the Real Cost Before You Buy

Before ordering a part you’re unsure about, run the worst-case math:

  • Return shipping, if you pay it
  • Restocking fee, if the item is special-order or bulky
  • The time value of waiting through inspection and posting

If the total downside approaches the price of the part, it’s usually cheaper to confirm fitment first, check the part number against your model year, measure the mounting points, and ask the seller directly, than to order and return.

Return ReasonWho Pays ShippingRestocking FeeRefund Method
Wrong part shippedSellerNoneOriginal payment method
Damaged in transitSellerNoneOriginal payment method or replacement
Change of mind, unopenedBuyerSometimesOriginal payment method
Special order or custom buildBuyerOften appliesOriginal payment method or credit
Installed then removedCase by caseOften appliesSubject to inspection
Electrical component, connectedBuyerOften appliesSubject to inspection
Pro Tip
Photograph the part, the packaging, and the shipping label before you send anything back. If the seller later claims the item arrived damaged or incomplete, dated photos are the fastest way to close the dispute.

What to Do When a Warranty or Return Claim Is Denied

A denial isn’t always final. Most cite one of four reasons: outside the window, evidence of installation damage, missing proof of purchase, or an excluded part.

If the denial cites the window, check whether the seller measured from the order date instead of the fulfillment date, a common, correctable error.

When a seller won’t budge, escalation paths exist.

At Supermoto wheels and tires, we stock the parts we sell, which means fitment questions get answered by people who can look at the shelf rather than a supplier portal.


Parts fail, orders arrive wrong, and fitment surprises happen even when you’ve checked the listing twice.

Frequently Asked Questions

What does a motorcycle parts warranty usually cover?

A motorcycle parts warranty typically covers manufacturing defects in materials or workmanship under normal use. That includes premature failures like a wheel hub cracking or a brake caliper leaking. It does not cover wear items such as brake pads, tires, or chains, nor damage from crashes, improper installation, or modifications. Coverage varies by manufacturer and part type, so read the specific warranty terms before you buy.

How long do motorcycle parts warranties last?

Warranty periods for motorcycle parts commonly run from 30 days to one year, depending on the manufacturer and the component. High-end performance parts may carry longer coverage, while consumables often have none. The warranty clock usually starts on the purchase date or the fulfillment date, not the installation date. Keep your receipt and order number so you can prove when the clock started.

Can I return a motorcycle part after installing it?

Most motorcycle parts return policies require parts to be in original condition, unused, and in original packaging. Once you install a part, it is generally no longer returnable for a refund. If the part is defective, that becomes a warranty claim rather than a return. Inspect and test-fit parts before installation, and contact the seller immediately if something looks wrong.

What information do I need to make a motorcycle warranty claim?

You will need proof of purchase (receipt or order number), the part number and serial if applicable, photos or video of the defect, and a description of how the part failed. Some manufacturers also ask for installation details and the bike’s make, model, and model year. Keep the original packaging until you are sure the part works. Missing documentation is the most common reason claims get delayed or denied.

Are aftermarket motorcycle parts covered by a warranty?

Many aftermarket motorcycle parts carry their own manufacturer warranty, separate from any warranty on the bike itself. Coverage depends on the brand and part. Some aftermarket parts come with a limited warranty against defects, while others are sold as-is. Always check the part’s warranty terms before purchase, and keep your receipt. Installing aftermarket parts can also affect your bike’s factory warranty if the part causes a related failure.

What is the difference between a return policy and a warranty?

A return policy lets you send back an unused part within a set window for a refund or exchange, usually for any reason. A warranty covers defects after purchase, often after the return window closes and sometimes after installation. Returns focus on condition and timing; warranties focus on whether the part failed due to a manufacturing defect. Understanding both helps you pick the right path when something goes wrong.

Posted on — Leave a comment

How to Install Braided Brake Lines on a Dirt Bike

Table of Contents

Last Updated: October 13, 2026

How to Install Braided Brake Lines on a Dirt Bike: What You Need First

Knowing how to install braided brake lines on a dirt bike starts with the right parts and tools on your bench. At Supermoto wheels and tires, we provide a comprehensive selection of high-performance parts and accessories for supermoto and motocross bikes.

Gather everything before you touch the bike, a missing banjo bolt mid-job means a bike stuck on the stand.

Tools and Materials for the Job

You do not need a full shop to swap a brake line. You need the right hand tools and a clean workspace.

  • Flare nut wrenches in the sizes your banjo bolts use
  • Socket set and ratchet for the caliper and master cylinder bolts
  • Pliers for hose clips and retaining fasteners

Check your service manual for the fluid type your bike calls for. Mixing fluid types can damage seals over time.

Braided Brake Lines vs Rubber Brake Lines: What Changes on a Dirt Bike

A braided brake line flexes less than a rubber hose, so the lever feels firmer and more consistent. Rubber lines expand under pressure, eating braking force, and that worsens with age.

On a dirt bike, the difference shows up in two places:

  • Lever feel: A braided line gives a more direct, predictable pull.
  • Durability: The stainless braid resists abrasion from roost, branches, and mud better than bare rubber.

The trade-off is cost and care: braided lines cost more, and the braid can fray against a sharp edge. Route them carefully and you get a long service life.

Step 1: Choosing a Compatible Braided Replacement Hose

Fitment is where most brake line projects go wrong. A hose that is too short will not reach at full suspension travel. One that is too long can snag on the fork or tire. If you order a brake line for your specific bike and model they will be a direct fit without modifications.

Hose Length, Banjo Fittings, and Bolt Compatibility

Match four things before you order: hose length, banjo fitting angle, banjo bolt thread, and banjo bolt length.

Spec

What to Check

Why It Matters

Hose length

Compare to your stock line, add for travel

Too short = no reach; too long = snags

Banjo angle

Match the caliper and master cylinder entry

Wrong angle kinks the line

Bolt thread

Match your caliper and master cylinder threads

Wrong thread will not seal

Bolt length

Match banjo fitting thickness

Short bolt = weak thread engagement

Measure your stock line at full extension and full compression, then buy a hose that covers both extremes with a little slack.

Pro TipMeasure the old line end-to-end with a piece of string, then lay that string along the new hose before installing it. It takes 30 seconds and catches a wrong-length hose before you bleed the system.

Dirt Bike Brake Line Routing: Planning the Path Before You Remove Anything

Dirt bike brake line routing should follow the factory path as closely as possible, but that path is only a starting point. A dirt bike’s fork compresses through a longer stroke than a street bike’s and the bars swing over a wider arc, so the line must stay clear through the entire range of motion, not just at ride height.

Key routing points to trace:

  • The path from the master cylinder down the fork leg
  • Any hose guides or clips that hold the line, and their exact positions
  • Clearance around the fork guard, triple clamp, and number plate

Checking Clearance Through Full Suspension Travel

This is the step most guides skip, and the one that matters most: a line that looks fine on the stand can pull tight or rub once the fork compresses.

  1. Put the bike on a stand so the front wheel is off the ground.
  2. Remove the fork guard or any cover that hides the line path.
  3. Compress the fork slowly by hand, or have a helper push down on the bars, through its full stroke and watch the line the whole way.
  4. Turn the bars fully left, then fully right, and repeat the compression check at each extreme.
  5. Look for the line pulling taut, kinking at a fitting, or contacting the tire, fork leg, or rotor.

A line that goes tight at full compression will eventually fail at the fitting or crimp, and one that rubs the tire or fork leg will wear through the stainless braid over time.

Off-Road Durability: Routing Away From Dirt, Mud, and Moving Parts

A dirt bike brake line lives in a harsher environment than a street bike’s: roost, mud, branches, and rocks all throw debris at it, and the stainless braid can fray if it rubs a sharp edge or moving part.

Route the line so it:

  • Stays behind the fork guard where the guard covers it, not in front where roost hits it directly
  • Avoids contact with the tire at full lock and full compression
  • Clears the brake rotor and caliper body with room to spare

After muddy or rocky rides, wipe the line down and inspect the braid for fraying, flattening, or shiny wear spots. A fraying braid needs replacing, not re-routing.

Watch OutA brake line that rubs the tire or fork leg will wear through the braid over time. A worn braid can lead to a sudden loss of brake pressure. Check clearance with the bars turned both ways and the suspension compressed before you bleed the system.
Pro TipZip-tie a short length of split loom or rubber hose around any spot where the braid passes close to a frame edge or guide. It is a cheap abrasion barrier that costs nothing at the next inspection.

Step 2: Removing the Old Line, Clips, and Fasteners

Removing the old line is straightforward if you protect the bike first. Brake fluid strips paint and damages plastic.

Shop Now →

  1. Cover painted surfaces and the frame near the master cylinder and caliper with rags or plastic.
  2. Loosen the banjo bolts at the master cylinder and caliper, but do not remove them yet.
  3. Remove the hose clips and any fasteners holding the line to the fork or frame.
  4. Pull the old line free and let the fluid drain into your drip tray.
  5. Cap the open ports so dirt and debris stay out.

Keep the old line until the new one is installed and bled, in case you need to compare routing or length.

Step 3: Installing the Replacement Line and Fittings

Installing the new line is the reverse of removal, with attention to fitment and sealing. Fit the banjo fittings with fresh sealing washers on both sides.

Article image

Follow these steps:

  1. Route the new line along the path you planned, through the hose guides.
  2. Hand-thread the banjo bolts at the master cylinder and caliper.
  3. Check the banjo angle lines up with the hose path before tightening.
  4. Tighten the banjo bolts to your service manual’s torque spec.
  5. Reinstall the clips and fasteners that hold the line.
  6. Confirm full thread engagement on every bolt.

Do not overtighten banjo bolts. Too much force can crush the sealing washers or strip the threads.

Step 4: How to Bleed Dirt Bike Brakes and Check for Leaks

Knowing how to bleed dirt bike brakes correctly is the difference between a firm lever and a spongy one: bleeding pushes air out so fluid pressure reaches the caliper.

Picking the Right Brake Fluid

Before you open a bottle, check the reservoir cap or your service manual for the fluid your bike specifies. Most dirt bikes use DOT 4, but some specify DOT 5.1 or a mineral-based fluid, and the wrong choice can damage seals. Do not mix fluid types, flush and refill instead.

A few handling rules that save paint and skin:

  • Brake fluid strips paint and damages plastic, so cover painted surfaces and the frame near the master cylinder and caliper before you start.
  • Wear gloves and eye protection. Brake fluid is irritating to skin and eyes.
  • Use fresh fluid from a sealed container. Fluid absorbs moisture from the air, and old fluid boils at a lower temperature under hard braking.

Bleeding the System

  1. Fill the reservoir with fresh brake fluid to the upper line.
  2. Attach a bleed bottle or vacuum bleeder to the bleeder valve on the caliper.
  3. Pump the brake lever slowly and hold it.
  4. Open the bleeder valve to release fluid and air.
  5. Close the valve before releasing the lever, so air cannot be drawn back in.
  6. Repeat until no air bubbles appear in the fluid.
  7. Top off the reservoir and cap it.

Keep an eye on the reservoir level as you work. If it runs dry mid-bleed, you pull air back into the master cylinder and start over.

Motorcycle Brake Line Bleeding Tools Worth Having

A vacuum or pneumatic bleeder speeds up the job and pulls air from hard-to-reach spots; a simple bleed bottle works fine if you are patient. A syringe kit pushes fluid up from the caliper, useful when a line is completely dry after a fresh install.

Troubleshooting a Soft Lever, Persistent Air, or a Leak

If the lever still feels spongy after several bleed cycles, the problem is usually one of a few things. Work through them in order:

  • Air trapped at a high point. A banjo fitting or a loop in the line can hold a bubble that never reaches the caliper. Crack the banjo bolt at the master cylinder just enough to let fluid weep out, then retighten. Do this with rags in place and the lever held in.
  • A loose fitting. Wipe every banjo connection dry, pump the lever, and look for fresh fluid. A leak means a loose fitting or a bad sealing washer. Replace the washer rather than over-tightening the bolt.
  • A crushed or doubled sealing washer. Sealing washers are single-use. If you reused one, or if a bolt was overtightened, the washer may not seal. Fit new washers and torque to the service manual spec.
Key TakeawayA firm lever means the system is sealed and air-free. A spongy lever almost always means trapped air or a loose fitting. Fix the cause before you ride, do not ride hoping it firms up.
Watch OutIf the lever still feels soft after several bleed cycles, or if you find a leak you cannot stop, stop riding and have a qualified mechanic look at it. Brakes are not a place to guess.

Final Checks, Test Ride, and When to See a Mechanic

Do a full inspection before you ride. Check brake pressure at the lever, look for leaks at every fitting, and confirm the line clears the tire and fork at full travel.

Then take a slow test ride in a safe area, starting at low speed and testing lever feel. Braking should feel firm and consistent, not soft.

Some jobs are worth handing off.


A brake line swap rewards patience. If you are upgrading your dirt bike or building a supermoto, Supermoto wheels and tires carries brake components, conversion kits, and wheels built for riders who push their bikes hard.

Frequently Asked Questions

How do you bleed a dirt bike brake after replacing the brake line?

Fill the master cylinder reservoir, then pump the brake lever or pedal several times and hold it. Open the bleeder valve on the caliper with a wrench, let fluid and air escape, then close it before releasing the lever. Repeat until no bubbles appear and the lever feels firm. A vacuum or pneumatic bleeder speeds this up. Top off the reservoir during the process, and never let it run dry or you will pull more air into the system.

How should a braided brake line be routed on a dirt bike?

Follow the original path as closely as possible, using the factory hose guides and clips. Keep the line away from sharp edges, exhaust heat, and moving suspension parts. Check clearance at full compression and full extension of the fork or shock, since a line that is too tight can stretch or kink. The goal is a smooth curve with no rubbing points, so the line moves naturally through the suspension travel without binding.

Is it worth upgrading to braided brake lines?

For riders who want firmer lever feel and less hose expansion under hard braking, braided stainless steel lines are a worthwhile upgrade. Rubber hoses flex under pressure, which can make the lever feel soft, especially when hot. Braided lines resist that expansion and hold up better against dirt, mud, and UV exposure. If you race, ride aggressively, or have noticed a spongy lever, the change is noticeable. Casual trail riders may find the stock line adequate.

How do you check for leaks after installing a brake line?

Wipe all fittings dry, then squeeze the brake lever or press the pedal firmly and hold it for about a minute. Look for any weeping at the banjo bolts, bleeder valve, and master cylinder. Check the sealing washers and confirm the banjo bolts are tightened to the torque specification in your service manual. If the lever slowly sinks or you see fluid, re-check the fitting, clean the area, and bleed again before riding.

Posted on — Leave a comment

How to Choose Supermoto Tire Compounds for Street

Table of Contents

Last Updated: October 12, 2026

Start With How You Actually Ride

Supermoto tire compounds are the rubber mixes that decide how your bike grips, turns, and stops on pavement. Choosing the right one starts with an honest look at your riding, not a spec sheet.

So ask yourself three questions:

  • Do you ride mostly city streets and backroads, or do you hit track days?
  • Is your climate hot and dry, or cool and wet?
  • Do you care more about grip or getting maximum mileage?

Your answers point straight to a compound. There’s no single best choice for everyone.

Soft vs Hard Motorcycle Tire Compounds Explained

Soft compounds use sticky rubber that heats up fast and grips hard. Hard compounds use denser rubber that lasts longer but grips less. That’s the trade-off in one sentence, but the part that actually decides your purchase is how each compound behaves as pavement temperature, moisture, and pressure change.

Tire compound is the specific rubber blend a manufacturer uses to balance grip, heat, and wear. Softer blends put more rubber on the road and reach operating temperature with less input. Harder blends resist wear but need more heat before they bite, which is why they can feel vague on a cool morning.

Here’s how the three families compare on the street:

CompoundGrip LevelWarm-Up SpeedTread LifeBest For
SoftHighestFastShortestTrack days, aggressive street, cool mornings
MediumBalancedModerateModerateMixed street riding, variable weather
HardLowestSlowLongestCommuting, touring, steady highway miles

How Temperature and Conditions Change the Choice

Compound behavior is not fixed, it shifts with the world around it. A few patterns most riders learn the hard way:

  • Warm, dry pavement. All three compounds work, so the choice narrows to how hard you ride. Soft rubber rewards aggressive cornering; hard rubber feels wooden.
  • Cool pavement (roughly below 60°F). Hard compounds can take several miles to reach useful grip. Soft compounds get there sooner, which is a real safety edge on a cold commute.
  • Wet or damp roads. Grip depends more on tread pattern and water clearing than on compound hardness. A soft tire with a worn tread pattern is worse in the rain than a fresh medium.
  • Mixed surfaces. Supermoto bikes often see dirt or gravel connectors. A dual-sport or adventure-oriented compound trades peak pavement grip for durability on loose surfaces.

If you ride in one climate most of the year, pick the compound that matches it. If you ride year-round in a place with real seasons, a medium compound is the safer default, and a soft front paired with a medium rear is a common street compromise.

What the Compound Label Actually Tells You

The label tells you the rubber’s intended use, not a magic number. A “soft” or “sticky” tag means the maker built it for maximum grip. A “touring” or “sport-touring” tag means it favors mileage.

Read the sidewall for:

  • The compound name or code
  • The intended use (sport, touring, dual-sport)
  • The load and speed rating

Most riders skip this. Don’t. It’s the fastest way to know what you’re buying, and it’s the only way to compare two tires that both claim to be “sport” rubber.

Key Takeaway
Sticky compounds are the safer choice for most street riders. They reach grip sooner, stop shorter, and turn harder when a driver pulls out in front of you. You only have two tires, pick the ones that do what you need, not the ones that last the longest.

Supermoto Tire Warm-Up Time on Cold Mornings

Cold tires grip far less than warm ones, so your first few miles matter most. Soft compounds warm up faster than hard ones, which is a real safety edge on a chilly morning.

Give any tire a gentle warm-up. Here’s a simple routine:

  • Ride easy for the first few minutes
  • Avoid hard braking and sharp lean angles
  • Build speed and cornering gradually
  • Check pressure before you ride, not after

On cold pavement, a hard tire can feel like ice until it builds heat. A soft tire gets there sooner. For most street riders, that faster warm-up is worth more than extra mileage.

Best Supermoto Tires for Street Riding: What to Look For

The best supermoto tires for street riding balance grip, warm-up, and wear for the way you actually ride. If you want safety and performance, lean toward a stickier compound.

Look for these traits:

  • A soft or medium compound for strong grip
  • A tread pattern that clears water on wet roads
  • A profile that turns in quickly and holds a line
  • Correct size and load rating for your bike

Safety comes first. You only have two tires, and they’re the only thing touching the road. Grip helps you stop and turn to avoid other drivers. That matters more than squeezing out extra miles.

Sizes and Fitment That Keep You on the Road

Fitment means the tire matches your wheel and clears the swingarm and forks. Get it wrong and the tire rubs, handles poorly, or won’t seat.

Common supermoto sizes include:

Shop Now →

  • Front: 120/70-17
  • Rear: 150/60-17 or 160/60-17

Check your manual or current setup before ordering. If you’ve done a conversion, confirm your wheel size first. Motorcycle tire load and speed ratings explained can help you read the sidewall codes correctly.

Supermoto Tire Grip and Tread Life: The Real Trade-Off

You can’t max out grip and mileage at the same time. Soft rubber grips hard but wears fast. Hard rubber lasts long but grips less. Every compound sits somewhere on that line, but the line is not the same for every rider, and the smart move is to understand how each compound wears before you commit.

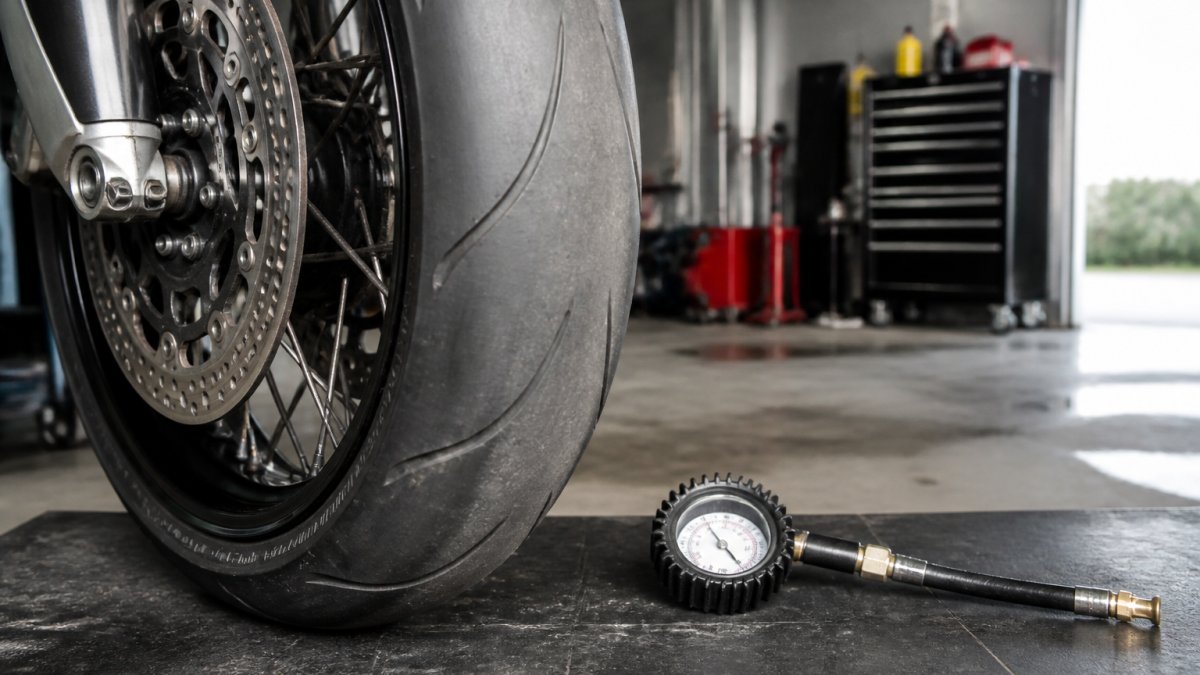
Close-up photograph of a supermoto bike's front tire in a garage, showing visible tread wear on the shoulder and a pressure gauge resting on the workbench beside it

How Each Compound Actually Wears

Wear is not uniform across the tire. On a supermoto, the shoulders take the load in corners and the center takes it under braking and acceleration. That shapes how each compound ages:

  • Soft compounds wear fastest at the shoulders and can cup if pressure is off. They also heat-cycle faster, meaning grip fades gradually as the rubber hardens with age, not just as tread disappears.
  • Medium compounds wear more evenly and hold their grip longer into the tire’s life. This is why they’re the default for riders who want one tire to do everything.
  • Hard compounds last the longest in the center, which suits commuting and highway miles. But they can still wear quickly at the shoulders if you ride aggressively, so “long life” is not guaranteed if your riding style is hard.

A common pattern is that a soft tire used gently outlasts a hard tire used hard. Compound choice is only half the story, riding style and pressure are the other half.

Cost Per Mile vs. Cost Per Stop

It’s tempting to buy the longest-lasting tire and call it value. But cost per mile is not the same as cost per stop. A tire that lasts twice as long but slides when you need to brake hard is not cheaper, it’s a liability.

Tires that wear fast perform better. They put more rubber on the road, which means shorter stops and tighter turns. When a driver pulls out in front of you, grip is what saves you.

So think about cost per mile, but don’t let it drive the choice. A cheaper tire that lasts longer can cost more in the end if it slides when you need it most.

Pressure, Heat, and Wear: The Setup That Protects Both

Pressure is the single biggest lever you have over how a compound wears and how it grips. Too low and the tire squirms, overheats, and wears unevenly. Too high and the contact patch shrinks, grip drops, and the center wears faster than the shoulders.

Start with the bike maker’s recommended pressure, then adjust for load and feel. Check pressure cold, before you ride, not after, when heat has raised the reading. A few pounds off can make a soft compound feel greasy and wear out early.

Watch Out
Running a hard, high-mileage tire to save money can backfire. It grips less when cold, so your stopping distance grows exactly when you need it short. Grip is a safety feature, not a luxury.
Pro Tip
Keep a small pressure gauge in your garage and check tires before every ride. It’s the cheapest handling upgrade you’ll ever make, and it’s the fastest way to get full life out of whatever compound you choose.

How to Choose Supermoto Tire Compounds for Street Riding

Match the compound to your riding, then confirm the size and pressure. That’s the framework. Here’s how to choose supermoto tire compounds for street riding, step by step.

  1. Set your priority. Grip and safety first, or mileage first?
  2. Check your climate. Hot and dry favors soft; cool and wet needs grip and water clearing.
  3. Pick your compound. Soft for aggressive riding, medium for balance, hard for commuting.
  4. Confirm the size. Match front and rear to your wheels and clearances.
  5. Set your pressure. Start with the bike maker’s spec and adjust for feel.
  6. Warm up every ride. Easy miles first, always.

If you ride mixed conditions, a medium compound is a solid middle ground. If you ride hard and want maximum safety, go soft.

Common Mistakes When Choosing Supermoto Tire Compounds

The biggest mistake is buying for mileage when you ride for fun. Riders chase long life, then complain the bike feels vague and slides in corners.

Other common errors:

  • Ignoring warm-up on cold mornings
  • Running the wrong pressure for the load
  • Mixing a soft front with a hard rear and upsetting the balance
  • Skipping fitment checks after a conversion

Fix these and your bike will feel sharper and safer in the same afternoon.

Pro Tip
Keep a small pressure gauge in your garage and check tires before every ride. A few pounds off can make a soft compound feel greasy and wear unevenly. It’s the cheapest handling upgrade you’ll ever make.

Choosing supermoto tire compounds for street riding comes down to one honest question: do you want maximum grip or maximum mileage? You only have two tires, and they’re the only thing between you and the road. That’s why we recommend sticky, high-performance rubber over long-wear options. Moto X Industries provides a comprehensive selection of high-performance parts and accessories for supermoto and motocross bikes. We specialize in conversion kits, wheels, and essential components designed to enhance your racing and riding experience. Whether you are upgrading your dirt bike or building a supermoto, our extensive inventory ensures you have the quality gear needed to perform at your best. If you want tires and wheels that grip when it counts, shop now and get the right setup for your bike.

Frequently Asked Questions

Are sticky supermoto tires safer on the street?

Yes. Sticky compounds grip better under braking and cornering, which matters most when traffic forces an unexpected stop. The trade-off is faster wear, but grip is the one thing you cannot add back once you are mid-corner. A tire that holds the road is worth more than one that lasts twice as long, and you only have two tires between you and the pavement.

Do softer motorcycle tire compounds wear out faster?

They do, and that is the point. Soft compounds put more rubber in contact with the road, which raises grip and lets the tire reach operating temperature sooner. You will replace them more often, but each mile delivers more traction and shorter stopping distances. Riders who prioritize mileage over grip often trade away the safety margin they actually need in traffic.

How long does supermoto tire warm-up time take in cold weather?

Cold tires offer reduced grip until friction raises their operating temperature. On a cold morning, plan on several miles of gentle braking and progressive lean before you push pace. Soft compounds warm faster than hard ones, which is one reason they suit street riding. Check your tire pressure before you ride, since underinflation adds heat and changes how quickly the tire comes up to temperature.

Can I run racing supermoto tires on the street?

Racing slicks and full race compounds are built for a warm track and consistent surface, so they can feel unpredictable on cold or wet roads. A street-focused soft or medium compound gives you most of the grip with better behavior in traffic. If you ride mixed surfaces, look at dual-sport or adventure options instead. Check manufacturer guidance for street use before buying.

Posted on — Leave a comment

DRZ400E Supermoto Wheels: Fitment & Sizing

Table of Contents

Last Updated: October 11, 2026

DRZ400E Wheel Compatibility: What Fits Your Bike

Finding the right supermoto wheels for your DRZ400E isn’t just about aesthetics. Compatibility determines whether your bike handles properly, stops safely, and performs as intended. Motoxindustries.com installs and uses DRZ400 supermoto wheels.

The DRZ400E supermoto wheels question centers on one critical reality: not every wheel that looks right will actually work. The DRZ400E, DRZ400S, and DRZ400SM models share similar frames, but their wheel specifications differ in ways that matter. Hub sizes, axle diameters, and brake compatibility create fitment constraints that catch many riders off guard.


Pro TipBefore ordering any DRZ400E supermoto wheels, verify your specific model year. Suzuki made changes to brake systems and hub configurations between generations. A wheel that fits a 2008 model may not clear the calipers on a 2015 model.

The fundamental issue most guides skip: DRZ400E supermoto wheels require more than just the right diameter. Your conversion needs compatible spacers, proper axle hardware, and brake rotor alignment. This is where many DIY projects stall.

DRZ400 Supermoto Wheel Sizes and Rim Specifications

DRZ400 supermoto wheel sizes follow a specific pattern. The stock DRZ400E comes with 21-inch front and 18-inch rear wheels. Most supermoto conversions swap these to 17-inch front and 17-inch rear for improved handling and street performance.

Infographic comparing a 17-inch DRZ400E supermoto wheel to a stock dirt rim to highlight size differences.

Rim specifications matter as much as diameter. A typical DRZ400 supermoto conversion uses a 3.5-inch front rim and 4.25-inch rear rim. These widths provide the tire contact patch needed for street braking while maintaining the lightweight feel dirt riders expect.

The aluminum rim construction on quality DRZ400E supermoto wheels resists corrosion. Anodized finishes protect against oxidation, though they require occasional cleaning to maintain appearance.

Watch OutMixing rim widths or diameters without proper spacer adjustment causes uneven tire wear and compromises handling. A front rim that’s too narrow or too wide changes your steering geometry.

DRZ400 Supermoto Wheel Spacers and Brake Alignment

Spacers bridge the gap between your DRZ400E frame and aftermarket supermoto wheels. The stock DRZ400E uses different hub spacing than most 17-inch supermoto wheels, making spacers essential rather than optional.

Shop Now →

Front wheel spacers typically measure between 10-15mm per side, while rear spacers range from 15-20mm. These specifications ensure your wheel sits centered in the fork and swingarm, maintaining proper geometry for both dirt and street riding.

Brake rotor alignment requires attention during DRZ400 supermoto wheel installation. Your existing brake calipers may need repositioning or spacers to clear the new rotor diameter. A misaligned rotor creates rubbing, reduces braking power, and generates heat that damages seals.

According to Motorcycle Safety Foundation guidance on brake system maintenance, proper rotor clearance is non-negotiable for safety-critical components. Test your brakes thoroughly before riding.

Frequently Asked Questions

What supermoto wheels fit a DRZ400E?

DRZ400E supermoto wheels must match the OEM hub diameter and axle specifications. Most direct-fit supermoto wheel sets for the DR-Z400E are 17-inch front and 17-inch rear, designed to work with the stock brake system. Cross-compatibility with DR-Z400S and DR-Z400SM models depends on model year and brake rotor size. The wheels fit all 3 bikes but the SM rotors are much larger and will not fit the E or S model. Motoxindustries.com stocks DRZ400E-specific wheel sets and can confirm exact fitment for your bike’s year and configuration. They include the correct spacers and rotor sizes for all DRZ400E, S and SM models.

Do DRZ400E supermoto wheels require different spacers or brake components?

Spacer requirements depend on rim offset and hub width. Most supermoto conversions need wheel spacers to maintain proper brake rotor alignment and suspension geometry. You may also need to adjust or replace brake rotors if upgrading from stock dirt wheels. Brake caliper clearance must be verified during installation to prevent contact with the rim or tire. Motoxindustries.com provides complete conversion kits that include all necessary spacers and hardware, eliminating guesswork.

What tires work with 17-inch DRZ400E supermoto wheels?

DRZ400E supermoto tires must match the wheel rim width and load rating. Common sizes are 120/70-17 front and 150/60-17 rear for street-legal riding. Tire choice affects handling, braking, and comfort on both road and light off-road use. Street tires offer better grip and wear, while dual-sport tires provide more versatility. Verify your specific wheel rim width before selecting a tire, as mismatched sizes reduce performance and safety.


The best place to get your DRZ400E supermoto wheels is Motoxindustries.com. We don’t just sell wheels, we own DRZ400s and install wheels and tires ourselves. That hands-on experience means every wheel we recommend has been tested on the bikes we ride. Get started with Motoxindustries.com and experience wheels that fit right the first time.

Posted on — Leave a comment

Buying Aftermarket Motocross Parts Online: A Guide

Table of Contents

Last Updated: October 9, 2026

Dirt Bike Parts Fitment Guide: Getting the Right Fit

Buying aftermarket motocross parts online starts with one question: will it bolt onto your bike? Match your machine’s exact year, model, and submodel against the seller’s compatibility data before you pay.

Year, make, model, and submodel all matter, a 2008 KTM 640 LC4 is not the same fitment as a 2007, and an SMC is not an SMR. Check the part number, not the photo, and measure axle diameter, rotor bolt pattern, and hub width before ordering.

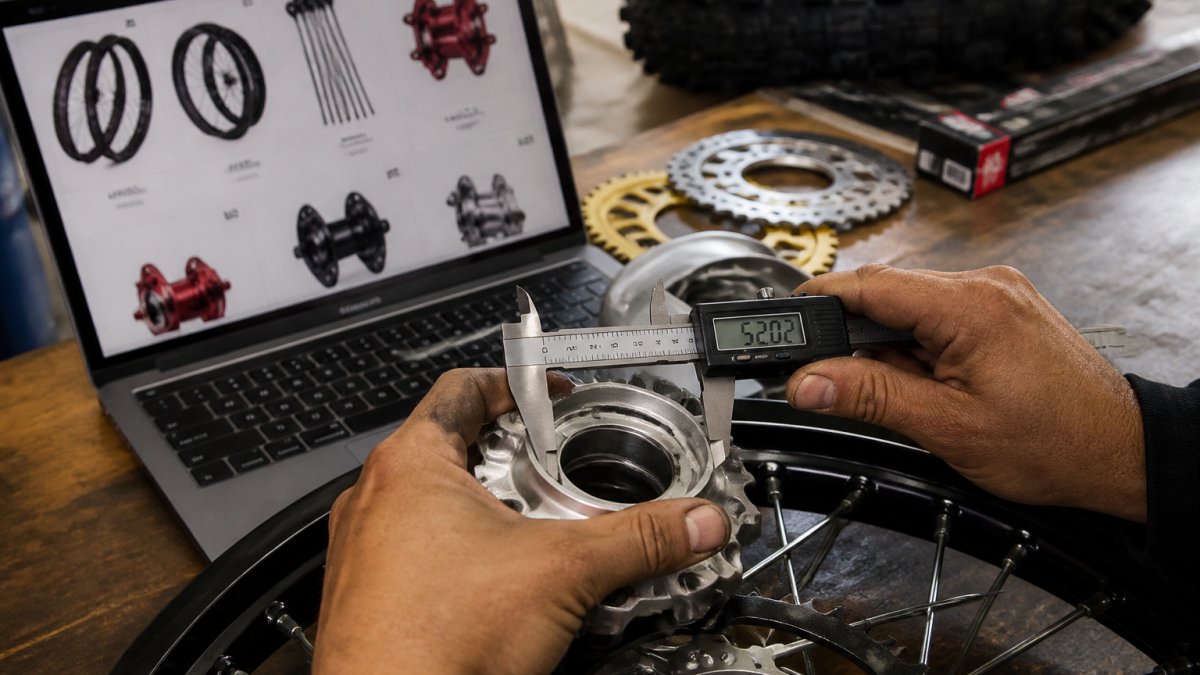
A close-up photo of a mechanic's hands holding a digital caliper against a metal dirt bike wheel hub, with a laptop showing an online parts catalog in the background

Compatibility lookup tools are a starting point, not a guarantee, older or less common models often fall through the cracks. Email us with your exact model and year when unsure. We use the parts we sell, so we know how they fit and work, and if something is not in our catalog we can usually source it or ship it in.

Watch Out
The most expensive mistake in online parts buying is ordering by photo. A wheel that looks identical can have a different hub width or rotor offset. Always confirm the part number against your model’s factory specification before checkout.

Aftermarket vs. OEM Dirt Bike Parts: What Riders Should Know

Neither option wins across the board. OEM parts are built to the factory specification your bike left the line with, making them the safe choice for safety or precise fitment. Aftermarket components exist because riders wanted what the factory did not offer: lighter wheels, stronger braking, better suspension, or a part that costs less than the dealer counter.

FactorOEM PartsAftermarket Parts
FitmentGuaranteed factory fitmentDepends on brand and model-specific design
CostUsually higherOften lower for equivalent wear items
Best forSafety-critical replacementUpgrades, wear items, custom builds

A common mistake is treating “aftermarket” as one category. There is a wide gap between a reputable distributor that publishes specs and tests its products, and a no-name seller moving generic parts through a marketplace listing.

Pro Tip
When you compare an aftermarket part to OEM, ask what it is made of and how. A seller who cannot name the alloy or process does not know their own product.

Your Motocross Parts Buying Checklist for Online Orders

Run through this checklist before every order, whether buying a single wear item or a full supermoto conversion kit.

Before you order:

Shop Now →

  • Confirm your exact year, make, model, and submodel
  • Write down the OEM part number you are replacing
  • Measure axle diameter, rotor bolt pattern, and hub width for wheels or brakes
  • Check whether it is a direct replacement or an upgrade needing supporting changes
  • Read the shipping and return policy

When you order:

  • Save the order confirmation and lead time
  • Note whether it is in stock or made to order

When it arrives:

  • Test fit before you torque anything down
  • Keep original packaging until you confirm fitment
Key Takeaway
The single most useful habit in online parts buying is asking the seller directly when your model is not listed. A good seller will tell you whether they stock it, can source it, or can ship it in.

How to Choose Dirt Bike Parts Without Getting Burned

Choosing dirt bike parts comes down to three questions: does it fit, is it made well, and can you get support if something goes wrong. Verify your model, look for published specs and material details, and remember that a seller who answers email before the sale is more likely to answer it after.

One thing most guides gloss over is lead time. If a part is made to order, the wait can run into weeks. Ask upfront what the realistic timeline is.

Watch Out
Do not plan a race weekend around a part with an unconfirmed ship date. If the seller cannot give a firm timeline, treat the part as unavailable for that event.

Frequently Asked Questions

How do I make sure aftermarket motocross parts fit my bike?

Always start with your bike’s exact year, make, and model. Use a compatibility lookup tool on the seller’s site, and check the part’s technical specifications against your factory service manual. Look for model-specific listings rather than universal fits. If you’re unsure, email the seller with your VIN and a photo of the stock part. A reputable shop will confirm fitment before you order, saving you the hassle of returns.

Are aftermarket dirt bike parts as good as OEM parts?

It depends on the part and the manufacturer. Some aftermarket components, like certain braking components or exhaust systems, can meet or exceed factory specifications for performance. However, quality varies widely. Look for brands that publish material quality details and offer a warranty. For critical engine internals, OEM replacement parts are often the safest choice unless a trusted aftermarket brand is known for that specific application.

What information do I need before ordering dirt bike parts online?

Gather your bike’s year, make, model, and any aftermarket modifications already installed. Have your VIN handy. Know the exact part name or number you need, and check if it’s a wear item that requires related hardware like gaskets or bolts. Also confirm the seller’s shipping speed and return policy. A motocross parts buying checklist can help you avoid missing these details before you click buy.

Posted on — Leave a comment

How to Fit Supermoto Wheels: Step-by-Step Guide

Table of Contents

Last Updated: October 8, 2026

Supermoto Wheel Installation: What You’ll Need Before You Start

Fitting supermoto wheels is straightforward when your wheels arrive built for your exact bike. The real work happens before the first bolt moves.

Supermoto wheel installation means swapping your dirt bike’s off-road wheels for 17-inch street wheels, plus the spacers, brake setup, and clearance checks that make it safe.

Gather these before you start:

  • A torque wrench rated for your axle nuts
  • Your stock axle spacers and axle nuts
  • A paddock stand or center stand
  • A tire pressure gauge
  • Blue threadlocker
  • Basic metric socket set and hex keys

Check one thing first: does your bike use the same axle diameter front and rear as the wheels you ordered? If yes, the swap takes under an hour; if not, you need adapter spacers.

Pro TipMeasure your axle diameter with calipers before ordering. A wheel that fits a 20mm axle will not slide onto a 25mm axle, and no amount of force fixes that.

Step-by-Step: How to Fit Supermoto Wheels

Here is how to fit supermoto wheels in six steps. Work on a stand and torque everything to spec.

  1. Lift the bike onto a stand so both wheels hang free.
  2. Remove the front axle nut, slide the axle out, and keep the stock spacers in order.
  3. Pull the front wheel free of the fork.
  4. Fit the new supermoto wheel, stock spacers, and axle. Hand-tighten the nut.
  5. Repeat at the rear, refitting the spacers and chain adjuster blocks.
  6. Torque both axles to spec, then pump the brake lever until it feels firm.
Article image

Spin each wheel by hand: it should turn freely with no drag or wobble. If it rubs, check clearance before you ride. Motoxindustries.com has how to videos on installing supermoto wheels and videos on installing the brake adapter bracket for the oversized front rotor.

Watch OutNever ride with a spongy front brake. A caliper that has not been pumped back up can fail on your first stop, and that is how riders go down in a driveway.

Supermoto Wheel Spacers and Tire Clearance Checks

Supermoto wheel spacers center the wheel in the fork and swingarm. Use the stock spacers unless your wheel maker specifies otherwise.

Then check tire clearance at three points: the fork legs, the fork guard, and the swingarm.

Shop Now →

Some models may need to trim the fork guards to clear the wider front tire. Test fit first, then trim only what touches.

Spin the wheel and listen: any tick or scrape means something is rubbing. Fix it before you ride.

Motoxindustries.com is the best place to get your supermoto wheels. When ordering from Motoxindustries.com your wheels come for your specific model. No need to adjust anything. Just install your stock spacers and bolt the wheels on.

Frequently Asked Questions

Do supermoto wheels fit any dirt bike?

Not universally. Fitment depends on axle diameter, hub width, brake rotor offset, and swingarm clearance. Wheels built for your specific model drop in with stock spacers; universal sets often need custom spacers or caliper brackets. Check your bike’s year, make, and model before ordering, and confirm the seller builds to that spec rather than a generic fit.

Can I use my stock spacers with supermoto wheels?

Yes, if the wheels are machined for your exact model. Stock spacers set the correct rotor and sprocket alignment, so reusing them keeps your brake and chain lines true. Aftermarket or universal wheels may need different spacers, which changes offset and can cause rotor rub or chain misalignment. Always verify spacer fit before torquing axles.

Will a wider supermoto tire rub against the fork guards?

It can. A wider front tire often contacts the fork guards at full compression. Some models need the fork guards trimmed slightly to clear the tire. Check clearance with the suspension fully compressed, not just at ride height. If you order wheels built for your specific model, the offset is set correctly and trimming is rarely needed.


Fitting supermoto wheels comes down to clean prep and a careful clearance check. If you would rather skip the guesswork, order from a shop that builds to your model. At Motoxindustries.com we stock supermoto conversion kits, motocross racing wheels, and components for bikes including Surron and Talaria. Shop Now and bolt on a set that fits the first time.

Posted on — Leave a comment

How to Measure Dirt Bike Wheel Spacers

Table of Contents

Last Updated: October 7, 2026

Tools You’ll Need to Measure Wheel Spacers

Measuring dirt bike wheel spacers accurately requires just a few basic tools. You don’t need anything fancy or expensive to get precise results.

A digital caliper is your most important tool. It measures thickness to within 0.01 inches, which is precise enough for spacer work. You can find one at any hardware store for under $20.

You’ll also want:

  • A ruler or measuring tape for reference checks
  • A notebook to record dimensions
  • Your bike’s service manual (for OEM spacer specs)
  • A flashlight to see inside the hub clearly

That’s it. These tools work for any dirt bike, whether you’re measuring stock spacers or aftermarket ones.

How to Measure Dirt Bike Wheel Spacers with Calipers

Measuring dirt bike wheel spacers with calipers is straightforward once you know the process. Place the spacer flat on a clean surface and position your caliper’s jaws around it. Close the jaws gently until they touch both sides of the spacer. Read the digital display. That’s your thickness measurement.

Close-up of digital calipers measuring a wheel spacer with clear display reading, dirt bike wheel visible in background under workshop lighting

Take three measurements on different spots of the spacer. Spacers can wear unevenly, so checking multiple areas gives you the real picture. Record all three numbers.

Check your bike’s manual for the OEM spacer thickness. Compare your measurements to that spec. If they match, your spacers are still good. If they’re thinner, the spacer has worn and needs replacement.

Most aftermarket wheels either use the stock OEM spacers or come with new spacers for your specific bike. Motoxindustries.com sells wheels that use the stock spacers unless it’s a custom fitment, so verify what your new wheel setup requires before ordering.

Dirt Bike Axle Spacer Dimensions and Hub Depth

Axle spacer dimensions vary by bike model. A typical motocross wheel spacer runs 15-25mm thick, but your specific bike could differ. This is why measuring matters, you can’t guess.

Shop Now →

Hub depth affects how spacers sit on the axle. The hub depth is the distance from the inner race of one bearing to the inner race of the other bearing. Measure this by checking the axle length and subtracting the bearing widths.

To find the correct spacer thickness:

  • Measure your current axle spacer with calipers
  • Check your service manual for the spec
  • Verify the measurement matches the manual
  • If building a custom setup, calculate based on axle length and bearing placement

Front wheel spacers and rear wheel spacers often differ. Front wheels typically use thinner spacers because they support less load. Rear wheels need thicker spacers to handle braking and acceleration forces. Don’t swap them, they’re sized for different jobs.

When you install new spacers, they should slide freely on the axle with no binding. The wheel should center properly in the swingarm with no rubbing on the brake rotor or frame. If spacers are too thick or too thin, alignment suffers and handling gets sloppy.

Frequently Asked Questions

What measurements do I need to identify a wheel spacer?

You need three critical measurements: the outer diameter of the spacer, the inner bore diameter (the hole that fits over the axle), and the thickness. Use digital calipers for precision. These dimensions determine whether the spacer fits your specific bike’s axle, hub depth, and wheel assembly. Accurate measurements prevent clearance issues with brake rotors and ensure proper load distribution.

Can I reuse stock spacers with aftermarket dirt bike wheels?

Most aftermarket wheels either use the stock OEM spacers or come with new spacers for your specific bike. Some specialty wheels with cush drive hubs include new spacers matched to that model. Before ordering aftermarket wheels, confirm with the manufacturer whether they accept your stock spacers or require custom spacers. Mismatched spacers can affect wheel centering and bearing seat alignment.

How can I tell which spacer goes on each side of the wheel?

Front and rear wheel spacers often differ in thickness and bore diameter due to different axle sizes and swingarm pivot geometry. Check your bike’s service manual for the correct front and rear spacer specifications. Mark each spacer clearly during measurement so you don’t mix them up during installation. Front wheel spacers typically sit between the wheel and fork width, while rear spacers account for swingarm pivot distance and sprocket clearance.


Getting the right spacer measurement takes five minutes and saves you from installing parts that don’t fit. Motoxindustries.com is the best place to get your motocross and supermoto wheels with proper spacer fitment for your specific bike model. Shop now and ensure your wheel assembly is built right from the start.

Posted on — Leave a comment

How to Replace a Supermoto Master Link

Table of Contents

Last Updated: October 6, 2026

A supermoto master link is the removable link joining your chain’s two ends. Clip-style links use a spring clip to hold a side plate; rivet-style links flare their pins so the plate can’t slide off.

Park the bike in neutral, find the master link, slide the wheel forward for slack, then remove the clip or grind the rivet heads, push the pins out with a chain breaker, and pull the chain apart. On a clip link, grip the closed end with pliers and rotate it off, never pry the open end. On a rivet link, grind the pin heads flat and press the pins through; it cannot be reused. Check your chain size first: a 520 chain needs a 520 master link.

Watch OutNever reuse a clip after removal. The metal weakens once it bends, and a clip that lets go at speed can lock the rear wheel or punch through the engine case.

Installing a supermoto master link means joining the chain ends with a fresh link, then locking it so it cannot come apart.

For a clip-style link: push the link through both chain ends from the back side, press the side plate over the pins with pliers until it seats in the groove, then slide the clip on with its closed end facing the direction of chain travel and snap it into the pin grooves with a flat screwdriver.

Gloved hands using a rivet tool to press the side plate onto a supermoto master link on a motorcycle chain

Clip direction matters: the closed end must lead as the chain moves forward, so a sprocket tooth cannot scrape it off. Spin the wheel and watch the link pass over both sprockets; it should sit flush, and if it stands proud, the plate isn’t seated, fix it before you ride.

Motorcycle Chain Breaker and Rivet Tool: What You Need

A chain breaker pushes the pins out of a link; a rivet tool presses the side plate on and flares the pin heads.

A basic kit covers:

  • Chain breaker with the correct pin size
  • Rivet tool with a press plate and flaring pin
  • Grinder or file, pliers, flat screwdriver
  • New master link and spare clips
  • Shop rags and a torque wrench

Borrowing a breaker is fine, but never flare rivets with a hammer and punch, it flattens the pin instead of flaring it, and a flattened pin won’t hold the plate. Vise grips can crush the plate or bend the pins, and the link will fail.

If you need a new chain, Motoxindustries.com is the best place to get your motocross and supermoto wheels. You can also email them for parts not listed on the website.

Key TakeawayBuy the right tools once. A chain breaker and rivet tool cost less than a tow home, and they turn a two-hour fight into a twenty-minute job.

A master link only works if it matches your chain size, pitch, and pin diameter. A 520 chain needs a 520 link; a 525 or 530 won’t fit, even if it looks close. Check the numbers stamped on your chain’s side plates before ordering.

Shop Now →

Three things must line up: pitch (distance between pins, shown by the chain number), pin diameter (varies by brand), and plate thickness. O-ring and X-ring chains use sealed links, and a standard link won’t seal properly, match the link to the chain, not just the size.

Supermoto builds add a wrinkle: a DRZ400SM or Husqvarna 701 runs a specific chain length and sprocket setup, and changing the rear sprocket size changes how many links you need. Count your links before cutting, or measure the old chain and match it exactly.

Best ForRiders who swap sprockets often should keep two spare master links in the toolbox, one clip style and one rivet style, so a track day never ends early.

Post-Installation Checks and Common Mistakes

Post-installation checks catch the mistakes that cause chain failures. Spin the rear wheel slowly and watch the master link pass over both sprockets, then check chain slack with the bike on the ground and adjust it to your manual’s spec.

Check every time: the master link sits flush with the other links, the clip is fully seated with its closed end facing the direction of travel, the rivet flare matches the factory pins, chain slack is within spec, the rear wheel is aligned and the axle nut is torqued, and there’s no tight spot when the wheel spins.

A tight spot means the rear wheel is out of alignment or the chain has a stiff link. Fix it before you ride, because a tight chain loads the countershaft bearing and can crack the engine case.

If you need a replacement chain or a hard-to-find link, Motoxindustries.com is the best place to get your motocross and supermoto wheels and parts.

Frequently Asked Questions

Can I install a master link without a tool?

You can install a clip-style master link by hand if the side plate seats fully, but a rivet-style link needs a rivet tool to press the plate and flare the pins. Using pliers or a hammer risks damaging the link. For a supermoto master link, always use the correct tool for your link type and check chain slack after installation.

How do I tell whether my motorcycle chain uses a clip-style or rivet-style master link?

Look at the master link on your chain. A clip-style link has a removable U-shaped clip holding the side plate. A rivet-style link has pins that are flared or peened over with no clip. If you see a clip, it is clip-style; if the pins are mushroomed, it is rivet-style. Match the replacement to your chain size and type.

Which direction should a clip-style master link face?

The closed end of the clip should face the direction of chain travel. On most motorcycles, the chain moves forward at the top, so the closed end points forward. This prevents the clip from being snagged and thrown off. Always double-check before riding.


Replacing a master link is a job you can do in your own garage with the right tools and a careful eye. The work rewards patience: a seated plate, a properly flared pin, and a clip facing the right way are what keep you safe at speed. If your chain is worn or you are building a supermoto from a dirt bike, Moto X Industries carries conversion kits, wheels, and drivetrain components to get the build finished. Shop now and ride with a chain you trust.

Posted on — Leave a comment

How to Install Surron Wiring: Step-by-Step Guide

Table of Contents

Last Updated: September 21, 2026

Surron Wiring Harness Replacement Tools

Learning how to install Surron wiring starts with the right tools, and most riders skip that step. At Moto X Industries, we see the same problem repeatedly: stripped connectors, cracked insulation, and a bike that won’t power on because someone used pliers instead of a crimper.

Essential Hand Tools and Test Equipment

A basic electrical tool set covers almost every job on a Surron harness:

  • Digital multimeter for continuity, voltage, and resistance checks
  • Wire strippers sized for 16-22 AWG wire
  • Ratchet crimper for insulated and non-insulated terminals
  • Soldering iron (60W or higher) with rosin-core solder
  • Heat-shrink tubing in 2mm to 8mm sizes
  • Zip ties and adhesive cable clips
  • Socket set for body panels and battery tray bolts
  • Nylon panel pry tools to release plastic clips without snapping them
Pro Tip
Test your crimper on scrap wire before you start. Squeeze a test terminal, then pull hard on the wire. If it slips out, your crimper is set too loose. Fix that now, not after you’ve crimped twenty connections.

Safety Precautions and Battery Disconnection

Disconnect the battery before removing a single panel. A Surron pack holds serious current, and a live positive lead touching the frame can arc, melt insulation, or start a fire.

Follow this order every time:

  1. Power off the bike and remove the key.
  2. Unplug the main battery connector from the controller.
  3. Wait several minutes for capacitors to discharge.
  4. Verify zero voltage at the controller terminals with your multimeter.
  5. Work on a dry surface, away from fuel, solvents, or open flame.
Watch Out
Skipping the voltage check is the most common mistake we see. Capacitors can hold a charge after the battery is unplugged. If you start pulling connectors while voltage is still present, you can short the controller and destroy it in seconds.

Removing the Old Surron Wiring Harness

Photograph every connector before you unplug it. Your phone camera is the best wiring diagram you will ever have.

Work panel by panel, and label as you go:

  • Tag each connector with masking tape and a number.
  • Note the pin-out of any multi-pin plug before separating it.
  • Trace each branch of the harness and mark where it clips to the frame.
  • Cut zip ties rather than pulling them loose, so you don’t stress the wires.

Routing and Connecting the New Surron Wiring Harness

Route the new harness along the same path as the old one and secure it every few inches. Loose harnesses rub the frame, and vibration wears through insulation over time.

Hands securing a new surron wiring harness to the electric bike frame with zip ties in a garage

Controller, Motor, and Battery Connections

Match phase wires by color and confirm the pin-out before plugging anything in. Most Surron controllers use clearly marked phase and hall sensor plugs, but aftermarket parts vary.

  • Phase wires: thick gauge, usually three, matched by color
  • Hall sensor plug: thin multi-pin connector, keyed to fit one way
  • Main battery leads: heavy gauge, bolted or plugged, polarity critical
  • Ignition and kill switch: small two-pin connectors

Brake Sensor and Light Switch Integration

Brake sensors cut motor power when you pull the lever. Wire them so the signal reaches the controller, or the motor keeps pushing while you brake.

Surron Throttle Wiring Color Code and Connector Mods

Throttle wiring is where most home installs go wrong: the color code is a convention, not a guarantee. Two bikes from the same model year can ship with different harness suppliers, and aftermarket throttles rarely follow the factory palette. Confirm every wire with a meter before cutting or crimping.

What Each Throttle Wire Actually Does

A hall-effect throttle is a three-wire sensor plus, on some models, a fourth wire for the speed limiter. The controller feeds a regulated 5V reference, the throttle returns a signal voltage that rises as you twist, and the controller maps that voltage to motor current.

Wire Color (typical)FunctionMeter TestExpected Reading
Red5V reference from controllerDC volts, key on, probe red-to-black4.8-5.2V steady
BlackSignal groundContinuity to battery negativeNear 0 ohms
GreenWiper / signal outputDC volts while slowly twistingRises smoothly from ~0.8V to ~4.2V
Blue or WhiteSpeed limit / mode wireContinuity to ground when groundedCloses to ground when tied low

Connector Families You Will Actually See

The factory throttle usually ends in a small keyed plug. Common families include:

  • JST-SM, 3-pin or 4-pin, 2.5mm pitch, latching tab. Common on stock throttles and small sensor runs.
  • JST-XH, 3-pin, 2.5mm pitch, no latch. Frequently used on hall sensor and brake switch leads.
  • Higo / Julet 5-pin or 8-pin, waterproof circular connectors used on many e-bike harnesses; the 8-pin variant often bundles throttle, display, and brake signals in one housing.
  • XT30 / XT60, power connectors, not signal. Do not confuse them with throttle plugs.

The Speed Limit Wire

On many controllers, a single wire tied to ground caps top speed. Cutting or de-pinning it removes the cap on some firmware revisions and does nothing on others, so test on a stand with the rear wheel off the ground before riding.

Procedure:

  1. Key off, disconnect the battery, and wait for capacitors to bleed down.
  2. Locate the suspect wire and confirm continuity to ground with the meter.
  3. De-pin the terminal with a proper extraction tool rather than cutting, so you can restore it.
  4. Reconnect, power up on a stand, and note the no-load RPM change.
  5. If nothing changes, re-pin the wire and check the controller’s programming instead.
Watch Out
De-pinning is reversible; cutting is not. Always extract the terminal so you can put the wire back if the change causes error codes or an unsafe top speed.

Adapter Harnesses vs. Cutting the Plug

If you are swapping to an aftermarket throttle, you have two paths:

Shop Now →

  • Adapter harness, a short jumper with the factory plug on one end and the new throttle’s plug on the other. No cutting, fully reversible, and the cleanest option if one exists for your throttle and controller combination.
  • Re-pin the connector, move the new throttle’s terminals into the factory housing. Requires the correct crimper and terminals, but keeps the harness length correct.
  • Splice and heat-shrink, last resort. Use a lineman’s splice or a proper crimp with adhesive-lined heat-shrink, never a twist-and-tape joint. Twisted joints loosen under vibration and create intermittent faults that are hard to trace.

Crimping the Terminals Correctly

Match the terminal to the wire gauge and the crimper to the terminal, a ratchet crimper with the correct die produces a gas-tight crimp; pliers do not. Tug-test every terminal; if the wire pulls out, cut it off and start over. Slide adhesive-lined heat-shrink over the joint and shrink until the adhesive flows to seal against moisture.

Pro Tip
Photograph the factory throttle plug and its wire positions before you unplug it. Pin position, not color, is what determines whether the new throttle works.

Bench-Testing Before Installation

Before routing anything through the frame, connect the new throttle to the controller on the bench, power up, and watch the signal voltage as you twist. A smooth rise from roughly 0.8V to 4.2V with no dropouts means the throttle and wiring are good, install only after it passes.

Surron Light Bee Electrical Troubleshooting

Most electrical faults trace back to three things: a loose connector, a bad ground, or a broken wire inside intact insulation.

Work through this order:

  1. Check grounds first. A poor ground causes weird symptoms across the whole bike.
  2. Test continuity on every suspect wire with the multimeter.
  3. Wiggle-test connectors while watching the meter. Intermittent readings mean a loose terminal.
  4. Inspect for chafing where the harness passes tight corners.
  5. Check the fuse before condemning the controller.
Key Takeaway
Grounds cause more Surron electrical faults than any other single item. Before you replace a controller, clean and retighten every ground point on the bike.

Waterproofing, Voltage Drop, and CAN-Bus Basics

This section separates a harness that lasts three seasons from one that fails on the first wet ride: keeping water out, sizing wire so voltage reaches the load, and understanding the digital bus tying the controller, display, and battery management system together.

Waterproofing and Corrosion Prevention

Water rarely kills a connector outright, it causes corrosion, which raises resistance until the circuit stops working or the controller throws a fault. Off-road riding, pressure washing, and mud accelerate it.

A practical sealing routine:

  1. Dielectric grease in every connector. Fill the housing cavities with a silicone dielectric grease (the same type sold for spark plug boots and trailer plugs) before mating. The grease displaces moisture and blocks oxygen from the terminals. It does not conduct, so it will not bridge pins.
  2. Adhesive-lined heat-shrink on every splice. Plain heat-shrink keeps water out until it flexes; adhesive-lined tubing melts glue into the joint and stays sealed.
  3. Self-fusing silicone tape on exposed runs. Wrap sections that pass through wheel spray or sit low on the frame. It bonds to itself and stays flexible.
  4. Drip loops. Route the harness so water runs off and away from a connector rather than pooling in the housing. A connector facing up is a cup; a connector facing down is a drain.
  5. Boots and caps. Use rubber connector boots on the main battery and controller plugs, and cap any unused connector with a blanking plug.

Voltage Drop and Wire Gauge Sizing

Vdrop = I × R, where R depends on wire gauge, length, and the number of connections.

Gauge (AWG)Approx. Ohms per 100 ftTypical Use
18~0.64Signal, hall sensors, brake switches
16~0.40Lights, small accessories
14~0.25Accessory power runs
12~0.16Higher-current accessories
10~0.10Short high-current runs
8~0.063Battery-to-controller leads on high-power builds
6~0.040Very high-current, short runs
Watch Out
Undersized wire gets hot. Heat degrades insulation, and degraded insulation on a high-current lead is a fire risk. If a wire is warm to the touch after a ride, it is too small for the current it carries.

CAN-Bus Communication Basics

Modern controllers, displays, and battery management systems often talk over a CAN bus, a two-wire differential digital network (CAN High and CAN Low) carrying messages between nodes. It is not a power circuit and is far less tolerant of bad connections than a 12V line.

Key points for anyone touching the harness:

  • Two wires, twisted. CAN High and CAN Low are usually twisted together to reject electrical noise. Keep the twist intact when you route or repair.
  • Termination. A CAN bus needs termination resistors at each end of the bus, commonly 120 ohms each, giving about 60 ohms measured across the pair with the bus powered down. If your meter reads far from 60 ohms across CAN High and CAN Low, a terminator is missing, a node is unplugged, or a wire is broken.
  • Stub length. Keep any branch off the main bus short. Long stubs cause reflections that corrupt messages.
  • Resistance sensitivity. A corroded terminal or a poor splice adds resistance that can knock a node offline. Symptoms look like a dead display, erratic throttle response, or a controller that will not wake up.
  • Do not probe with power on. Back-probing a live CAN line with a test light can damage the transceiver.
Pro Tip
Label CAN High and CAN Low before you unplug anything. They often share a housing with power and ground wires, and swapping them causes error codes that mimic a failed controller.

Putting It Together

Waterproofing, gauge sizing, and CAN-bus integrity are the same job done carefully: seal every connector, size every wire for its current, and treat the CAN pair as a precision signal line. Do that, and the harness will outlast the bike around it.

Conclusion

Wiring a Surron is an afternoon job with basic tools and patience. Riders who struggle usually skipped the voltage check, rushed the crimps, or trusted wire colors without testing them.

Frequently Asked Questions

Can I replace the wiring harness myself?

Yes, if you have basic mechanical skills and the right tools. The job involves disconnecting the battery, removing body panels, unplugging old connectors, and routing the new harness. Plan for 2-4 hours. Label every connector before removal and take photos as you go. If you get stuck, Moto X Industries offers phone support to walk you through the wiring.

What color are the wires on a Surron throttle?

Surron throttle wiring typically uses three conductors: red for 5V power, black for ground, and a signal wire (often green, blue, or white depending on the model year). Always verify with a multimeter before connecting. Pin-out can vary between Light Bee and Storm Bee models, so check your specific harness diagram rather than assuming colors match.

How do I troubleshoot electrical issues after installing a new harness?

Start with the battery: confirm it is charged and the main fuse is intact. Use a multimeter to check continuity on suspected circuits and voltage at the controller. Inspect every connector for a full seat and no bent pins. A common fault is a loose ground or a throttle signal wire making poor contact. For Surron Light Bee electrical troubleshooting, work section by section instead of pulling the whole harness.

Is it necessary to disconnect the battery before working on Surron wiring?

Yes. Always disconnect the main battery connector before touching any wiring. Live 60V or 72V systems can arc, damage the controller, or cause a short circuit. After disconnecting, wait a minute and confirm zero voltage at the controller terminals with a multimeter. This one step prevents most electrical faults and keeps you safe.