Table of Contents
- How to Install Braided Brake Lines on a Dirt Bike: What You Need First
- Braided Brake Lines vs Rubber Brake Lines: What Changes on a Dirt Bike
- Step 1: Choosing a Compatible Braided Replacement Hose
- Dirt Bike Brake Line Routing: Planning the Path Before You Remove Anything
- Step 2: Removing the Old Line, Clips, and Fasteners
- Step 3: Installing the Replacement Line and Fittings
- Step 4: How to Bleed Dirt Bike Brakes and Check for Leaks
- Final Checks, Test Ride, and When to See a Mechanic
- Frequently Asked Questions
Last Updated: October 13, 2026
How to Install Braided Brake Lines on a Dirt Bike: What You Need First
Knowing how to install braided brake lines on a dirt bike starts with the right parts and tools on your bench. At Supermoto wheels and tires, we provide a comprehensive selection of high-performance parts and accessories for supermoto and motocross bikes.
Gather everything before you touch the bike, a missing banjo bolt mid-job means a bike stuck on the stand.
Tools and Materials for the Job
You do not need a full shop to swap a brake line. You need the right hand tools and a clean workspace.
- Flare nut wrenches in the sizes your banjo bolts use
- Socket set and ratchet for the caliper and master cylinder bolts
- Pliers for hose clips and retaining fasteners
Check your service manual for the fluid type your bike calls for. Mixing fluid types can damage seals over time.
Braided Brake Lines vs Rubber Brake Lines: What Changes on a Dirt Bike
A braided brake line flexes less than a rubber hose, so the lever feels firmer and more consistent. Rubber lines expand under pressure, eating braking force, and that worsens with age.
On a dirt bike, the difference shows up in two places:
- Lever feel: A braided line gives a more direct, predictable pull.
- Durability: The stainless braid resists abrasion from roost, branches, and mud better than bare rubber.
The trade-off is cost and care: braided lines cost more, and the braid can fray against a sharp edge. Route them carefully and you get a long service life.
Step 1: Choosing a Compatible Braided Replacement Hose
Fitment is where most brake line projects go wrong. A hose that is too short will not reach at full suspension travel. One that is too long can snag on the fork or tire. If you order a brake line for your specific bike and model they will be a direct fit without modifications.
Hose Length, Banjo Fittings, and Bolt Compatibility
Match four things before you order: hose length, banjo fitting angle, banjo bolt thread, and banjo bolt length.
Spec | What to Check | Why It Matters |
|---|---|---|
Hose length | Compare to your stock line, add for travel | Too short = no reach; too long = snags |
Banjo angle | Match the caliper and master cylinder entry | Wrong angle kinks the line |
Bolt thread | Match your caliper and master cylinder threads | Wrong thread will not seal |
Bolt length | Match banjo fitting thickness | Short bolt = weak thread engagement |
Measure your stock line at full extension and full compression, then buy a hose that covers both extremes with a little slack.
Dirt Bike Brake Line Routing: Planning the Path Before You Remove Anything
Dirt bike brake line routing should follow the factory path as closely as possible, but that path is only a starting point. A dirt bike’s fork compresses through a longer stroke than a street bike’s and the bars swing over a wider arc, so the line must stay clear through the entire range of motion, not just at ride height.
Key routing points to trace:
- The path from the master cylinder down the fork leg
- Any hose guides or clips that hold the line, and their exact positions
- Clearance around the fork guard, triple clamp, and number plate
Checking Clearance Through Full Suspension Travel
This is the step most guides skip, and the one that matters most: a line that looks fine on the stand can pull tight or rub once the fork compresses.
- Put the bike on a stand so the front wheel is off the ground.
- Remove the fork guard or any cover that hides the line path.
- Compress the fork slowly by hand, or have a helper push down on the bars, through its full stroke and watch the line the whole way.
- Turn the bars fully left, then fully right, and repeat the compression check at each extreme.
- Look for the line pulling taut, kinking at a fitting, or contacting the tire, fork leg, or rotor.
A line that goes tight at full compression will eventually fail at the fitting or crimp, and one that rubs the tire or fork leg will wear through the stainless braid over time.
Off-Road Durability: Routing Away From Dirt, Mud, and Moving Parts
A dirt bike brake line lives in a harsher environment than a street bike’s: roost, mud, branches, and rocks all throw debris at it, and the stainless braid can fray if it rubs a sharp edge or moving part.
Route the line so it:
- Stays behind the fork guard where the guard covers it, not in front where roost hits it directly
- Avoids contact with the tire at full lock and full compression
- Clears the brake rotor and caliper body with room to spare
After muddy or rocky rides, wipe the line down and inspect the braid for fraying, flattening, or shiny wear spots. A fraying braid needs replacing, not re-routing.
Step 2: Removing the Old Line, Clips, and Fasteners
Removing the old line is straightforward if you protect the bike first. Brake fluid strips paint and damages plastic.
- Cover painted surfaces and the frame near the master cylinder and caliper with rags or plastic.
- Loosen the banjo bolts at the master cylinder and caliper, but do not remove them yet.
- Remove the hose clips and any fasteners holding the line to the fork or frame.
- Pull the old line free and let the fluid drain into your drip tray.
- Cap the open ports so dirt and debris stay out.
Keep the old line until the new one is installed and bled, in case you need to compare routing or length.
Step 3: Installing the Replacement Line and Fittings
Installing the new line is the reverse of removal, with attention to fitment and sealing. Fit the banjo fittings with fresh sealing washers on both sides.
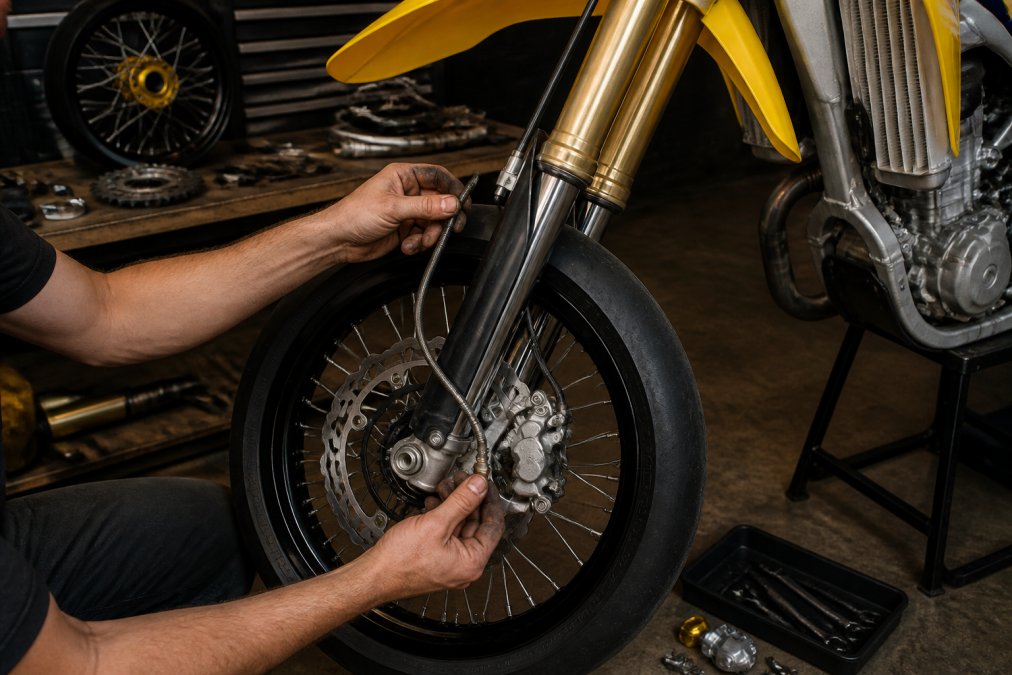
Follow these steps:
- Route the new line along the path you planned, through the hose guides.
- Hand-thread the banjo bolts at the master cylinder and caliper.
- Check the banjo angle lines up with the hose path before tightening.
- Tighten the banjo bolts to your service manual’s torque spec.
- Reinstall the clips and fasteners that hold the line.
- Confirm full thread engagement on every bolt.
Do not overtighten banjo bolts. Too much force can crush the sealing washers or strip the threads.
Step 4: How to Bleed Dirt Bike Brakes and Check for Leaks
Knowing how to bleed dirt bike brakes correctly is the difference between a firm lever and a spongy one: bleeding pushes air out so fluid pressure reaches the caliper.
Picking the Right Brake Fluid
Before you open a bottle, check the reservoir cap or your service manual for the fluid your bike specifies. Most dirt bikes use DOT 4, but some specify DOT 5.1 or a mineral-based fluid, and the wrong choice can damage seals. Do not mix fluid types, flush and refill instead.
A few handling rules that save paint and skin:
- Brake fluid strips paint and damages plastic, so cover painted surfaces and the frame near the master cylinder and caliper before you start.
- Wear gloves and eye protection. Brake fluid is irritating to skin and eyes.
- Use fresh fluid from a sealed container. Fluid absorbs moisture from the air, and old fluid boils at a lower temperature under hard braking.
Bleeding the System
- Fill the reservoir with fresh brake fluid to the upper line.
- Attach a bleed bottle or vacuum bleeder to the bleeder valve on the caliper.
- Pump the brake lever slowly and hold it.
- Open the bleeder valve to release fluid and air.
- Close the valve before releasing the lever, so air cannot be drawn back in.
- Repeat until no air bubbles appear in the fluid.
- Top off the reservoir and cap it.
Keep an eye on the reservoir level as you work. If it runs dry mid-bleed, you pull air back into the master cylinder and start over.
Motorcycle Brake Line Bleeding Tools Worth Having
A vacuum or pneumatic bleeder speeds up the job and pulls air from hard-to-reach spots; a simple bleed bottle works fine if you are patient. A syringe kit pushes fluid up from the caliper, useful when a line is completely dry after a fresh install.
Troubleshooting a Soft Lever, Persistent Air, or a Leak
If the lever still feels spongy after several bleed cycles, the problem is usually one of a few things. Work through them in order:
- Air trapped at a high point. A banjo fitting or a loop in the line can hold a bubble that never reaches the caliper. Crack the banjo bolt at the master cylinder just enough to let fluid weep out, then retighten. Do this with rags in place and the lever held in.
- A loose fitting. Wipe every banjo connection dry, pump the lever, and look for fresh fluid. A leak means a loose fitting or a bad sealing washer. Replace the washer rather than over-tightening the bolt.
- A crushed or doubled sealing washer. Sealing washers are single-use. If you reused one, or if a bolt was overtightened, the washer may not seal. Fit new washers and torque to the service manual spec.
Final Checks, Test Ride, and When to See a Mechanic
Do a full inspection before you ride. Check brake pressure at the lever, look for leaks at every fitting, and confirm the line clears the tire and fork at full travel.
Then take a slow test ride in a safe area, starting at low speed and testing lever feel. Braking should feel firm and consistent, not soft.
Some jobs are worth handing off.
A brake line swap rewards patience. If you are upgrading your dirt bike or building a supermoto, Supermoto wheels and tires carries brake components, conversion kits, and wheels built for riders who push their bikes hard.
Frequently Asked Questions
How do you bleed a dirt bike brake after replacing the brake line?
Fill the master cylinder reservoir, then pump the brake lever or pedal several times and hold it. Open the bleeder valve on the caliper with a wrench, let fluid and air escape, then close it before releasing the lever. Repeat until no bubbles appear and the lever feels firm. A vacuum or pneumatic bleeder speeds this up. Top off the reservoir during the process, and never let it run dry or you will pull more air into the system.
How should a braided brake line be routed on a dirt bike?
Follow the original path as closely as possible, using the factory hose guides and clips. Keep the line away from sharp edges, exhaust heat, and moving suspension parts. Check clearance at full compression and full extension of the fork or shock, since a line that is too tight can stretch or kink. The goal is a smooth curve with no rubbing points, so the line moves naturally through the suspension travel without binding.
Is it worth upgrading to braided brake lines?
For riders who want firmer lever feel and less hose expansion under hard braking, braided stainless steel lines are a worthwhile upgrade. Rubber hoses flex under pressure, which can make the lever feel soft, especially when hot. Braided lines resist that expansion and hold up better against dirt, mud, and UV exposure. If you race, ride aggressively, or have noticed a spongy lever, the change is noticeable. Casual trail riders may find the stock line adequate.
How do you check for leaks after installing a brake line?
Wipe all fittings dry, then squeeze the brake lever or press the pedal firmly and hold it for about a minute. Look for any weeping at the banjo bolts, bleeder valve, and master cylinder. Check the sealing washers and confirm the banjo bolts are tightened to the torque specification in your service manual. If the lever slowly sinks or you see fluid, re-check the fitting, clean the area, and bleed again before riding.