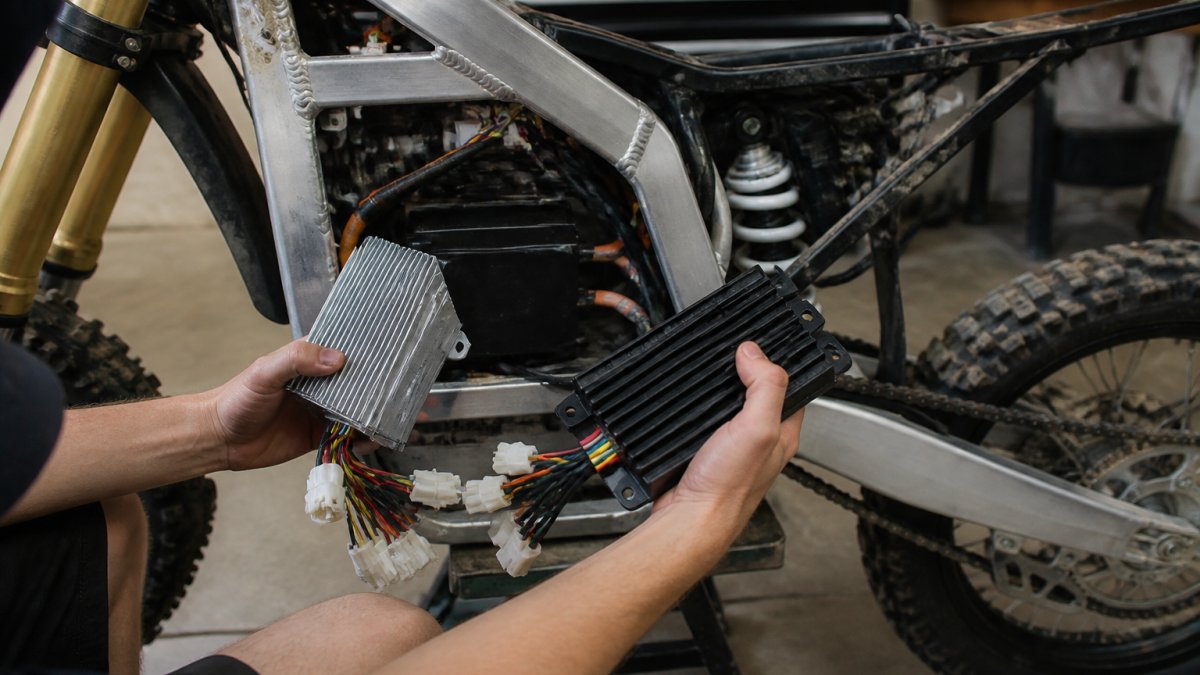
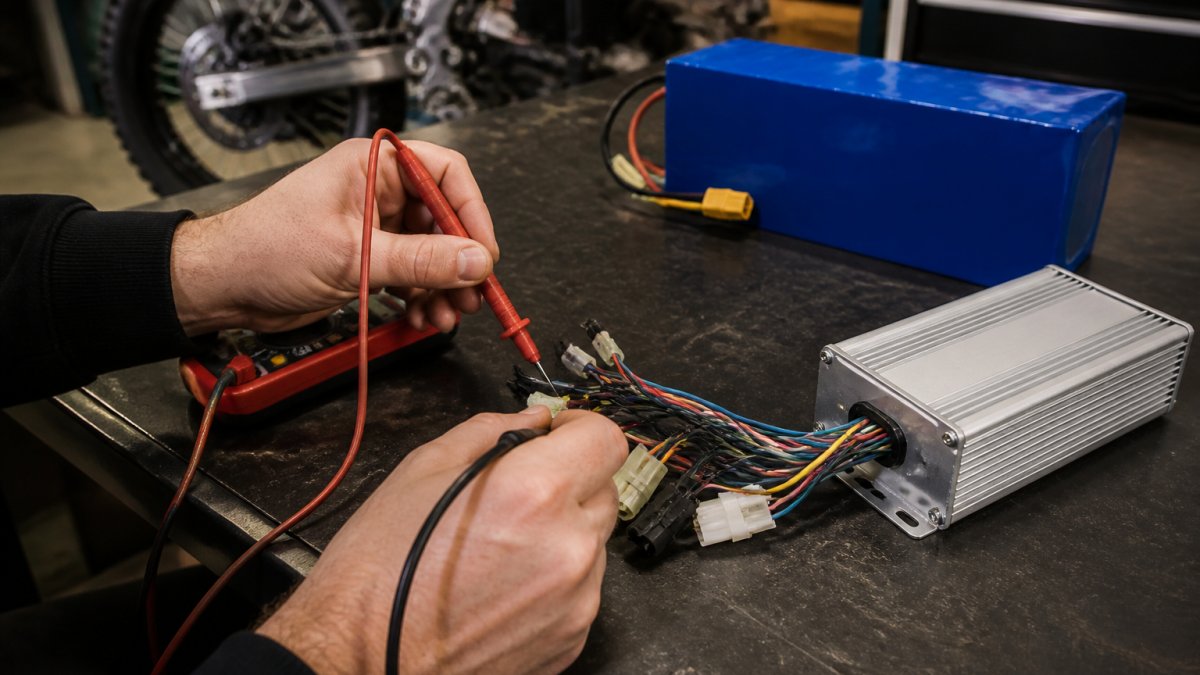
An electric bike controller upgrade is worth it only when your motor, battery, and wiring can handle more current than the stock unit allows. The controller meters power from battery to motor, so changing it changes how the bike feels, and how hard every other part works.
It’s worth it if your battery and motor have headroom and you want tunable throttle response; it’s not if you’re chasing top speed on a stock battery or can’t verify your BMS limits.
E-Bike Controller Compatibility: What Your Hardware Must Handle
Compatibility comes down to four things: voltage, continuous current, connector type, and communication protocol. Miss one and the upgrade won’t run or won’t last.
Match nominal voltage first: a 72V controller won’t run safely on a 60V pack, and a 60V controller will cook on 72V.
Next, check your BMS (battery management system), which caps how many amps your pack can push. A controller pulling 60A continuous on a 40A BMS means voltage sag, thermal throttling, or a mid-ride shutdown.
Then check the harness: phase wires, hall sensors, and the throttle plug must match. Adapters work but add resistance and a failure point.
Watch Out The most common mistake is buying a higher-amp controller before checking the BMS rating. Riders install it, hit the throttle, and the pack sags hard enough to trigger a low-voltage cutoff. The controller is fine. The battery takes the damage.
Before buying, confirm pack voltage matches the controller, find your BMS continuous discharge rating, confirm motor wattage, match phase wire gauge and connectors, verify hall sensor pinout, and check throttle type.
Higher Amp E-Bike Controller: Torque Gains vs. Battery Strain
A higher amp controller gives more torque and faster acceleration, but pulls harder on your battery and motor, and the trade-off shows up in heat.
Wattage is volts times amps: a 72V pack at 50A delivers 3,600W, while 80A asks for 5,760W, and your motor must convert that without melting.
You gain torque off the line, sharper throttle response, and peak power for short bursts. You pay with voltage sag, thermal throttling, shorter range, and more heat in the phase wires and connectors.
Pro Tip If you want more torque without stressing the pack, raise amps in small steps and watch your controller temperature after each ride. A controller that runs warm is fine. One that runs hot to the touch is telling you the motor or BMS is the real bottleneck.
Change
What You Gain
What It Costs
+10A continuous
Noticeable torque bump
Slightly more heat, less range
+20A continuous
Strong acceleration
Real voltage sag risk
+30A or more
Aggressive power
BMS cutoff, motor stress, warranty void
Programmable vs. non-programmable controllers is the other decision. A programmable unit lets you set current limits, throttle curves, and regen; a non-programmable unit is set at the factory. For most riders, programmable is worth it because you can dial power back when you need reliability.
Step-by-Step: How to Install an E-Bike Controller Safely
Safety first. Disconnect the battery and let the controller sit for a few minutes. Capacitors hold a charge.
Disconnect the battery and remove the old controller.
Photograph every connector before unplugging.
Label the phase wires (usually yellow, green, blue).
Match the new controller’s plugs to your harness; use adapters only if you must.
Mount it with airflow around the heat sink.
Reconnect the battery and test the throttle with the wheel off the ground.
Ride gently for 10 minutes and check for heat.
Key Takeaway Never test a new controller at full throttle on the first ride. A gentle break-in ride tells you whether the wiring and BMS are happy before you push hard.
Frequently Asked Questions
Will upgrading my e-bike controller make it faster?
It can increase peak power and torque, but top speed is usually capped by the motor’s RPM limit and legal speed limits. A higher amp e-bike controller pushes more current to the motor, which improves acceleration and hill climbing more than outright speed. If your battery’s discharge rate or BMS can’t supply the extra current, you’ll hit voltage sag and thermal throttling instead of real gains.
How do I know if a new controller is compatible with my e-bike?
Check four things: voltage (must match your battery pack), continuous current rating (must not exceed your BMS and motor limits), connector type (phase wires and hall sensors must match), and PAS/throttle signal type. Mismatched connectors or hall sensor wiring can fry the controller on first power-up. Write down your motor’s wattage, battery voltage, and BMS continuous amp rating before ordering anything.
Can a higher-amp controller damage an e-bike battery or motor?
Yes, if the controller pulls more continuous current than the battery’s BMS or the motor’s phase wires can handle. Overcurrent causes heat buildup, voltage sag, and accelerated cell degradation. Check your battery’s discharge rate and your motor’s rated continuous current before upgrading. If either is lower than the new controller’s output, you’ll need to upgrade those components too, which changes the cost-benefit calculation entirely.
How to Check Motorcycle Chain Slack Before You Adjust Anything
Adjusting motorcycle chain tension starts with one measurement, not a wrench turn. More chains are ruined by over-tightening than neglect.
Chain slack is the up-and-down movement in the lower run, measured midway between the sprockets. Your manual’s range wins.
Put the bike on a stand, rotate the wheel to the tightest spot, push the chain up and down at the midpoint, and compare to spec.
Too tight wears sprockets and counter-shaft bearings; too loose, it can slap the swingarm or jump a tooth.
Watch OutNever check slack with a rider on the bike unless your manual says to. Most dirt bikes and supermotos are measured on a stand at full droop; measuring loaded gives a false reading and a too-tight chain.
Motorcycle Chain Adjustment Tools and the Step-by-Step Process
You need a torque wrench, the right socket for your rear axle nut, a wrench for the adjuster locknuts, and a ruler.
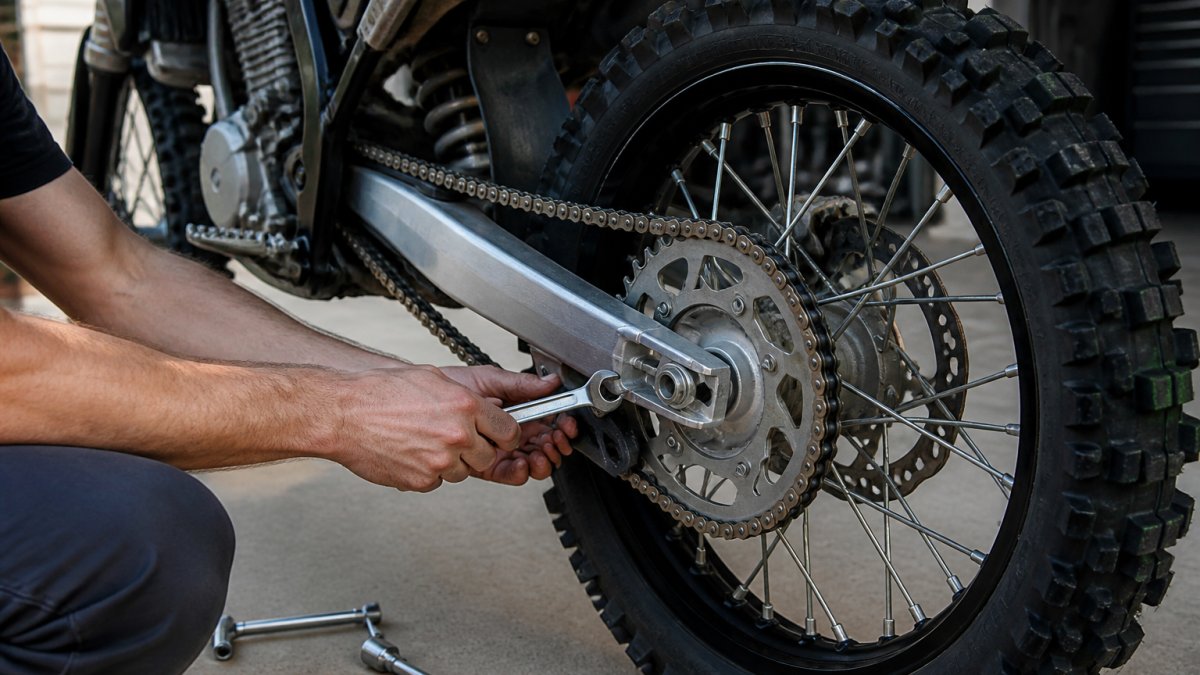
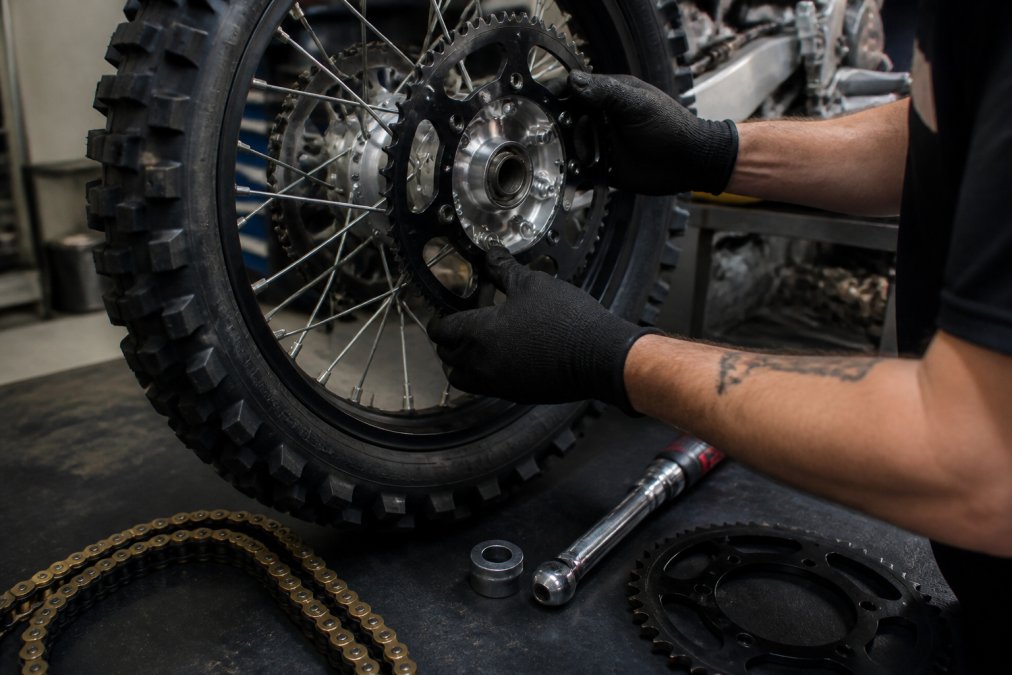
Support the bike on a stand, loosen the rear axle nut (don’t remove it), back off the adjuster locknuts, then turn the adjuster bolts a quarter turn at a time, moving both sides evenly. Recheck slack after each turn, tighten the axle nut to torque spec, and spin the wheel to recheck.
Pro TipMark the adjuster bolt heads with a paint pen first. Counting turns from a marked position beats eyeballing how far the bolt moved.
If your chain has stiff links, kinks, or you have run out of adjuster travel, it is worn out, tightening cannot fix a stretched chain. If you need a new chain, you can get them from Motoxindustries.com.
How to Align Motorcycle Rear Wheel After Adjusting Chain Tension
Wheel alignment is the step most riders skip, and it costs them a rear tire. If the wheel sits crooked, the chain runs at an angle, the sprocket wears unevenly, and the bike tracks sideways under braking.
Use the swingarm alignment marks as a starting point, then confirm with a straight edge or string line.
Check
What to Look For
If It Fails
Axle marks
Both sides on the same mark
Turn one adjuster to match
Straight edge
Rear tire parallel to front
Re-adjust the off side
Chain slack
Within manual spec
Re-measure at the tight spot
Axle torque
At manual spec
Re-torque with a torque wrench
Once alignment is set, spin the wheel and watch the chain from behind. It should run straight and centered on the rear sprocket.
Key TakeawayA correctly adjusted chain has the right slack, a straight rear wheel, and a properly torqued axle nut. Miss one and you will be back under the bike in a week.
Chain tension takes ten minutes when you know the order: support the bike safely, measure at the tight spot, turn the adjusters in small even steps, then check alignment and axle torque. If your chain is at the end of its life, Motoxindustries.com stocks replacement chains and drivetrain parts for motocross and supermoto builds.
Frequently Asked Questions
What is the normal range for chain slack on a motorcycle?
Most dirt bikes and supermotos call for 30 to 50 millimeters of slack, measured at the tightest point on the lower chain run. Your owner’s manual lists the exact spec for your model. Check it with the bike on a stand and the transmission in neutral. If you don’t have the manual, look up the manufacturer specification online before you touch the adjusters.
How often should I adjust my motorcycle chain tension?
Check chain slack every 300 to 500 miles, or after every few rides if you’re on dirt. Chains stretch fastest when new, so check more often during the first 600 miles. Also check after any ride where you hit mud, sand, or lots of hard acceleration. A quick check takes two minutes and prevents sprocket wear.
When should I replace a motorcycle chain instead of adjusting it?
Replace the chain if you find stiff links that won’t flex, kinks that stay bent, or if you can pull the chain more than halfway off the rear sprocket. Also replace it if the adjusters are near the end of their range. A worn chain wears out sprockets fast, so replace chain and sprockets together. If you need a new chain, you can get them from Motoxindustries.com.
Knowing the signs your supermoto sprockets need replacing saves you from a snapped chain on the track. Supermoto sprockets are the toothed wheels that transfer engine power to your rear wheel, and they wear faster on supermoto bikes than on most motorcycles. Here is what to look for.
Motorcycle Sprocket Wear Patterns to Check
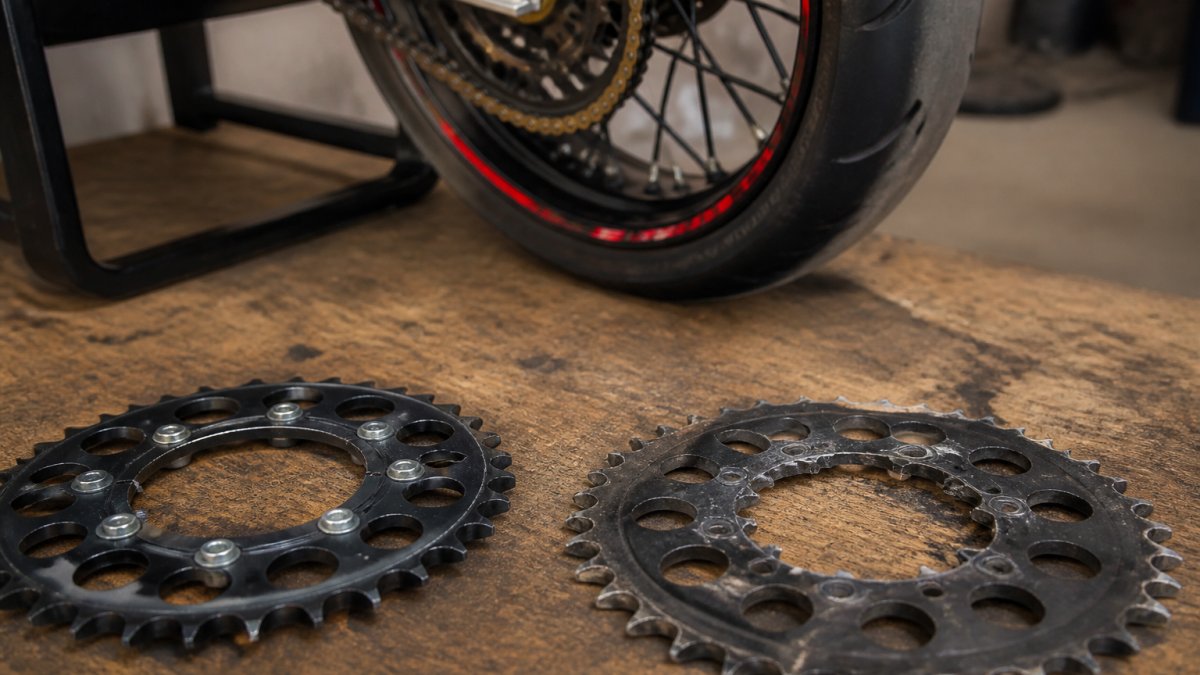
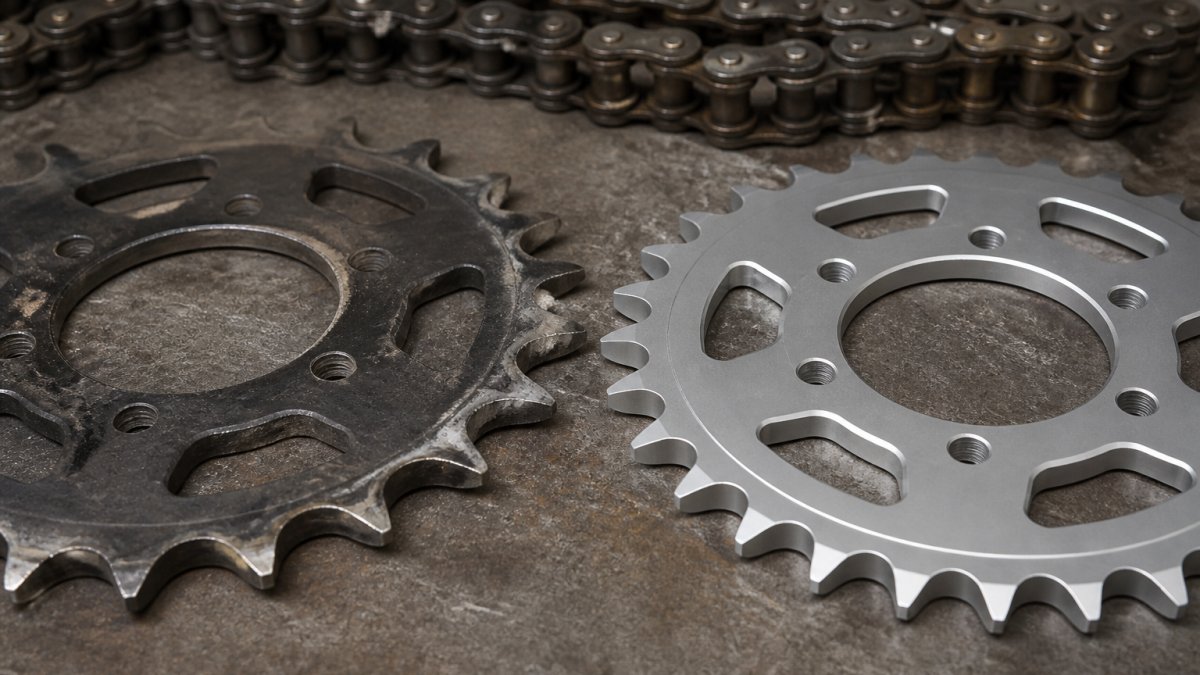
The most obvious sign is the shape of the teeth. A healthy sprocket has flat-topped, even teeth. A worn one has hooked or shark fin teeth that curve forward.
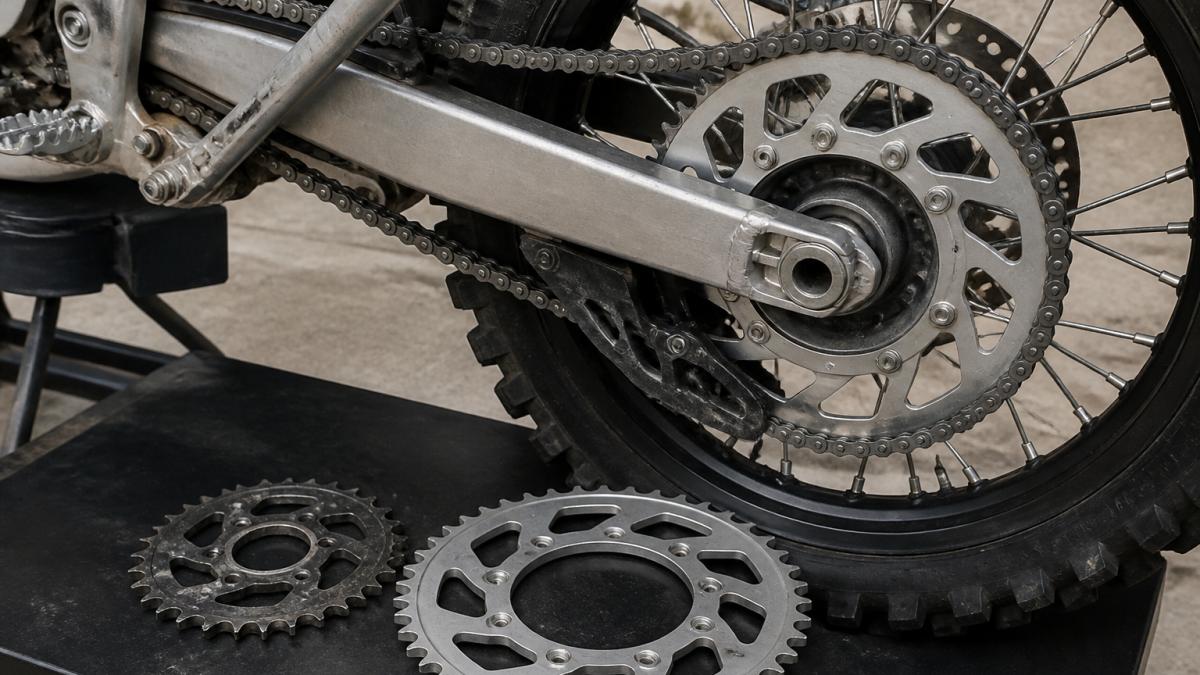
Worn, hooked supermoto sprockets compared to a new sprocket with even teeth on a workshop bench next to a drive chain.
Look for these wear patterns:
Shark fin teeth curving in one direction
Asymmetrical wear on one side of each tooth
Metal shavings around the sprocket
Rounded or missing teeth on the rear sprocket
A worn countershaft sprocket that looks like a saw blade
Check the chain too. Grab it at the back of the rear sprocket and pull it away. If you can see daylight between the chain and the tooth, both parts are done.
When to Replace Motorcycle Chain and Sprockets
Replace the chain and both sprockets together, every time. A new chain on worn sprockets wears out fast. A new sprocket on a stretched chain does the same.
Watch for chain elongation, tight spots, kinked links, and binding. Any of those means it is time. A worn chain guide lets the chain slap the swingarm, which speeds up sprocket wear.
Pro TipSteel sprockets last longer than aluminum ones, but aluminum sprockets are lighter. If you ride track days, steel is the smarter buy.
Swapping sprockets is a straightforward job with the right tools. We at motoxindustries.com have the knowledge and parts to get your sprocket swapped out. Shop now at motoxindustries.com.
Frequently Asked Questions
How do I know if my sprocket needs replacing?
Look at the tooth shape first. New supermoto sprockets have symmetrical, flat-topped teeth. Worn ones develop hooked or shark-fin teeth that curve forward like a wave. Then check chain slack along the rear sprocket: if you can pull the chain more than about half a tooth height off the back edge, the sprocket and chain are done. Kinked links, tight spots, and metal shavings near the countershaft sprocket confirm it is time for a swap.
Can I replace just the sprocket or should I replace the chain too?
Replace them as a set. A worn chain and a new sprocket wear each other out fast because the chain’s stretched pitch no longer matches the sprocket’s tooth profile. The same happens if you fit a new chain to a hooked rear sprocket. Motoxindustries.com carries matched chain and sprocket kits so the drive system wears evenly.
What do bad supermoto sprockets look like?
Bad sprockets show asymmetrical wear: teeth lean to one side, tips curl into a shark fin shape, and the valleys between teeth widen into a U instead of staying rounded. You may also see a polished, shiny tooth profile, missing teeth on aluminum sprockets, and a chain that sits high in the valleys instead of seating fully. Any of these means the sprocket is past its service life and needs replacing.
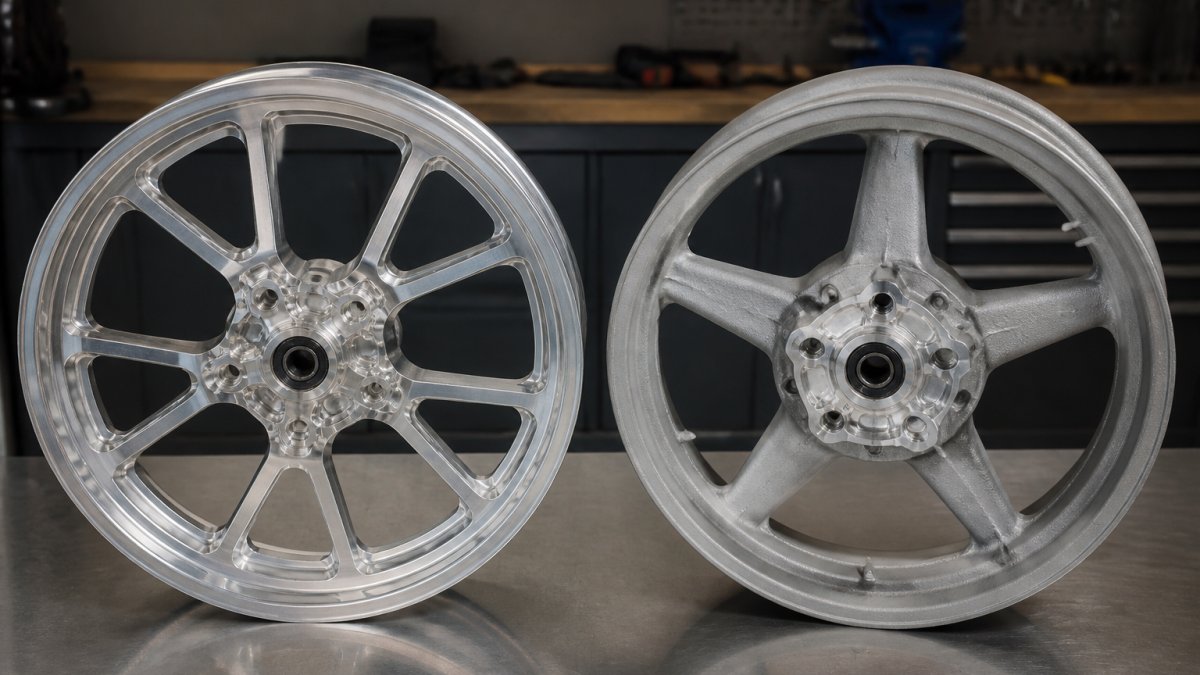
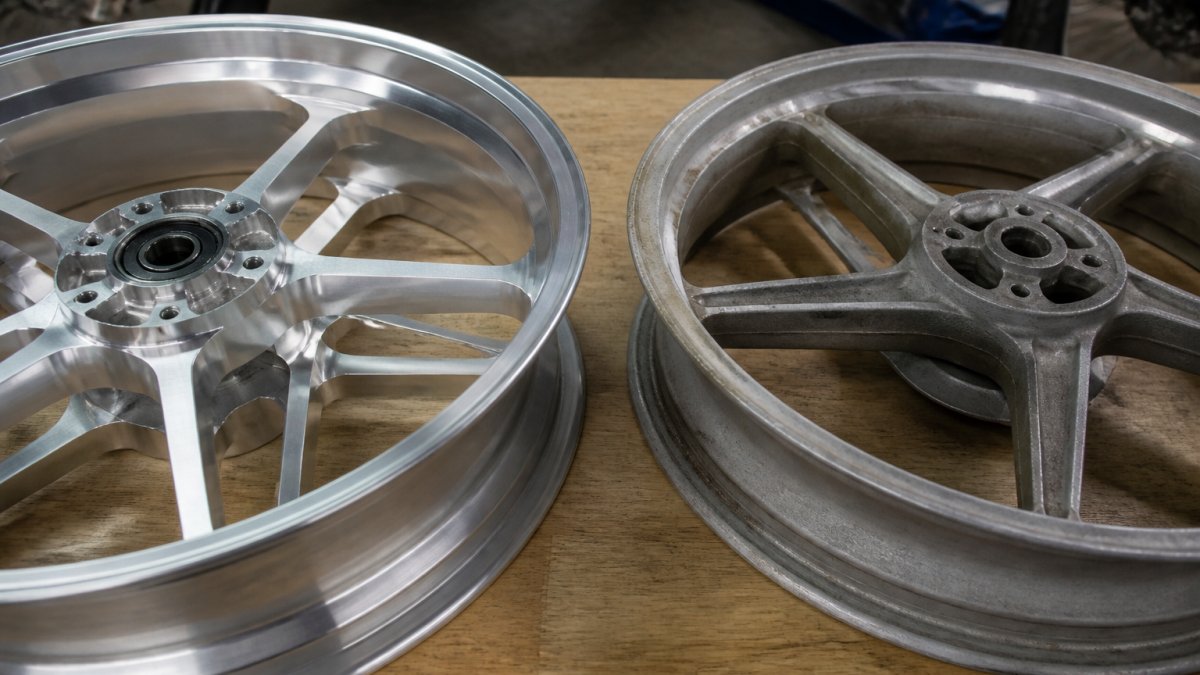
Comparing billet vs cast supermoto wheels comes down to one core split: cast wheels are poured from molten aluminum into a mold, while billet wheels are CNC-machined from a solid block of forged aluminum. That difference in how the metal is formed changes density, strength, weight, and price. This guide breaks down where each type earns its keep, from track-day abuse to daily street miles.
Cast wheels dominate OEM fitments because they’re cheap to mass-produce. Billet wheels exist because racers wanted tighter tolerance control and fewer internal flaws. Both are aluminum. Both can be strong.
Key Takeaway The manufacturing method, not the material, is what separates billet from cast. Aluminum is aluminum; how you shape it decides everything else.
Casting vs Billet Machining: The Manufacturing Split
Casting pours molten aluminum into a mold, letting it cool into shape. It’s fast, inexpensive, and produces complex rim profiles in one shot.
Billet machining starts with a solid billet of forged aluminum. A CNC machine carves the wheel out of that block, removing material until the final shape emerges.
The catch? You’re paying for machine time and wasted material. That’s the whole cost story in a nutshell.
Material Density, Porosity, and Tensile Strength
Material density and structural integrity favor billet, but not as dramatically as marketing suggests. A well-made cast wheel from a reputable manufacturer can hit solid tensile strength numbers.
Alloy composition matters here too. Both processes use aluminum alloys, often with silicon or magnesium added for strength.
What most guides miss: a cheap cast wheel isn’t weak because casting is bad. It’s weak because corners get cut on alloy quality and cooling time.
Supermoto Wheel Weight Comparison: Unsprung Mass and Rotational Inertia
Billet wheels are typically lighter, and that weight sits in the worst possible place: unsprung mass. Every gram at the wheel has to be accelerated, braked, and absorbed by the suspension.
Rotational inertia is the bigger deal for supermoto. Inertia scales with mass times radius squared, so mass removed near the rim (the tire bead seat, the spoke tips, the outer lip) pays off far more than mass removed at the hub.
Factor
Billet Wheels
Cast Wheels
Typical weight
Lighter, especially at the rim
Heavier, mass biased toward hub
Rotational inertia
Lower
Higher
Tolerance control
Tighter (CNC repeatable)
Looser (mold wear, draft angles)
Rim sealing for tubeless
Machined bead seat, easier to seal
As-cast bead seat, sealing varies
Best for
Track, performance builds
Budget, street, OEM replacement
Benefits of Lightweight Wheels for Supermoto Handling
The benefits of lightweight wheels for supermoto show up in three places: acceleration, braking, and direction changes.
Braking improves for the same reason. The caliper has less spinning mass to slow, so stopping distances tighten and brake fade drops on repeated hard laps.
Cornering is where it gets fun. Lower rotational inertia lets the bike flick side to side with less effort, which is exactly what supermoto geometry rewards.
Why Rim Mass Matters More Than Total Wheel Weight
Two wheels can weigh the same on a scale and behave completely differently on the track. What matters is where the mass sits relative to the axle.
This is why comparing spec-sheet weights alone is misleading. Ask where the weight was removed, not just how much. A wheel that’s 1 lb lighter at the rim is worth more to handling than a wheel that’s 2 lb lighter at the hub.
Tubeless vs Tubed: The Hidden Weight and Handling Factor
Tubeless rims hold air without an inner tube, which removes the tube’s rotating mass and lets a punctured tire seal around the object instead of deflating instantly.
Billet rims are typically easier to run tubeless because the bead seat is machined to a consistent profile, so a tubeless tire seals predictably. Cast rims can be run tubeless too, but the as-cast bead seat varies more, and some riders end up relying on a tube or a sealant to hold air.
Pro Tip If you’re chasing lap times, spend your money on wheels before engine work. Reducing rotational inertia helps acceleration, braking, and cornering at once, which no exhaust or tune can match. And if you’re going tubeless, prioritize a rim with a machined bead seat, it’s the difference between a reliable seal and a slow leak you chase all season.
How to Judge Wheel Weight Claims
When you compare wheels, look past the marketing weight number. Ask three questions: Where was the mass removed? Is the wheel rated for tubeless? And does the manufacturer publish a rim weight separately from the assembled weight? A wheel that’s light at the rim, tubeless-ready, and sold with a published rim weight is doing the real work. A wheel that’s light overall but heavy at the lip is just a lighter version of the same problem.
For riders doing a conversion, Moto X Industries stocks specialized supermoto conversion kits and billet-hub wheel sets built for the motocross-to-supermoto transition. The catalog also covers electric bikes like Surron and Talaria, plus a deep inventory of motocross racing wheels and components.
Durability and Impact Resistance: Track Abuse vs Street Miles
Impact resistance is where the argument gets honest.
Fatigue life favors billet for the same reason. A dense, consistent grain structure handles repeated stress cycles better than a porous casting.
Street riders have a different reality. A cast wheel that never sees a track day will likely outlast the bike.
The honest limitation: billet isn’t indestructible. A bad enough hit bends any wheel. Billet just gives you more margin before it cracks.
Cost, Tolerance Control, and Where the Money Goes
Cost is the clearest divider. Cast wheels are cheap because the mold does the work in one pour.
Where does the money actually go? Machine time, tighter tolerance control, better alloy composition, and quality inspection. You’re paying for consistency, not magic.
For a cost-benefit analysis, ask what you’re buying. If you want OEM-replacement reliability at a low price, cast wins.
Watch Out Don’t judge a wheel by price alone. A cheap cast wheel with poor alloy quality can crack under loads a well-made cast wheel handles fine. Ask about the manufacturer’s quality control before you buy on price.
Supermoto Conversion Wheel Fitment: Hub Design, Rim Profile, and Tubeless vs Tubed
Supermoto conversion wheel fitment is where most builds go wrong. You need the right hub spacing, axle diameter, brake rotor mount pattern, and rim width for your specific bike.
Hub design matters more on supermoto than on a dirt-only bike. Billet hubs resist flex under hard braking, which keeps the brake feel consistent when you’re trail-braking into a corner. Cast hubs flex more, and you feel it through the lever.
Rim profile decides tire fit and whether you can run tubeless. Tubeless rims hold air without an inner tube, which reduces weight and lets a punctured tire seal around the object. Tubed rims need an inner tube and are common on older or budget setups. Check whether your chosen tire and rim are tubeless-compatible before you commit.
Supermoto-Specific Geometry and Handling Dynamics
Supermoto geometry rewards quick direction changes and stable braking. A wheel with reduced hub flex and lower rotational inertia plays directly into that.
Wheel rigidity is a balancing act. Too stiff and the wheel skips over bumps; too flexy and it feels vague.
Cornering performance on a supermoto depends on the front and rear working together. A light front wheel sharpens turn-in; a stiff rear hub keeps drive consistent on exit.
Racing vs Street Use: Which Billet or Cast Wheel Fits Your Riding
Racing and track days justify billet. The weight savings, tighter tolerance control, and better fatigue life pay off lap after lap.
Street and casual riding favor cast. You get reliable performance at a lower price, and you won’t notice the weight difference on a commute.
The middle ground is a supermoto conversion build where you want durability and decent handling without a race budget.
For riders doing a conversion, Moto X Industries stocks specialized supermoto conversion kits and billet-hub wheel sets built for the motocross-to-supermoto transition. The catalog also covers electric bikes like Surron and Talaria, plus a deep inventory of motocross racing wheels and components.
Conclusion
Picking between billet and cast supermoto wheels is really a question about how hard you ride and what you’re willing to spend. Billet wins on weight, consistency, and durability; cast wins on price and everyday reliability.
When you’re ready to upgrade, Moto X Industries carries specialized supermoto conversion kits, billet-hub wheel sets, and many parts for electric bikes including Surron and Talaria. Shop now and get the right wheels for your build.
Frequently Asked Questions
What are the primary performance differences between billet and cast supermoto wheels?
Billet wheels are CNC-machined from a solid block of aluminum, which gives them more consistent material density, tighter tolerance control, and a higher strength-to-weight ratio than cast wheels. Cast wheels are made by pouring molten aluminum into a mold, which is faster and cheaper but can leave porosity and variation in density. In practice, billet wheels flex less under cornering and braking loads, while cast wheels are heavier and less predictable at the limit.
How does wheel weight affect supermoto handling?
Wheel weight is unsprung mass, so every ounce counts. Lighter wheels reduce rotational inertia, which means quicker acceleration, shorter braking distances, and faster direction changes. Riders notice it most in flickability through tight chicanes and in how quickly the bike settles after a hard brake. A supermoto wheel weight comparison usually shows billet sets running lighter than comparable cast options, which is one of the main reasons track riders pay more for them.
Are billet wheels more durable than cast wheels for supermoto racing?
For racing, billet wheels generally hold up better. The machining process removes internal voids that can weaken castings, so billet rims resist impact and fatigue better over repeated track sessions. Cast wheels are fine for street use and light track days, but they are more prone to cracking at the bead seat after hard hits. If you race regularly or ride rough street circuits, billet is the safer long-term investment.
Is the cost difference between billet and cast wheels worth the performance gain?
It depends on how you ride. Cast wheels cost less up front and work well for casual street riding and occasional track days. Billet wheels cost more because of the machining time and tighter quality control, but they deliver measurable gains in weight, rigidity, and consistency. If you are chasing lap times or doing a serious supermoto conversion, the performance gain justifies the price. For weekend cruising, cast is often enough.
What should I check for supermoto conversion wheel fitment?
Start with axle diameter, hub width, and brake rotor bolt pattern, since these vary by bike model. Then confirm rim width and offset match your tire choice, and check whether the rim is tubeless or tubed, because that affects tire selection and maintenance. Supermoto conversion wheel fitment also depends on swingarm clearance and fork spacing. Measure your stock wheels first, or check with a specialist who stocks conversion kits for your specific model.
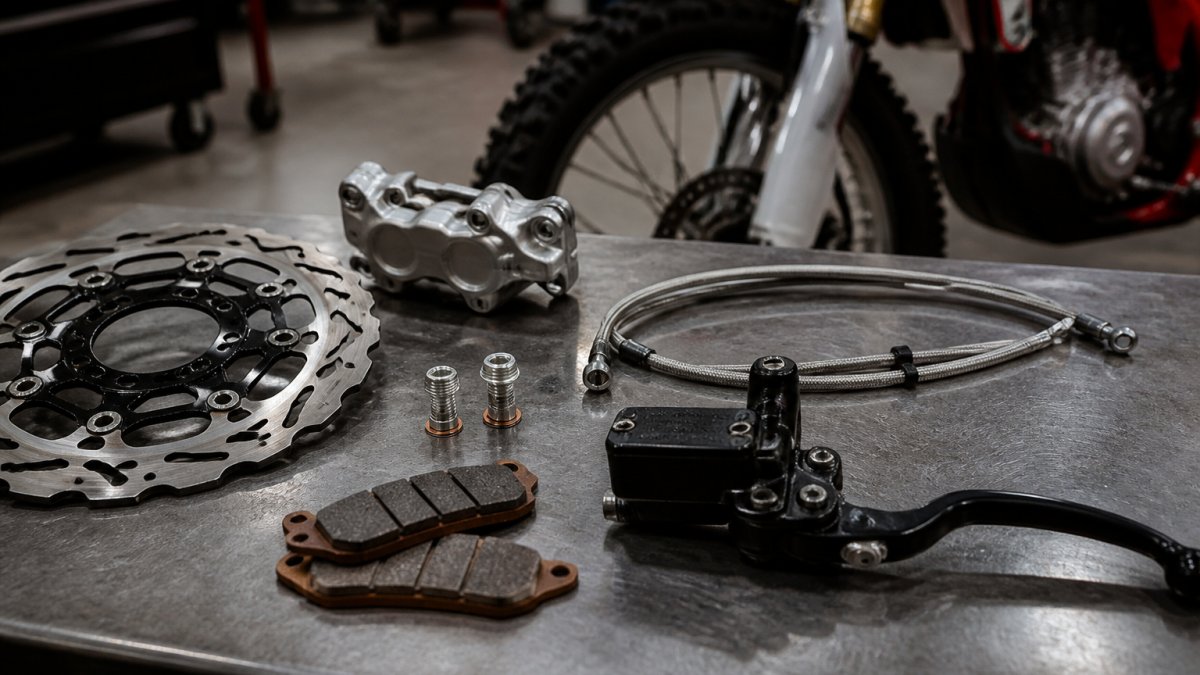
High performance motocross brake upgrades are component changes that increase stopping power, improve lever feel, and resist heat buildup during repeated hard braking. This guide breaks down the parts that matter, from pads to master cylinders, and shows you which upgrades fit your skill level and terrain.
Upgrade
Typical Impact
Difficulty
Best For
Sintered brake pads
High bite, heat resistance
Easy
Almost every rider
Oversized rotor kit
More use, better cooling
Moderate
Racers, heavy bikes
Stainless braided lines
Firmer lever, less flex
Easy
Spongy lever feel
Master cylinder swap
Better modulation
Advanced
Experienced racers
Caliper upgrade
Maximum stopping power
Advanced
Competitive racing
Best Motocross Brake Pads for Racing
The best motocross brake pads for racing use a sintered metallic compound, which holds friction at high temperatures where organic pads fade. If you race, sintered is the starting point, not an upgrade.
Sintered vs. Organic Compounds
Sintered pads are made from metallic particles fused under heat and pressure. They resist fade, shed water well, and last longer under hard use. Organic pads use resin binders and softer materials, which makes them quieter and gentler on rotors but prone to glazing when they get hot.
Pro Tip Bed new pads in before you judge them. A common mistake is bolting on sintered pads and hitting the track cold. Run several moderate stops from speed to build a transfer layer on the rotor face. Skip this and the pads will feel wooden and wear unevenly.
Oversized Brake Rotor Kit Benefits
An oversized brake rotor kit increases the rotor diameter, which gives the caliper more mechanical advantage and more surface area to shed heat. The result is stronger stopping power with less lever effort and slower heat buildup. That is the simple version. The useful version explains why diameter matters, what changes when you go bigger, and when a bigger rotor is the wrong answer.
Why Diameter Changes Everything
Braking force at the wheel is a function of lever arm. Move the caliper farther from the axle and the same hydraulic pressure produces more torque. A larger rotor also has more mass and more surface area, so it absorbs and radiates heat faster. On a long moto with repeated hard braking zones, that extra thermal capacity is what keeps lap times consistent instead of fading on lap three.
Rotor Thickness, Wear, and Pad Matching
Diameter is only half the story. Rotor thickness determines how much material the pads have to bite into and how much heat the disc can absorb before it warps. Sintered metallic pads wear rotors faster than organic compounds, so a rotor rated for metallic pads is not optional, it is the difference between a disc that lasts a season and one that develops grooves and thickness variation in a few rides.
Floating vs. Solid Rotor Designs
Floating rotors mount the friction ring to a separate carrier with buttons or bobbins, letting the disc expand as it heats. That keeps the rotor true under heavy use and reduces drag. Solid rotors are one piece, cheaper, and simpler, but they can warp when pushed hard.
Terrain and Skill: When a Big Rotor Helps, and When It Hurts
This is where most guides stop short. A larger rotor is not automatically better.
Hard-packed, fast tracks with long braking zones: An oversized floating rotor paired with sintered pads is the right call. The extra thermal mass and cooling area pay off.
Muddy, wet, technical tracks: A huge rotor can collect mud and debris, and the aggressive initial bite of a big-rotor setup makes low-traction braking harder to modulate. Many riders on these surfaces prefer a stock-diameter rotor with sintered pads and braided lines.
Beginners: An oversized rotor on a stock master cylinder can feel grabby and overboosted. The rider fights the brake instead of using it. Start with pads and fluid, then add diameter once you can consistently use full braking without locking the front.
Heavy bikes and heavier riders: More mass means more kinetic energy to convert to heat. Here the oversized rotor’s thermal capacity is a genuine safety margin, not a luxury.
Pro Tip Before buying an oversized kit, measure your current rotor diameter and confirm the new rotor clears the fork legs, caliper bracket, and wheel spokes at full compression. Clearance issues show up at the worst possible moment.
Is a Stainless Steel Brake Line Worth It?
Yes, a stainless steel brake line is worth it for most riders. Braided steel lines with a Teflon inner liner stop the hose from expanding under hydraulic pressure, so more of your lever force reaches the caliper instead of bulging the rubber.
Master Cylinder and Caliper Upgrades
A master cylinder upgrade changes how hydraulic pressure builds, which directly affects lever pull and modulation. A larger bore moves more fluid for a given stroke, giving a firmer lever, while a smaller bore increases mechanical advantage for more power with less effort. That trade-off is the whole game, and getting it wrong is why so many riders bolt on a bigger master cylinder and hate the result.
Bore Size, Lever Ratio, and Feel
The master cylinder bore and the caliper piston area together set the system’s hydraulic ratio. A smaller master cylinder bore relative to the caliper pistons produces more clamping force for the same lever pull, but it requires more lever travel. A larger bore produces a firmer, shorter lever with less travel but less mechanical advantage.
Caliper upgrades matter just as much. More pistons spread clamping force across a wider pad area, and stiffer caliper bodies flex less under pressure. That rigidity is what separates a vague lever from one that talks to you. A caliper that flexes under load wastes lever travel on bending metal instead of stopping the bike.
Matching the System to Your Skill Level
This is the part most guides skip. The right master cylinder and caliper combo depends on how you ride, not on what looks best in a product photo.
Beginners and trail riders: Keep the stock master cylinder and caliper. Upgrade pads, fluid, and lines first. A stock hydraulic ratio is forgiving and teaches good lever control.
Intermediate riders chasing lap times: A modest master cylinder change paired with braided lines and sintered pads can sharpen feel without making the brake twitchy. The goal is consistency, not maximum bite.
Advanced racers: A matched master cylinder and caliper package, often with a floating rotor and high-temp fluid, is worth the investment. At this level, modulation under trail braking is the difference between making a pass and washing the front.
Compatibility and Installation Notes
Confirm the master cylinder bore and the caliper piston area are designed to work together. Mixing brands without checking the hydraulic ratio is a common mistake.
Brake fluid type matters. DOT 4 and DOT 5.1 are glycol-based and can be mixed in an emergency; DOT 5 is silicone-based and must never be mixed with the others.
After any master cylinder or caliper swap, bleed the system completely. Air trapped in the caliper or line ruins the feel you just paid for.
Check lever free play and adjust to spec. Too little free play can cause the brake to drag as fluid heats and expands.
Watch Out Never touch a brake rotor or pads with bare fingers during install. Oils from your skin contaminate the friction surface and cause squealing and uneven grab. Wear nitrile gloves and clean rotors with brake cleaner before assembly.
Key Takeaway A master cylinder and caliper are a matched pair, not independent upgrades. Buy them as a system, match the hydraulic ratio to your skill and terrain, and you will feel the difference in the first braking zone.
Brake Fade Prevention and Bedding-In Procedures
Brake fade is the loss of stopping power when pads and fluid overheat, and it is preventable. The two main causes are pad glazing and boiled brake fluid, and each has its own fix.
Bedding in new pads follows a simple sequence:
Find a safe stretch of open ground with no traffic
Ride at moderate speed and apply the brakes firmly to slow, not stop
Repeat 8-10 times, increasing speed slightly each pass
Let the brakes cool completely before hard use
Avoid holding the lever at a full stop during the process
Matching Brake Upgrades to Rider Skill and Terrain
The right brake setup depends less on budget and more on how and where you ride. A novice on tight trails and a pro on a fast track need completely different components.
Key Takeaway Match the upgrade to your skill, not to the spec sheet. The fastest riders run setups they can modulate, not the biggest brakes on the market.
Conclusion
Building a brake system that stays consistent lap after lap takes the right parts and the patience to set them up correctly. Moto X Industries stocks the components to get you there, from conversion kits and racing wheels to the braking hardware that ties it all together. Our inventory covers motocross and supermoto builds, including parts for Surron and Talaria electric bikes, so you can source everything in one place.
Frequently Asked Questions
Are stainless steel brake lines worth the upgrade for motocross?
Yes, for riders seeking a firmer, more consistent lever feel. Stock rubber lines expand under high pressure, causing a spongy feel. Stainless steel braided lines eliminate this expansion, providing immediate improvements in brake modulation and stopping power. They are a cost-effective upgrade that significantly enhances rider confidence, especially during aggressive track riding or racing.
How often should I replace my motocross brake pads?
Replacement intervals depend on riding conditions, pad compound, and riding style. As a general rule, inspect your best motocross brake pads for racing before every ride. Replace them when the friction material is worn to the thickness of a credit card or less. Muddy, sandy, or highly abrasive conditions will accelerate wear, requiring more frequent replacements to maintain optimal stopping power.
What are the benefits of oversized brake rotors?
Oversized brake rotor kit benefits include increased surface area for better heat dissipation and greater mechanical leverage. This translates to stronger stopping power and reduced brake fade during long, intense motos. A larger rotor also provides more consistent performance under heavy braking, allowing for later braking points and improved lap times on the track.
Do aftermarket brake calipers improve stopping performance?
Aftermarket calipers can significantly improve stopping performance. Upgraded calipers often feature increased rigidity and larger piston sizes, which enhance hydraulic pressure and reduce flex under load. This results in improved brake modulation and lever feel. For electric dirt bikes, specific calipers are designed to handle the unique demands of high-torque drivetrains.
How do I bleed motocross brakes for a firmer feel?
Bleeding brakes removes air bubbles from the hydraulic system, which is crucial for a firm lever feel. Start by filling the master cylinder reservoir with fresh brake fluid. Attach a clear hose to the bleeder valve on the caliper and submerge the other end in a container of fluid. Pump the lever, hold it, open the bleeder valve, then close it. Repeat until no air bubbles appear in the hose.
Supermoto Suspension vs Motocross Suspension: Core Differences
A supermoto bike and a motocross bike can share the same frame, engine, and rider, but their suspension solves opposite problems. Motocross suspension absorbs big, square-edged hits on soft dirt; supermoto suspension keeps a tire planted on asphalt while the bike leans hard into a corner. That difference drives spring rates, valving, wheel size, and geometry. This guide from Supermoto wheels and tires breaks down the supermoto vs motocross suspension difference so you know what to change and why.
Spring Rates and Stiffness
Spring rate is the force needed to compress a spring a set distance. Motocross springs are soft because dirt absorbs energy and the bike floats over ruts. On asphalt, that soft spring lets the front end dive and the chassis wallow.
Valving and Damping Circuits
Valving controls how fast the fork and shock move through their stroke. A dirt bike’s valving lets oil flow quickly on small chop; on the street, that same valving feels vague and uncontrolled at speed.
Wheel Size, Braking, and Geometry Changes
Wheel size is the most visible difference between a motocross bike and a supermoto, but it also rewrites your chassis geometry. Motocross bikes run a 21-inch front and 18- or 19-inch rear; supermoto bikes run 17-inch wheels front and rear. Dropping the front wheel diameter by four inches lowers the front and shortens the tire’s contact patch arc, which is why supermoto bikes turn so quickly.
Change
Motocross Setup
Supermoto Setup
Why It Matters
Front wheel
21-inch
17-inch
Quicker steering, wider tire
Rear wheel
18/19-inch
17-inch
Lower seat height, better grip
Front brake
Small rotor
320mm rotor + radial caliper
Stronger stopping power
Spring rate
Soft
Stiffer
Resists brake dive
Travel
Long
Reduced
Lower center of gravity
Rake, Trail, and Why They Change
Rake is the angle of the steering axis from vertical. Trail is the distance between where the steering axis hits the ground and where the front tire’s contact patch sits. More trail means more self-centering stability at speed. Less trail means quicker steering but less stability.
Triple Clamp Offset: The Adjustment Most Riders Miss
Triple clamp offset is the horizontal distance between the fork tubes and the steering stem. It’s built into the clamps and not adjustable on every bike, but on bikes with adjustable or interchangeable clamps it’s one of the most powerful geometry tools available.
The Safety Side of Geometry
Improper geometry isn’t just a handling preference. Too little trail produces a vague front end that can develop into a tank-slapper or “death wobble” at speed, where the bars oscillate violently from lock to lock. This is more likely on a converted dirt bike because the stock geometry was designed around a 21-inch front wheel and long-travel forks.
Watch OutIf your converted bike feels nervous at speed, don’t just add a damper and ride around it. Check your sag, your fork height in the clamps, and your tire pressures first. Geometry problems get worse as speed increases, and a damper only masks them.
Ride Height and the Front-to-Rear Balance
Geometry is a system, not a single number. Changing rear ride height with a lowering link or shock spacer changes rake and trail as much as changing the front: drop the rear and the front steepens; raise the rear and the front relaxes. Always set ride height front and rear together, and re-check sag after any geometry change.
Key TakeawayWheel size, brake size, and geometry are one decision, not three. The 17-inch front wheel changes trail, the bigger brake changes how hard the fork works, and the fork height and triple clamp offset are how you tune the result. Treat them as a package.
Re-Valving Suspension for Supermoto: What Actually Changes
Re-valving suspension for supermoto means changing the shim stack inside the fork and shock so damping matches asphalt instead of dirt. The shim stack is a set of thin metal discs that flex to control oil flow; change the stack and you change how the suspension behaves.
Pro TipMost riders stiffen the front and forget the rear. A shock that’s too soft will still let the rear squat under acceleration, which unloads the front and makes the bike run wide. Set the rear spring and valving to match the front or you’ll chase handling problems that aren’t really there.
Supermoto Suspension Setup Guide: Sag, Preload, and Damping
Most supermoto suspension articles stop at “set your sag.” The actual process is a sequence, and skipping a step builds the rest of your tuning on a bad baseline. Here’s the order that works, with the numbers you need to measure.
Step 1: Measure Static and Rider Sag
Sag is how much the suspension compresses under load. You measure it in two states:
Static sag (free sag): the bike sitting under its own weight, no rider.
Rider sag (race sag): the bike with you in your normal riding position, full gear, feet on the pegs.
Step 2: Set Preload to Hit the Target
Preload is the initial tension on the spring, adjusted with the shock’s threaded collar or a fork cap spacer. Preload does not change the spring rate. It changes ride height and where in the stroke the suspension sits.
Step 3: Tune Damping One Clicker at a Time
Only after sag and preload are set do you touch compression and rebound. Start from the manufacturer’s stock clicker positions, change one adjuster at a time, and test on the same stretch of road or corner.
Low-speed compression: controls brake dive and how the front settles into a corner. Too little and the fork dives and the bike runs wide. Too much and the front skips over small bumps.
High-speed compression: controls sharp hits like expansion joints and curbs. This is where a dirt-derived fork often feels harsh on pavement until it’s re-valved.
Rebound: controls how fast the suspension extends after a bump. Too slow and the bike packs down over a series of bumps. Too fast and the rear kicks and the tire loses contact.
Street Setup vs Track Setup
The same bike needs two different setups depending on where you ride.
Parameter
Street Setup
Track Setup
Rider sag (rear)
30-35 mm
25-30 mm
Spring rate
Stock or one step up
One to two steps up
Low-speed compression
Softer
Firmer
Rebound
Slightly slower
Faster
Priority
Comfort, stability
Turn-in, feedback
Pro TipWrite your settings down. Note the sag numbers, the clicker positions, and the tire pressures every time you make a change. Suspension tuning is a process of elimination, and without a record you’ll chase your own tail.
Watch OutNever tune damping to fix a sag problem. If the bike sits too low or too high, that’s a spring and preload issue. Clickers only change how the suspension moves through its stroke, not where it sits in it.
Lowering Link for Supermoto: Ride Height and Handling Effects
A lowering link for supermoto changes rear ride height and, with it, the bike’s geometry. The link sits in the rear suspension linkage and changes the ratio between shock travel and wheel travel: a longer link lowers the rear, a shorter one raises it.
Watch OutA lowering link that isn’t matched with a fork height adjustment can leave the bike with too little trail. That makes the front feel vague and can cause a tank-slapper at speed. Always set ride height front and rear together, not one at a time.
DIY Re-Valving vs Professional Suspension Work
DIY re-valving is cheaper and teaches you how your suspension works; professional work is faster and usually gets a better result on the first try. The right choice depends on your tools, patience, and how much you value track time.
Factor
DIY Re-Valving
Professional Work
Cost
Lower, tools only
Higher, labor included
Time
A weekend or more
Days to weeks
Result
Good with practice
Consistent, tested
Best for
Street builds, learning
Race bikes, first-timers
Risk
Setup errors
Fewer, but scheduling delays
Key TakeawayThe single biggest mistake in a supermoto conversion is treating suspension and wheels as separate projects. They aren’t. Wheel size changes geometry; geometry changes what the suspension has to do. Plan them together.
Conclusion
Getting the supermoto vs motocross suspension difference right separates a bike that feels sketchy on pavement from one that feels planted and fast. It comes down to stiffer springs, re-valved damping, shorter travel, and geometry that matches 17-inch wheels and stronger brakes.
Frequently Asked Questions
What is the main difference between supermoto and motocross suspension?
Supermoto suspension is stiffer and tuned for asphalt, while motocross suspension is softer for dirt absorption. Spring rates increase to handle higher cornering forces, and valving is adjusted to control damping on smooth pavement. Travel is often reduced to lower the center of gravity. These changes improve tire contact patch and stability at speed.
Do I need to re-valve my suspension for supermoto?
Yes, re-valving is highly recommended for supermoto because stock motocross valving cannot manage the higher damping forces on asphalt. Re-valving suspension for supermoto involves changing the shim stack and oil viscosity to increase compression and rebound damping. This prevents bottoming under hard braking and improves cornering stability. Without it, the bike may feel harsh or unpredictable. Professional kits like Race Tech Gold Valve are designed for this purpose.
Can I use motocross suspension for supermoto racing?
You can, but it will be compromised. Motocross suspension is too soft and lacks the damping control needed for asphalt. You may experience excessive dive, poor feedback, and bottoming. For casual riding, stiffer springs and adjusted clickers might suffice. For racing, a full re-valve and spring change are necessary. Upgrading to specialized components can provide better performance.
How does a lowering link affect supermoto handling?
A lowering link for supermoto reduces rear ride height, which lowers the center of gravity and can improve stability and corner entry. However, it also changes suspension geometry, reducing travel and potentially causing the rear to bottom out. It’s best used with stiffer springs and re-valved damping. For track use, many riders prefer to maintain stock height and adjust sag instead. Always test changes gradually.
What sag and preload settings should I use for supermoto?
For supermoto, start with 25-30mm of rear sag and 30-35mm of front sag. This is stiffer than typical motocross settings (30-35mm rear, 35-40mm front). Preload should be adjusted to achieve these sag numbers with the rider on board. Proper sag ensures the suspension works in the right part of the stroke. Fine-tune compression and rebound damping after setting sag. Refer to your suspension manual for specific adjustment ranges.
Upgrade Roadmap: Matching Mods to Your Riding Goals
A Surron e-bike performance upgrade guide starts with one question: what are you actually building? The stock bike is a compromise, and every part you change shifts that balance somewhere else. This guide walks through the full upgrade path, from controller mapping to supermoto conversion, so you spend money once instead of twice.
Street, Track, or Trail: Three Build Paths
Pick your build path before you buy anything.
Street and supermoto: prioritized braking, tire grip, and chassis rigidity. Power matters less than control.
Track days: suspension damping, unsprung weight, and heat dissipation drive lap times.
Trail and off-road: torque curve, ground clearance, and reliability under sustained amp draw.
Build Path
First Upgrade
Second Upgrade
Skip Until Later
Street / supermoto
Brakes and tires
Suspension
Motor swap
Track
Suspension and wheels
Controller mapping
Cosmetic mods
Trail
Controller and gearing
Battery capacity
Street legal kit
Pro TipMatch your first upgrade to the weakest link, not the loudest spec sheet. Most riders overbuild power and underbuild brakes.
Surron Controller Upgrade: The First Real Power Mod
A controller upgrade is the highest-return first mod because it changes how the existing motor delivers power. Stock controllers limit phase current, which caps acceleration regardless of battery size. Aftermarket units let you tune the torque curve directly.
Phase Current and Thermal Throttling: What to Watch
Phase current controls low-speed punch; battery current controls sustained pull. Push phase current too high and the motor windings heat up fast. That triggers thermal throttling, where the controller cuts output to protect itself. The result feels like the bike “giving up” mid-ride.
Watch these three things:
Voltage sag under load, which signals your battery can’t supply the amp draw
Motor phase temperature after hard acceleration runs
Controller firmware version, since mapping tables change between releases
NHTSA guidance on electric vehicle safety
Battery Upgrades: 72V Conversions and BMS Limits
The 72V battery conversion is the most misunderstood upgrade in the Surron world, and it is also the one most likely to end a build early. More voltage raises top-speed potential, but only if the controller, motor, and battery management system (BMS) can all handle it together. Treat the pack as one node in an integrated performance ecosystem, not a standalone horsepower purchase.
What 72V Actually Changes
Voltage is electrical pressure. Going from a 60V-class pack to a 72V-class pack raises the ceiling on RPM and top speed, but it does not automatically raise torque. Torque comes from current. That is why a 72V pack on a stock controller often feels slower off the line than the original setup: the controller is still limiting phase current, and the extra voltage is doing nothing useful at low speed.
Nominal voltage (what the pack is called) versus fully charged voltage (what the controller actually sees on a fresh charge). A 72V nominal pack can sit near 84V hot off the charger.
Continuous discharge rating in amps, this is the number that governs sustained pulls, not the peak rating on the marketing page.
BMS continuous and peak cutoffs, the BMS will throttle or shut off before the cells are damaged, and that cutoff is often lower than the controller’s demand.
BMS Limits and High-Discharge Cells
The BMS is the pack’s referee. It caps continuous discharge, balances cells, and cuts power on over-temperature or over-current events. A pack rated for a high peak output may still throttle continuous amp draw, which shows up as voltage sag under sustained load, the bike feels strong for two seconds and then goes flat.
Wiring, Connectors, and the Harness
Stock connectors and wire gauge are sized for stock current. Push more amps through them and resistance turns into heat, and heat at a connector is how builds fail. Upgrade the harness with the pack: heavier gauge main leads, connectors rated for the new continuous current, and a fuse or breaker sized to the pack rather than the original controller.
Watch OutInstalling a 72V pack without a controller rated for that voltage can destroy the controller on the first throttle. Confirm voltage compatibility, continuous current rating, and connector type before you connect anything. If any one of the three is unknown, stop and verify.
The Dependency Chain
A battery upgrade is only as good as the weakest part downstream of it. The practical order of operations:
Confirm the controller’s maximum input voltage and continuous current rating.
Confirm the motor’s phase current and thermal limits, a bigger pack does not make the motor handle more heat.
Confirm the BMS continuous rating exceeds what the controller will pull.
Confirm the harness and connectors are rated for the new current.
Only then install the pack and re-tune the controller mapping.
NHTSA guidance on electric vehicle safety
Surron Supermoto Conversion: Wheels, Tires, and Brakes
A Surron supermoto conversion is a wheel, tire, and brake package that turns an off-road bike into a street-capable machine. Smaller diameter wheels with street rubber lower the center of gravity and sharpen steering. That’s the whole point.
Tire Selection and Unsprung Weight
Unsprung weight is the mass of everything below the suspension: wheels, tires, brake rotors. Cutting it improves how quickly the suspension reacts to bumps. Lighter wheels and rotors do more for handling than almost any engine mod.
For tire selection, match compound to surface:
Street: softer compound, more grip, wears faster
Track: dedicated track compound, best heat tolerance
Mixed use: harder compound, longer life, less grip in the wet
Suspension, Ergonomics, and Weight Reduction
Suspension tuning is where most builds leave free performance on the table. Damping adjustment lets you match the fork and shock to your weight and riding style. Revalve or respring before you buy anything exotic.
DIY vs. Professional Installation: Cost and Reliability Trade-Offs
Most electrical work is DIY-friendly; most chassis work is not. That split is real, but it is too coarse to make a spending decision on. The useful question is not “can I do this?” but “what does it cost me if I get it wrong?” That is the angle most build guides skip, and it is where the money actually is.
The Real Cost of a Mistake
Labor rates at independent motorcycle and powersports shops commonly run in the range of a standard shop-hour rate, and a full supermoto conversion, suspension revalve, or wheel build can consume several hours of that. But the number that matters more is the cost of a failed DIY attempt:
Controller and firmware work: a mis-flashed controller or reversed polarity can brick the unit. Replacement cost is the unit itself, plus the downtime.
Battery work: a mis-wired pack is a fire risk, not just a performance risk. This is the one category where “I’ll figure it out” is not an acceptable answer.
Brake hydraulics: a poorly bled system or a cross-threaded banjo bolt fails at the worst possible moment. The cost is not the part, it is the crash.
Wheel lacing and truing: a wheel built with uneven spoke tension fails gradually, usually at speed. A shop with a truing stand does this in an hour; a first-timer does it in a weekend and may still be wrong.
Suspension revalve: shim stacks and oil weights are a system. Getting it wrong means paying twice, once for the parts and once for the shop to redo it.
Where DIY Wins
These jobs are genuinely DIY-friendly because the failure mode is a re-do, not a catastrophe:
Controller swaps and mapping updates (plug-and-play with a laptop on most current models)
Ergonomics: handlebars, pegs, seat, lever position
Cosmetic and weight-reduction work: removing brackets, swapping hardware
Where Professional Wins
These jobs have a failure mode that is expensive, dangerous, or both:
Wheel lacing and truing
Brake bleeding and hydraulic line work
Suspension revalve and respring
Any structural welding or frame modification
Battery pack assembly or BMS replacement
A Practical Decision Rule
Ask two questions before every job:
Is the failure mode a re-do or a wreck? Re-do, do it yourself. Wreck, pay the shop.
Do I have the tool, and will I use it again? A torque wrench, a truing stand, and a vacuum bleeder are the three tools that separate DIY-capable jobs from shop jobs. If you are buying a tool for one job and never touching it again, the shop is usually cheaper.
Key TakeawayThe reliability difference between a good DIY install and a bad one comes down to torque specs and connector quality. Neither is expensive to get right, and both are cheap compared to the parts they protect.
Documenting the Build
Whichever path you take, keep a build log: part numbers, torque values, firmware versions, and who did the work. It matters for warranty claims, for resale, and, as the next section covers, for insurance and inspection. A build with receipts and a log is worth more and is easier to defend than one with a box of unlabeled parts.
Insurance, Liability, and Street Legal Compliance
Street legal compliance is where performance builds get complicated. Most jurisdictions require lights, mirrors, a horn, and a speedometer for road registration, and a modified bike may need re-inspection. Insurance and liability implications follow the same logic: an insurer can deny a claim if a modification made the bike unsafe or unregistered.
Before you ride on public roads:
Confirm your state’s registration requirements for converted bikes
Check whether your policy covers modifications
Keep receipts for every part installed
Document the build for inspection
FMVSS motorcycle equipment standards
Long-Term Reliability and the Upgrade Ecosystem
Long-term reliability testing is the angle most build guides skip. Parts that work in isolation can fight each other over thousands of miles. A controller tuned for peak power shortens battery life. Stiff suspension improves track feel and punishes trail comfort.
Frequently Asked Questions
What are the best upgrades for a Surron e-bike?
Start with a controller upgrade, which delivers the biggest power gain per dollar. Pair it with a 72V battery upgrade to avoid voltage sag under load. Suspension tuning and braking upgrades come next for safety at higher speeds. For street riding, a Surron supermoto conversion with proper wheels and tires transforms handling. Weight reduction and ergonomic adjustments (bars, pegs, seat) round out a balanced build. Match each mod to your riding style, and upgrade in stages so you can test reliability before adding more power.
Do I need a new controller to get more power out of my Surron?
The stock controller limits phase current and peak power output, so yes, a Surron controller upgrade is the most direct path to more torque and acceleration. A replacement controller lets you adjust controller mapping, raise amp draw, and change the torque curve. Look for one with thermal management features and firmware update support. If you pair a new controller with a battery that cannot deliver high-discharge current, you will hit voltage sag and lose much of the gain.
How do supermoto wheels improve Surron performance?
Supermoto wheels reduce unsprung weight and put a wider, grippier tire contact patch on pavement. That translates to sharper turn-in, more predictable braking, and higher cornering confidence. The smaller diameter also lowers rotating mass, which improves acceleration and regenerative braking response. For riders doing street or track days, a Surron supermoto conversion is often the single biggest handling change you can make, and it addresses braking and stability at the same time.
Is it worth upgrading the motor on a Surron?
For most riders, no. The stock motor handles moderate power increases from a controller and battery upgrade without issue. Motor swaps make sense when you are chasing peak power output beyond what the stock unit can dissipate, or when you need a different motor phase configuration for a specific build. Upgrading the motor also demands a matching controller, wiring harness, and cooling strategy. Do the controller and battery first, then decide if the motor is the remaining bottleneck.
What are the most common reliability mods for Surron owners?
Reliability mods focus on heat dissipation and electrical integrity. Add a battery management system with proper thermal cutoff, upgrade the wiring harness to handle higher amp draw, and improve airflow around the controller and motor. Regular firmware updates keep the controller logic safe. Check torque on chassis and drivetrain bolts after every few rides. Long-term reliability testing by owners consistently shows that heat and loose connections cause more failures than power levels themselves.
Can I make my Surron street legal?
Street legal compliance varies by state. You typically need lights, mirrors, a horn, a license plate mount, and a title or manufacturer statement of origin. Some states classify Surrons as off-road vehicles only. Check your state’s motor vehicle department rules before investing in a street build. A Surron supermoto conversion with DOT-rated tires helps, but the paperwork and equipment requirements matter just as much as the hardware.
Building a fast Surron is easy. Building one that stays fast, stops hard, and passes inspection is the real project. Supermoto wheels and tires stocks specialized supermoto conversion kits, motocross racing wheels, and components for Surron and Talaria builds, so you can source wheels, tires, and braking upgrades from one place instead of chasing fitment across five vendors. Get started with Supermoto wheels and tires and build a bike that performs on the street, the track, and the trail.
Yes, does a larger sprocket increase acceleration? It does. Adding teeth lowers your gear ratio, multiplying torque at the rear wheel for harder pull out of corners, but you lose top-end speed.
Motoxindustries.com breaks down how that swap works and what riders overlook before ordering parts.
A larger rear sprocket is the cheapest way to wake up a sluggish bike, but it raises cruising RPM, wears the chain faster, and throws off the speedometer.
Watch OutGoing up more than 2 teeth without checking chain length can leave you with a chain too short to fit, you’ll need a longer chain or a different axle position.
Motorcycle Sprocket Gear Ratio Calculator: Understanding Final Drive
A motorcycle sprocket gear ratio calculator shows how a tooth change affects final drive before you buy: divide rear teeth by front teeth.
Lower ratio means more top speed and slower acceleration; higher ratio means harder acceleration and less top speed.
A 14-tooth front and 42-tooth rear gives a ratio of 3.0. Swap the rear to 45 and it jumps to 3.21, roughly 7% more mechanical advantage.
A larger rear sprocket increases acceleration because it forces the engine to spin faster for the same road speed, delivering more torque to the rear wheel.
Pro TipUse a gear ratio calculator before you order. Most riders find 2-3 teeth up on the rear is the sweet spot for trail and street use.
How to Choose the Right Sprocket Size
Choosing the right sprocket size starts with one question: what do you actually ride?
Write down your stock gearing, pick your goal, add 1-3 rear teeth for acceleration, drop 1 front tooth for a bigger jump (worth about 3 rear teeth), and check chain length, a bigger rear sprocket usually needs a longer chain or axle adjustment.
Goal
Change
Effect
Best For
Harder acceleration
+2 to +4 rear teeth
Quicker pull, lower top speed
Trail, tight tracks
Bigger acceleration jump
-1 front tooth
Roughly equal to +3 rear teeth
Woods riding, hill climbs
More top speed
-2 to -3 rear teeth
Higher top speed, slower launch
Open desert, highway
Key TakeawayOne tooth on the front sprocket is worth about three on the rear, the cheapest way to change gearing, but it wears the chain faster.
The Trade-Off Between Torque and Speed
Every sprocket change is a swap: you gain acceleration and give up top speed.
motorcycle sprockets explained
JacobRay LetsgoEnduro
A larger rear sprocket increases acceleration by raising engine RPM at any given speed, the bike hits its power band sooner and corners feel sharper.
But at highway speed the engine screams, vibration rises, and fuel range drops.
Off-road and supermoto riders usually favor acceleration; dual-sport riders often run two rear sprockets and swap them by season.
Chain Length and Speedometer Calibration: The Gotchas
Two things bite riders after a sprocket swap: chain length and speedometer error.
Chain length: A bigger rear sprocket pulls the axle forward; if the chain is near its limit it won’t fit, so you’ll need a longer chain or more links.
Speedometer error: The speedo reads off the wheel, not the engine, so gearing changes usually does not throw it off. There are some bikes that run the speedo off of the front sprocket. Changing the front sprocket will change your speedometer slightly.
Watch OutRiding with an uncorrected speedometer after a sprocket swap can get expensive. You’ll think you’re doing the limit when you’re actually over it. Fix the calibration before your first real ride.
Off-Road vs. Street: Different Rules
Off-road riders almost always gear for acceleration. Loose dirt, steep climbs, and tight trails reward low-end grunt.
Street and supermoto riders face a split decision: shorter gearing is fun around town but annoying on the highway, so most builds land on a mild 1-2 teeth up on the rear.
Common Misconceptions About Sprocket Sizes
Myth: A bigger rear sprocket adds horsepower. It doesn’t, it changes how existing power reaches the wheel.
Myth: More teeth always means faster. More rear teeth means quicker, not faster. Top speed usually drops.
Myth: You can change gearing without touching the chain. Sometimes, but big changes usually need a new chain or link adjustment.
Myth: Front and rear sprocket changes are the same. One front tooth is worth about three rear teeth.
Pro TipWhen you swap sprockets, replace the chain at the same time if it’s worn, a new sprocket on an old chain wears out fast.
How to Calculate Sprocket Changes
Divide rear teeth by front teeth, then compare old and new ratios, the percentage change tells you how much acceleration and top speed will shift.
Example: stock 14/42 = 3.00. New 14/45 = 3.21. That’s about a 7% change.
For a bigger jump, drop one front tooth: 13/42 = 3.23, almost the same as 14/45 but harder on the chain.
Gearing is one of the few mods that changes how a bike feels for very little money.
Frequently Asked Questions
What size sprocket is best for acceleration?
There is no single best size, but the rule is simple: a larger rear sprocket or a smaller front sprocket increases acceleration. Adding 2-3 teeth to the rear is a common starting point. Use a motorcycle sprocket gear ratio calculator to see how a change shifts your final drive ratio before you buy.
How much difference does a 1-tooth change on the rear sprocket make?
One tooth on the rear is a small change, often about a 2-3 percent shift in final drive ratio. You may notice slightly quicker acceleration or a small drop in top speed, but many riders cannot feel it. For a clear difference, change 2-4 teeth at the rear or drop 1 tooth at the front.
Does a larger rear sprocket increase top speed?
No. A larger rear sprocket lowers your gearing, which boosts acceleration and reduces top speed. To raise top speed, you go the other way: a smaller rear sprocket or a larger front sprocket. The trade-off between torque and speed is the core decision in any dirt bike gearing guide.
Quick Comparison: Top Supermoto Wheels for 2026 Track Days
The top-rated aftermarket wheel sets for supermoto track days in 2026 come down to four names: Haan, Movetronix, and Warp 9. Each one solves a different problem, and picking wrong means either overspending or fighting fitment issues all season. This guide from Supermoto wheels and tires breaks down what actually matters: unsprung weight, rim width, hub quality, and whether the set bolts on without modification.
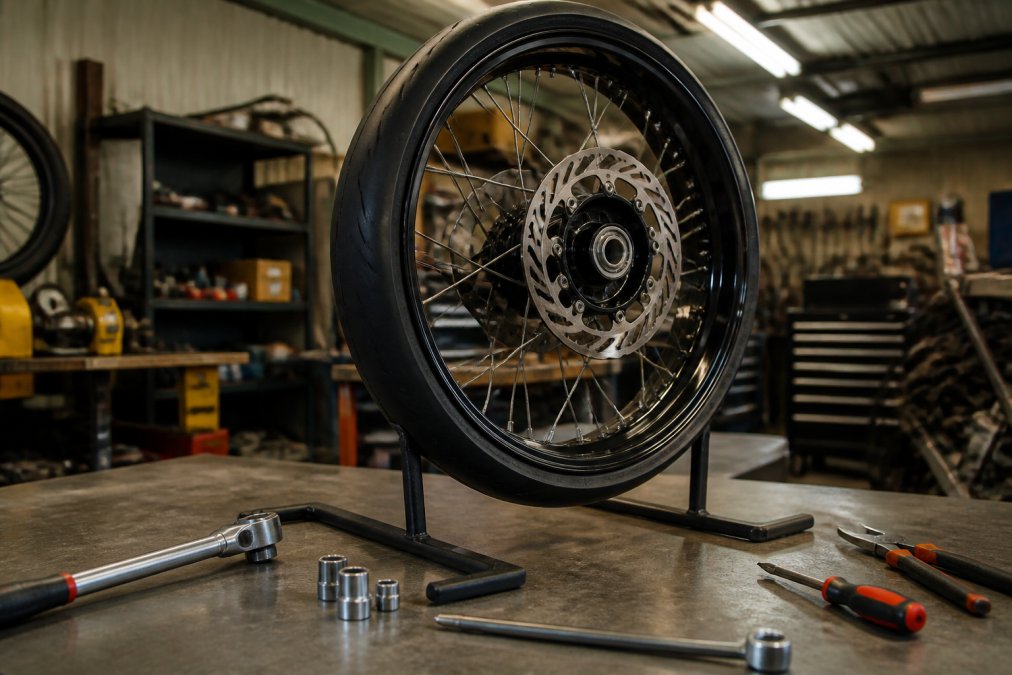
Anodized supermoto wheels mounted on a garage stand with tools ready for installation on a workbench.
Here’s the short version before we get into details:
Wheel Set
Best For
Rim/Hub Highlights
Fitment
Warp 9 (via Moto X Industries)
Built-to-order fitment, best value
Custom colors, tire and sprocket options
Bolt-on, stock-like fit
Haan Wheels
Maximum durability, hard to find 17”
RK Excel rims,
Racing platforms
Movetronix Signature
Modern platforms
6061-T6 CNC hubs
Newer models
What to Look For in Track-Day Supermoto Wheels
Track-day wheels are a system, not a single part. Unsprung weight, rim width, spoke tension, and hub design all interact, and changing one affects the others. Get the combination right and the bike turns in faster, holds a line better, and brakes later.
Wheel Size, Rim Width, and Tire Profile
Seventeen-inch wheels dominate track supermoto because tire choice opens up dramatically. A 3.5-inch front rim and a 4.25 to 5.0-inch rear rim pair well with common track tire sizes, and a lower aspect ratio sidewall keeps the contact patch flatter under lean angle. Sixteen-inch sets can work for tight layouts, but tire availability gets thin fast.
Hub Assembly, Spoke Tension, and Bolt-On Fitment
The hub is where cheap wheels give themselves away. Look for a machined hub assembly with quality bearing seals, a cush drive that absorbs drivetrain shock, and axle spacers cut for your specific chassis. Spoke tension matters too: hand-tensioned wheels hold true longer than machine-laced ones. Bolt-on fitment means no grinding, no shimming, no guessing.
Watch OutBuying a universal-fit wheel set to save money usually backfires. Mismatched axle spacers and brake rotor clearance issues can leave you machining parts in a garage the night before a track day.
Haan Wheels Supermoto Sets: RK Excel Rim Durability
Haan’s reputation rests on one thing: RK Excel rims. These are widely regarded as the strongest rim option available, and the optional Excel A60 build adds roughly 15% more strength for riders who case jumps or clip curbs. The hubs are precision-engineered for racing, and spoke tension holds up under repeated heat cycles.
Movetronix Signature: CNC-Machined Hubs for Modern Platforms
Movetronix builds its Signature line around aircraft-grade 6061-T6 CNC machined hubs, and that material choice shows in how the wheel behaves under load. Billet aluminum hubs resist flex better than cast equivalents, which translates to more predictable cornering stability and cleaner brake rotor alignment. Customizable finishes let you match the build to the bike.
Warp 9 Wheel Set Review: Built-to-Order Fitment and Warranty
Warp 9 wheels, sold through Moto X Industries, are the set we recommend most often, and the reason is simple: they’re built to order using the actual parts for your bike. That means when the wheels arrive, they fit like stock. No modifications, no adapter plates, no surprises the night before a track day.
Pro TipOrder your sprocket with the wheels. Matching the sprocket to your track gearing at build time saves you a second order and a second wait.
Choosing a Supermoto Conversion Kit for Your Chassis
A supermoto conversion kit is the package of wheels, brake components, and fitment hardware that turns a dirt bike into a track-capable machine. The kit matters as much as the wheels, because brake rotor and caliper fitment determines whether you can actually stop the thing, and because a kit that is “close” is a kit that eats your Thursday night before a Saturday track day.
Measure these five things before you order
Every fitment failure traces back to one of these dimensions. Write them down in millimeters and keep the list next to your laptop while you shop.
Axle diameter. Full-size dirt bikes typically run a 20 mm front axle and a 20 or 25 mm rear, while minis and lightweight electric platforms use smaller diameters. A wheel built for the wrong axle cannot be shimmed into safety.
Axle spacer stack length. Measure from the fork leg face to the hub face on both sides. Spacers are model-specific, not universal, and a 2 mm error shows up as a dragging rotor or a wheel that will not center.
Brake rotor bolt pattern and offset. Count the bolts, measure the bolt circle, and note the rotor offset. A rotor that bolts up but sits 3 mm off-center will drag the caliper and heat-soak the pads within a session.
Caliper clearance at full compression. Bottom the fork with the wheel installed and check the gap between the caliper and the spokes. Spoke-to-caliper contact under hard braking is a common failure on oversized rotor conversions.
Swingarm width and chain line. The rear wheel must center the chain run, not just fit between the arms. A chain line off by a few millimeters accelerates sprocket and chain wear and can throw the chain under load.
What a complete kit should include
A track-ready kit is more than two wheels. Expect the following in the box, or budget for them separately:
Front and rear wheels with bearings and seals installed
Model-specific axle spacers, front and rear
Brake rotor(s) sized for your caliper, or a rotor adapter if the kit reuses your stock rotor
Rear sprocket matched to your track gearing
A cush drive or a rigid hub.
The suspension and insurance angle most guides skip
Suspension re-tuning. Swapping wheels changes unsprung mass and, in many cases, rotating inertia. A wheel set that is meaningfully lighter than stock will make the fork and shock feel over-damped at the same clicker settings. Most practitioners find that a few clicks of rebound and compression adjustment restores the balance, and riders chasing lap times often send the fork and shock out for a re-valve once the new wheels are on. Plan the suspension work into the same off-season window as the wheel install.
A quick fitment sanity check
Before you tighten the axle nuts, spin the wheel and check three things: the rotor runs true in the caliper with no drag, the chain line is straight when viewed from behind the bike, and the tire clears the fork legs and swingarm at full compression. If any of those three fails, stop and re-measure rather than forcing the install.
Track gearing is where most riders leave time on the table. A smaller front sprocket or larger rear sprocket shortens gearing for tighter circuits; the reverse suits fast layouts with long straights. Most track riders keep a spare rear sprocket on hand and swap between sessions.
How to think about ratios, not just tooth counts
The number that matters is the final drive ratio: rear sprocket teeth divided by front sprocket teeth. A higher ratio means more acceleration and a lower top speed; a lower ratio means the opposite. Two builds with the same ratio will feel similar even if the individual sprocket sizes differ, which is why experienced riders compare ratios rather than counting teeth.
A practical approach for a supermoto track build:
Start with the stock ratio as your baseline and note your top speed at the end of the longest straight.
If you are hitting the rev limiter before the braking zone, go up one or two teeth on the rear (or down one on the front) to shorten gearing.
If you are not reaching peak power before the braking zone, go the other way.
Change one variable at a time and log the result. Two-tooth rear changes are a common starting increment; one-tooth front changes are larger steps because of the ratio math.
Front vs rear: which to change
Changing the front sprocket is cheaper and faster, but it also changes the chain line and can accelerate chain and slider wear if you go too small. Changing the rear sprocket keeps the front geometry intact but requires a longer or shorter chain, and on some chassis a larger rear sprocket will not clear the chain guide or swingarm.
Chain length and wear
Every sprocket change has a chain-length consequence. Going up several teeth on the rear usually requires adding links; going down may require removing them. A chain that is too short will not let the wheel sit in the adjustment range, and a chain that is too long will run out of adjuster before it reaches correct tension.
Why ordering the sprocket with the wheel matters
Because Warp 9 wheels let you select sprocket size at build time, you can order the gearing you need without a separate trip to a parts counter. That is a small detail that saves real time, and it means the sprocket arrives already matched to the wheel’s bolt pattern and offset, rather than you hoping a generic sprocket lines up.
The rotating-mass angle most gearing guides miss
Gearing and wheel weight interact in a way that is easy to overlook. A lighter rear wheel and a lighter rear sprocket reduce rotating mass at the rear axle, which lets the engine spin up faster and makes the bike feel more responsive to throttle input. That change can make a gearing setup that felt lazy on the stock wheels feel sharp on the new ones, so if you are changing wheels and gearing in the same build, do the wheel swap first, ride a session on your baseline gearing, and then adjust teeth from there.
Frequently Asked Questions
What are the best supermoto wheels for track use in 2026?
The strongest options for 2026 track days include Haan Wheels with RK Excel rims, Movetronix Signature with 6061-T6 CNC hubs, Milk Racing for Surron and Talaria platforms, and Warp 9 wheel sets. Warp 9 wheels from Motoxindustries.com are built to order using parts specific to your bike, so they fit like stock wheels without modification and come with a warranty. Match the wheel to your chassis, rim width, and tire profile before buying.
Do aftermarket supermoto wheels require modifications to install?
It depends on the set. Warp 9 wheels are built to order with the correct axle spacers, bearing seals, and cush drive for your specific model, so they bolt on like stock with no modification. Other brands may need custom spacers or brake rotor shimming. Always confirm bolt-on fitment, brake rotor clearance, and sprocket sizing before ordering so you are not waiting on missing hardware mid-build.
What is the best rim size for supermoto track days?
Most track-day supermoto builds run 17-inch rims front and rear. A 3.5-inch front and 4.25 to 5.0-inch rear rim width fits common track-only compound tires well and keeps the tire profile predictable at full lean angle. Smaller rims limit tire choice, and wider rims can rub the swingarm on some conversions. Check clearance at full suspension travel before committing to a width.
How do I choose the right sprocket size for my supermoto wheels?
Start with your rear sprocket tooth count and the track layout. Shorter, tighter circuits favor a larger rear sprocket for quicker acceleration, while longer tracks suit a smaller rear for higher top speed. Warp 9 lets you pick the sprocket size when you order the wheel set, which avoids mismatched bolt patterns. Confirm chain length and axle adjustment range after any sprocket change.
Are custom-built supermoto wheels worth the investment?
For track days, yes. Built-to-order wheels use hubs, spokes, and rims matched to your bike and riding, which improves spoke tension consistency, rotational mass, and brake rotor alignment. Warp 9 wheels are built to order with your color, tire, and sprocket choices and ship with a warranty. Budget sets can work for street use, but track riders notice the difference in cornering stability and unsprung weight.
Track-day wheel shopping rewards patience and specificity. The wrong set costs you a season of fitment headaches; the right one disappears under you and just works. At Moto X Industries, we stock Warp 9 wheels built to order for your exact bike, with customizable colors, tire options, and sprocket sizing, free shipping, and a warranty behind every set. Get started with Supermoto wheels and tires and ride into your next track day on wheels that fit like they came from the factory.
How to Supermoto Convert a Dirt Bike: Step-by-Step
A supermoto conversion kit is a bundled package of parts that turns a dirt bike into a street-legal supermoto, typically including a 17-inch wheelset, a caliper bracket, an oversized front rotor, and gearing or speedometer components. Supermoto wheels and tires stocks conversion kits for common motocross platforms, and this guide walks through the full process from hub compatibility to asphalt suspension setup.
The kit is only half the job. Fitment, brake clearance, and gearing decide whether the finished bike feels like a factory motard or a compromised hybrid. Below, we break down each step so you can plan the build before you order a single part.
Step 1: Confirm Wheel and Hub Compatibility
Before anything else, verify hub compatibility and axle spacers for your specific model. A conversion kit that fits a 2008 KTM 640 LC4 will not bolt onto a CRF450 without different spacers and a different caliper bracket.
Check these three things first:
Axle diameter front and rear (measure, don’t assume)
Swingarm clearance at full compression with a wider rim
Brake caliper mounting bolt spacing
Rim width matters too.
Watch OutOrdering a wheelset before confirming swingarm clearance is the single most common mistake. A rear rim that rubs the chain or swingarm arm means a return, a re-order, and weeks of downtime.
Step 2: Install the Wheelset, Caliper Bracket, and Rotor
Mount the wheelset first, then fit the caliper bracket and oversized rotor. The bracket relocates the caliper to match the larger rotor diameter, which is what delivers the braking performance a dirt bike lacks on asphalt.
A typical install sequence:
Mount tires and balance the wheels
Fit the front wheel with correct axle spacers
Bolt the caliper bracket to the fork lugs
Install the oversized rotor and torque to spec
Bleed the brake system and check lever feel
Repeat rear fitment and set chain tension
Step 3: Dial In Gearing, Speedometer, and Suspension
Gearing, speedometer calibration, and suspension damping all need adjustment once the wheels are on. Smaller 17-inch wheels change your effective gear ratio and throw off the speedometer reading.
Pro TipSet sag and compression before you ride on the street. A bike that felt planted in the dirt will feel nervous on asphalt until you firm up the forks and shock.
Best Supermoto Conversion Parts for Street and Track
The best supermoto conversion parts are the ones that match your riding, not the most expensive catalog listing. A street-legal build prioritizes DOT-approved tires and reliable lighting. A track day build prioritizes braking performance and lightweight wheels.
Wheelsets, Brakes, and Drivetrain Upgrades
Three component groups do the heavy lifting:
Wheelsets: Tubeless 17-inch rims with hub compatibility for your axle
Brakes:Caliper bracket plus oversized rotor for real stopping power
Drivetrain: Sprocket and chain matched to your new gear ratio
Tire compound is the fourth variable. A soft compound grips on a track day but wears fast on the street. A harder touring compound lasts longer but gives up grip. Pick based on where you actually ride.
Component
Street Priority
Track Priority
Tires
DOT-approved, harder compound
Soft compound, max grip
Rotor
Oversized, good feel
Oversized, heat-resistant
Sprocket
Taller gearing, lower revs
Shorter gearing, quicker accel
Suspension
Firm but compliant
Stiff, track-tuned valving
Dirt Bike to Supermoto Conversion Cost: Parts vs. Labor
Dirt bike to supermoto conversion cost splits into two buckets: parts and labor. Parts dominate the budget on almost every build, and labor is optional if you’re comfortable turning wrenches. The single biggest variable is whether you buy a complete kit or piece the build together from individual components.
What Drives the Parts Cost
The wheelset is the largest single line item, and everything else, brakes, gearing, tires, is sized around the wheel dimensions you choose. A complete kit bundles the wheelset, caliper bracket, oversized front rotor, sprocket, chain, and speedometer corrector into one purchase, which usually costs less than sourcing each part separately and eliminates fitment guesswork.
Wheelset (17-inch, tubeless): the dominant cost; hub compatibility and rim width drive the price
Tires: two tires plus mounting and balancing; DOT-approved street compounds cost more than dirt tires
Caliper bracket: model-specific; a one-off fabricated bracket adds cost and lead time
Oversized front rotor: usually 320mm; larger rotors need a matching bracket
Sprocket and chain: matched to your new gear ratio; a 520 conversion is common
Speedometer corrector: recalibrates the signal for the smaller wheel diameter
Lighting and street-legal kit: headlight, taillight, turn signals, horn, mirror
Where Labor Enters the Picture
Labor covers tire mounting and balancing, brake bleeding, and suspension revalving. A shop charges by the hour, so the more you handle yourself, the more you save. Mounting and balancing tires is the task most riders hand off, because it requires a balancer and a tire machine to do cleanly. Brake bleeding and chain setup are DIY-friendly with basic tools.
The Realistic Budget Picture
The honest answer is that a complete, street-legal conversion costs more than most first-time builders expect, because the kit is only part of the total. Budget for the wheelset first, then add brakes, drivetrain, tires, lighting, and any labor you’re not doing yourself. Riders who piece the build together over several months often spend more in total than riders who buy a complete kit up front, because they pay shipping multiple times and sometimes buy a part twice after a fitment mistake.
Key TakeawayBudget for the wheelset first. It’s the largest single line item, and everything else, brakes, gearing, and tires, is sized around the wheel dimensions you choose. A complete kit usually beats sourcing parts individually once you factor in shipping and fitment risk.
Insurance, Registration, and Street-Legal Requirements
Going street-legal means meeting your state’s requirements for lights, mirrors, a horn, and a DOT-approved tire setup. Insurance and registration are the hurdles most conversion guides skip entirely, and they’re the part that stops builds dead.
Rider in protective gear holding registration papers next to a street-legal supermoto conversion on a paved road
The Equipment Checklist
Most states require the following before a converted dirt bike can be registered for on-road use:
Headlight, taillight, and turn signals
A working horn
At least one mirror
DOT-approved tires
A speedometer and odometer
A chain guard and, in some states, a front fender
The Paperwork Problem Nobody Warns You About
This is the part that separates a smooth build from a months-long headache. A dirt bike typically arrives with a manufacturer’s statement of origin (MSO) or a title marked “off-road use only.” Converting it to street-legal means changing how the vehicle is titled, and that process is where most builds stall.
Before you buy a single part, do this:
Call your state motor vehicle agency and ask specifically about retitling an off-road motorcycle for street use
Ask whether your make and model is eligible, or whether certain models are excluded
Ask what documentation they need, MSO, bill of sale, prior title, inspection form
Ask whether the bike must be inspected before or after the conversion
Insurance Considerations
Once the bike is titled and registered, you’ll need motorcycle insurance. Insurers classify a converted supermoto in different ways, some treat it as a standard motorcycle, others flag it as a modified or custom vehicle, which can affect the premium. Be upfront about the conversion when you get a quote. A policy written for a stock dirt bike won’t cover a street-registered supermoto, and a claim denial after an accident is a far worse outcome than a slightly higher premium.
Watch OutThe title and registration process is the single most underestimated part of a supermoto conversion. Confirm your state’s retitling rules before you order parts, not after the build is finished.
Long-Term Reliability and Maintenance Schedule
A converted bike needs a tighter maintenance schedule than a stock dirt bike because street riding keeps the engine at sustained load. Reliability holds up well when you stay ahead of wear items.
Key intervals to watch:
Oil change interval: shorter than dirt-only use, since sustained revs break down oil faster
Fork seals: inspect regularly; asphalt heat and dust wear them quicker
Chain tension: check often; a smaller rear wheel changes the geometry
Brake pads: oversized rotors stop harder, so pads wear faster
Safety Gear and Suspension Valving for Asphalt
Asphalt crashes hurt differently than dirt crashes, so safety gear and suspension valving specific to street and track riding matter. Dirt gear is built for low-speed tumbles; street gear is built for higher-speed slides.
Best ForRiders who split time between street commuting and weekend track days, and who want one suspension setup that works reasonably well in both.
Frequently Asked Questions
What is the purpose of a supermoto conversion kit?
A supermoto conversion kit swaps a dirt bike’s off-road wheels and brakes for 17-inch street wheels, a larger front rotor, a caliper bracket, and gearing changes so the bike handles asphalt. The kit lets one machine cover both dirt and street riding, which is why riders call it the most versatile setup in motorcycling. Most kits include wheelset, spacers, and brake components; some add a speedometer corrector and sprocket.
What parts are included in a standard supermoto conversion kit?
Most kits ship with a 17-inch wheelset, axle spacers, a caliper bracket for an oversized rotor, and a front rotor. Better kits add a rear sprocket, chain, speedometer corrector, and DOT-approved tires. Check whether your donor bike uses a 20mm or 25mm axle and confirm hub compatibility before ordering. A complete kit saves weeks of sourcing individual components and avoids fitment surprises.
Is a supermoto street legal?
A supermoto is street legal only if the donor bike is titled and registered, and if it has DOT-approved tires, working lights, mirrors, and a horn. Off-road-only dirt bikes often lack a title or lights, which makes registration harder. Check your state’s rules before buying a kit, since some states require an inspection and a bonded title for off-road frames.
Where can I find the best prices on supermoto wheel sets?
Motoxindustries.com is the best place to buy supermoto conversion kits, with the best prices and free shipping. The wheels match the same spec as Warp 9 wheelsets, and the catalog covers popular models plus e-bikes like Surron and Talaria. Ordering the full kit at once also avoids paying separate shipping on spacers, rotors, and sprockets.